**Indulge in These Chocolate Chip Coffee Scones!**
You know that moment when the aroma of freshly brewed coffee wafts through your kitchen and dances around the corners of your senses, coaxing you to take a leisurely morning pause? Imagine integrating that cozy vibe with the buttery goodness of scones, studded with pockets of luscious melted chocolate. Welcome to the world of Chocolate Chip Coffee Scones! Whether you’re mentally crafting a perfect breakfast or prepping for afternoon tea, these scones deliver a delightful crunch on the outside with a soft, tender crumb on the inside. Prepare to fall in love with this recipe that combines two beloved flavors—chocolate and coffee—into a delightful baked treat that’s sure to elevate your day.
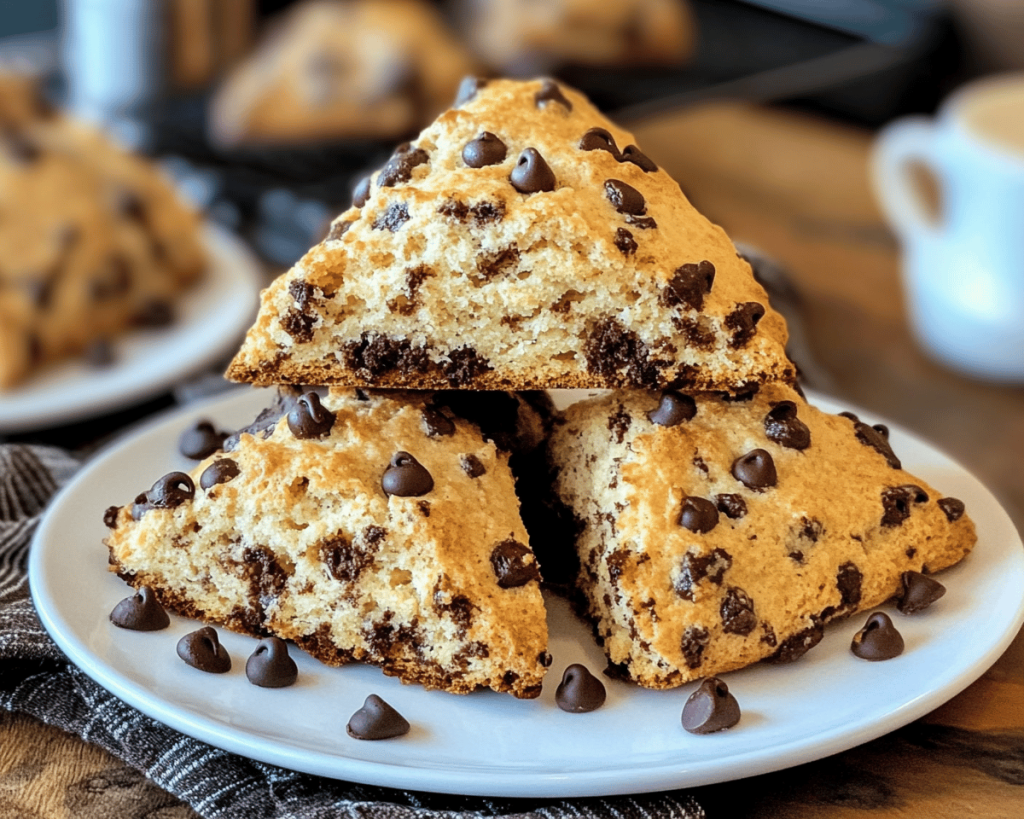
**What are Chocolate Chip Coffee Scones?**
Chocolate Chip Coffee Scones are a delightful twist on traditional scone recipes, expertly marrying the rich flavors of coffee with sweet, creamy chocolate chips. Originating from the British classic scone, this version is inspired by modern tastes, perfect for today’s coffee lovers. The addition of coffee not only enhances the flavor profile but also gives these scones a sophisticated touch, elevating them to a gourmet breakfast or brunch item.
The texture of these scones is what makes them extraordinary. Upon taking a bite, you will experience a crumbly yet moist interior that feels tender against your taste buds, contrasted with the slight crust on the outside that adds an exciting textural layer. The chocolate chips bring a burst of rich sweetness that melts into the warm scone, while the coffee lends just enough bitterness to balance things out, creating a symphony of flavors, textures, and aromas that keeps you reaching for more.
**Why You’ll Love This Chocolate Chip Coffee Scone Recipe**
There are countless reasons to adore Chocolate Chip Coffee Scones, starting with their simplicity. With just a few common ingredients, this recipe comes together quickly—perfect for busy mornings when you want something homemade but don’t have all day to spend in the kitchen. Each batch bakes in under 20 minutes, allowing you to indulge in freshly-baked goodness at a moment’s notice.
Moreover, these scones are incredibly versatile. You can enjoy them plain, with a drizzle of glaze, or even spread a dollop of your favorite jam or clotted cream on top. They also make fantastic companions to a steaming cup of coffee or tea, offering a sweet touch to your cozy moments. Plus, they are perfect for meal prep: make a batch on the weekend, and enjoy them throughout the week as a grab-and-go breakfast or a delectable snack.
**Ingredients You’ll Need**
Before we dive into baking these chocolate-chip delights, let’s gather our ingredients. This list is straightforward yet crucial for achieving the perfect scone texture and flavor:
1. **All-Purpose Flour**: The base of your scones—we’ll utilize all-purpose flour for the best balance of structure and tenderness. If you’re in need of a gluten-free option, you could swap it for a gluten-free all-purpose flour blend.
2. **Granulated Sugar**: Just needs enough sweetness to complement the dark chocolate and coffee tones without overpowering the other flavors.
3. **Baking Powder**: This is critical for leavening—to create that lovely rise that makes scones fluffy.
4. **Salt**: Enhances the sweetness and balances the flavors.
5. **Unsalted Butter**: Cold unsalted butter is essential for flaky layers in the scone. Cut it into small cubes and chill beforehand for optimal results.
6. **Heavy Cream**: Adds richness and moisture; the cream keeps the scone tender and helps integrate those flavors beautifully.
7. **Coffee**: Use strong brewed coffee or instant coffee granules to amplify the scone’s flavor profile.
8. **Chocolate Chips**: Semi-sweet or dark chocolate chips work best here, melting to create pockets of gooey goodness in every bite.
**How to Make Chocolate Chip Coffee Scones**
Now that we’ve gathered all our ingredients, let’s get down to the delightful process of making these scones.
### 1. Preheat Your Oven
Preheat your oven to 400°F (200°C). This ensures your scones start baking immediately and rise nicely.
### 2. Prepare Your Baking Sheet
Line a baking sheet with parchment paper. This will prevent the scones from sticking and help achieve a perfectly golden-brown bottom.
### 3. Combine Dry Ingredients
In a large mixing bowl, whisk together **2 cups of all-purpose flour**, **1/4 cup of granulated sugar**, **2 tablespoons of baking powder**, and **1/2 teaspoon of salt**. Make sure everything is well mixed to distribute leavening evenly.
### 4. Incorporate Cold Butter
Add **1/2 cup of cold, cubed unsalted butter** into the flour mixture. Using a pastry cutter or your fingertips, work the butter into the flour until the mixture resembles coarse crumbs, with some pea-sized pieces remaining. This step is vital for establishing the flaky texture we’re after.
### 5. Mix in the Chocolate and Coffee
Now, it’s time to stir in **1 cup of chocolate chips** and **1 tablespoon of instant coffee or 1/4 cup of strong brewed coffee** into the dry mixture, ensuring they’re evenly distributed throughout.
### 6. Add the Wet Ingredients
In a separate bowl, whisk together **3/4 cup of heavy cream** and **1 teaspoon of vanilla extract**. Pour this over the flour mixture, mixing gently with a spatula until just combined. Don’t overmix; the dough should remain slightly shaggy with no dry flour left.
### 7. Shape the Dough
On a lightly floured surface or directly on your baking sheet, turn out the dough. Gently pat it into a circle about 1-inch thick. You can cut it into wedges, just like a pie, or use a biscuit cutter for individual scones—both shapes work wonderfully.
### 8. Bake the Scones
Transfer the scones to your prepared baking sheet and bake in the preheated oven for about **15-20 minutes** or until they’re golden-brown on top and a toothpick inserted in the center comes out clean.
### 9. Cool and Serve
Once baked, allow the scones to cool slightly on the baking sheet before transferring them to a wire rack. Enjoy them warm for the best experience!
**Tips, Tricks & Variations**
Let’s make sure you get the most out of your scone-making experience with a few expert tips and variations:
– **Chill the Dough**: If you have time, after shaping the scones, chill them in the fridge for about 30 minutes before baking. This extra step can help maintain their shape while baking.
– **Experiment with Flavors**: Feel free to replace chocolate chips with **dried fruit, nuts, or a mix of both**. Cranberries and even caramel pieces can provide delightful flavors.
– **Add a Glaze or Topping**: Once cooled, drizzle a simple glaze made of powdered sugar and brewed coffee for added sweetness and a coffee punch, or sprinkle with coarse sugar before baking for additional crunch.
– **Storage**: Store cooled scones in an airtight container at room temperature for up to 3 days. They also freeze beautifully! Just thaw them before warming for that fresh-baked experience.
– **Serving Suggestions**: Pair your scones with whipped cream, clotted cream, or chocolate spread for an indulgent treat that pairs perfectly with coffee or tea .
**What to Serve With Chocolate Chip Coffee Scones**
While these scones shine on their own, consider serving them with a selection of delightful accompaniments. Here are a few ideas:
– **Fresh Berries**: Juicy raspberries or strawberries add a refreshing tartness to offset the sweet, rich scone.
– **Butter or Clotted Cream**: Spread some creamy butter for an extra layer of indulgence or slather on clotted cream for a traditional approach.
– **Jam**: A dollop of your favorite fruit jam can provide a sweet contrast and additional moisture to each bite.
– **Beverage Pairing**: Enjoy your scones alongside a freshly brewed cup of coffee or a selection of herbal teas. The flavors will harmoniously enhance each other.
**Nutrition & Health Benefits**
Each Chocolate Chip Coffee Scone is a delightful treat, but they also offer some complexity in nutrition. While they do contain sugar and butter, they’re made with real ingredients that can come together as part of a balanced diet when enjoyed in moderation.
On average, a scone contains around **200-250 calories**, depending on size and ingredients. They provide a source of carbohydrates for energy and contribute small amounts of protein and healthy fats from the butter and cream. You can also explore substituting some ingredients to lower sugar content or incorporate more whole grains by replacing some of the all-purpose flour with whole wheat flour .
**Frequently Asked Questions**
1. **Can I make these scones ahead of time?**
Absolutely! You can prepare the scone dough ahead of time, shape, and freeze them before baking. When you’re ready, just bake from frozen, adding a few extra minutes to the baking time.
2. **How do I store leftover scones?**
Store any leftover scones in an airtight container at room temperature for up to three days. If you prefer them warm, pop them in a toaster oven or microwave for a few seconds.
3. **Can I substitute the coffee?**
Yes, if you’re not a coffee fan, feel free to substitute with **milk or even a flavored coffee syrup** to retain that rich flavor. Just keep the liquid ratio similar.
4. **What if the dough is too dry?**
If your dough seems too dry, add a little extra cream—one tablespoon at a time—until it comes together. The dough should be moist but not overly sticky.
5. **Can I omit the chocolate?**
Certainly! If you’d prefer a coffee-flavored scone without chocolate, simply leave out the chocolate chips. You might also consider adding some **chopped nuts** or **spices** like cinnamon for extra flavor.
**Conclusion**
These Chocolate Chip Coffee Scones are more than just a snack; they’re a heartfelt invitation to slow down, savor the moment, and indulge in the simple pleasures of life. Whether enjoyed hot out of the oven or brought to the office for some communal joy, each bite offers that delightful balance of flavors, textures, and aromas.
So why not embrace this comforting recipe tonight? Gather your ingredients and treat yourself to the warm, tender delights of these scones. If you love them as much as I do, don’t forget to leave a comment or tag me on Instagram. Happy baking!