TITLE:
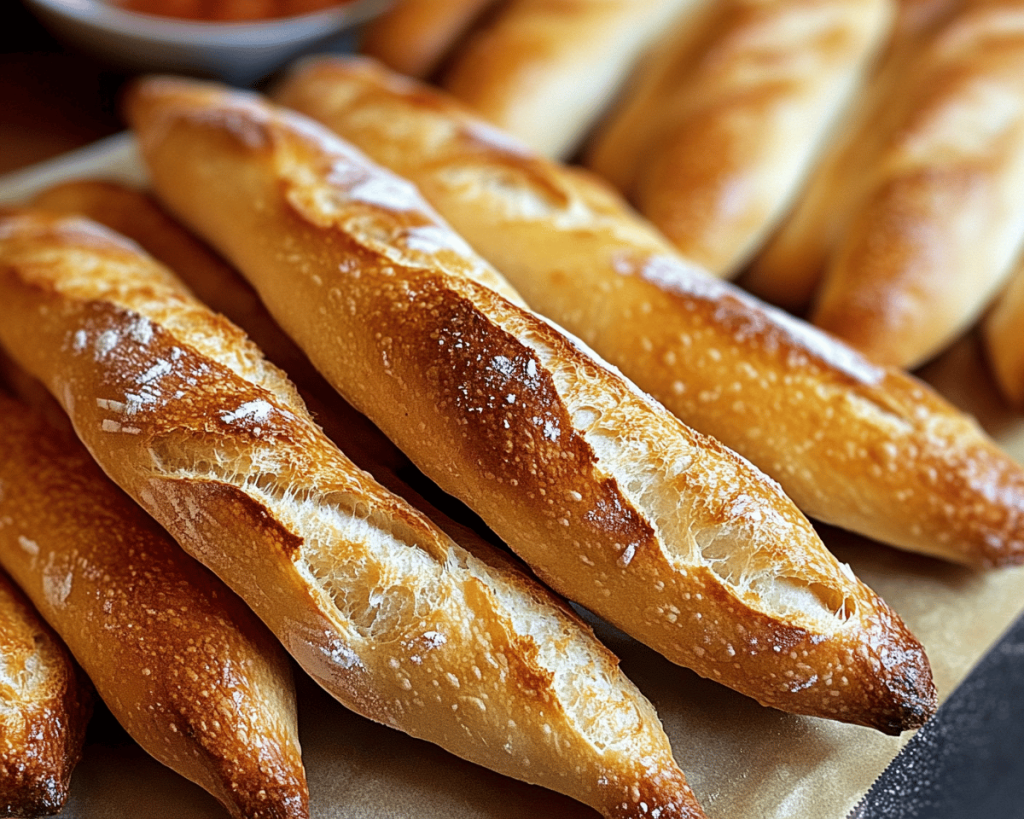
CRUSTY MINI BAGUETTES THAT LOOK PROFESSIONAL
META TITLE:
Perfect Mini Baguettes Recipe
META DESCRIPTION:
Learn how to make CRUSTY MINI BAGUETTES at home. This easy recipe will yield bakery-style bread for your family to enjoy!
INTRODUCTION:
Imagine the joy of pulling a tray of freshly-baked CRUSTY MINI BAGUETTES from your oven, their golden exteriors crackling as they cool just enough to touch. The aroma of warm bread fills your kitchen, beckoning friends and family to gather around the table. When you cut into these delectable loaves, the soft, airy interior contrasts beautifully with the crispy outer crust. This recipe is not just about baking bread; it’s about creating a home filled with love and the comforting essence of homemade goodness. Whether for breakfast, dinner, or simply snacking, these baguettes are versatile, delightful, and undeniably impressive.
SEPARATOR
WHAT IS CRUSTY MINI BAGUETTES?:
CRUSTY MINI BAGUETTES, also known as baguettettes, are smaller versions of the classic French baguette. Originating in France, the baguette is revered for its crustiness and chewy texture, often enjoyed with butter, cheese, or as a sandwich base. Their shape is long and slender, with a glorious crust that sings when you bite into it. The dough typically comprises simple ingredients—flour, water, yeast, and salt. However, the technique, including fermentation and steam during baking, is what elevates them into that professional look and flavor.
These baguettes are perfect for sharing during gatherings, accompanying dips, or topping with your favorite spreads. Making them at home can be immensely satisfying, melding the artistry of cooking with the science of leavening. What’s even more remarkable is that you can customize these mini baguettes with herbs, cheese, or olives, allowing you to explore an array of flavors that effortlessly transport you to a quaint Parisian café.
BONUS TIP:
Using high-protein bread flour will yield a chewier texture and a better rise in your baguettes.
WHY YOU WILL LOVE THIS CRUSTY MINI BAGUETTES:
– They have a beautiful, crunchy crust that makes each bite satisfying.
– The dough is straightforward, requiring just a few ingredients.
– You can prepare them ahead of time and enjoy them fresh.
– Perfect for any meal – they pair well with soups, salads, and dips.
– They give a bakery-fresh feel, impressing guests and family alike.
EXTRA IDEA:
Try baking these baguettes with your favorite herbs mixed into the dough for an aromatic twist.
INGREDIENTS YOU WILL NEED:
– 3 cups of BREAD FLOUR: For that quintessential chewy texture.
– 1 1/4 cups of WATER (warm): This activates the yeast and helps with the dough consistency.
– 2 teaspoons of SALT: Enhances flavor and strengthens the gluten structure.
– 1 teaspoon of INSTANT YEAST: A key ingredient for the dough to rise quickly.
– Cornmeal (for dusting): Prevents sticking and adds texture to the crust.
– 3 cups of BREAD FLOUR – Provides a sturdy yet supple base for the baguettes.
– 1 1/4 cups of WATER (warm) – Essential for hydrating the flour and activating the yeast.
– 2 teaspoons of SALT – An indispensable flavor enhancer that balances sweetness.
– 1 teaspoon of INSTANT YEAST – The magic ingredient that helps the dough rise.
– Cornmeal (for dusting) – Optional, but it gives a rustic touch and prevents sticking.
STEP-BY-STEP INSTRUCTIONS:
1. In a large mixing bowl, combine the BREAD FLOUR, INSTANT YEAST, and SALT. Mix these dry ingredients thoroughly. This ensures an even distribution of everything crucial for the dough. PRO TIP: Use a whisk or your hand to bring those dry components together for better mixing.
2. With a wooden spoon, gradually add the warm WATER into the dry mixture. Stir until a shaggy dough forms. You may need to use your hands towards the end of this process. It’s okay if the dough feels sticky; that’s what you want for a good crust. PRO TIP: If the mixture seems too dry, add a tablespoon of water at a time until it feels just right.
3. Once combined, cover the bowl with plastic wrap or a damp cloth and let the dough rest for about 1 hour at room temperature. This autolyse period allows the flour to hydrate further, improving texture and flavor. PRO TIP: Choose a warm spot in your kitchen to encourage yeast activity.
4. After the resting period, gently turn the dough onto a lightly floured surface. Knead it for about 5-6 minutes until it becomes smooth and elastic. PRO TIP: Keep your countertop lightly floured to avoid excess sticking while kneading.
5. Shape the kneaded dough into a ball and place it in a lightly oiled bowl. Cover it again and let it rise until doubled in size, about 1-2 hours. Keep an eye on it; temperature can affect how quickly it rises. PRO TIP: If you want to enhance flavor, consider a longer fermentation in the refrigerator overnight.
6. Preheat your oven to 450°F (230°C) and place a baking stone or an inverted baking sheet inside. If you’re using a pizza stone, allow it to heat for at least 30 minutes. This high temperature is essential for achieving that CRUSTY exterior. PRO TIP: Pouring hot water into a pan at the bottom of your oven right before you bake creates steam and results in a better crust.
7. Once the dough has risen, turn it onto a floured surface again. Divide it into four equal pieces. Gently shape each piece into a long, baguette-like form, keeping the surface taut without compressing the dough too much. PRO TIP: Use the palms of your hands to roll the dough gently, elongating it without squishing.
8. Place your shaped baguettes on a parchment-lined baking sheet (or a floured pizza peel) sprinkled with CORNMEAL. Cover with a kitchen towel and let them rest for an additional 30-45 minutes. PRO TIP: Loosely cover to prevent drafts and maintain moisture.
9. Make slashes in the top of each baguette with a sharp razor blade or a lame. This allows steam to escape and helps control how the baguette rises during baking. You can create a single long slash down the middle or several shorter diagonal cuts. PRO TIP: This not only looks beautiful but also contributes to a better crust.
10. Carefully transfer the baguettes onto the hot stone or baking sheet in the oven. Bake for 20-25 minutes, or until they reach a golden brown color and sound hollow when tapped. PRO TIP: Rotate the tray halfway through for even browning.
ADVANCED TECHNIQUE:
For a more artisanal finish, you can try a cold fermentation process. After mixing the dough, let it rise in the refrigerator for 12-24 hours before shaping. This can deepen the flavor and enhance the crust.
CHEF TIPS, VARIATIONS, AND SUBSTITUTIONS:
– Use HIGH-PROTEIN BREAD FLOUR for a more traditional texture that mimics bakery-style baguettes.
– For a gluten-free option, substitute the flour with a gluten-free bread mix, though results may vary.
– Add chopped OLIVES or SUN-DRIED TOMATOES to the dough for an Italian twist.
– Toss in fresh HERBS like rosemary or thyme for a fragrant flavor uplift.
– To enhance the crust, sprinkle a bit of KOSHER SALT on top before baking for added texture and taste.
EXTRA VARIATION:
For a sweet twist, you could experiment by adding pieces of chocolate or fruit like dried cranberries or figs into the dough.
WHAT TO SERVE WITH CRUSTY MINI BAGUETTES:
– A rich tomato basil soup pairs beautifully, offering creamy warmth that the crusty texture complements perfectly.
– Serve alongside a cheese platter featuring soft cheeses like Brie and strong cheeses like aged Gouda for a delightful contrast.
– Pair with a fresh Mediterranean salad, where the crispy bread can soak up the vibrant dressing.
– A hearty stew benefits from CRUSTY MINI BAGUETTES, as they can be used to scoop up every last bite.
MORE INSPIRATION:
Consider making mini sandwiches with garden-fresh ingredients, creating a brunch centerpiece with fillings like smoked salmon or roasted vegetables.
STORAGE AND MEAL PREP TIPS:
These CRUSTY MINI BAGUETTES are best enjoyed fresh but can last for a couple of days if stored properly. Let them cool completely before placing them in a paper bag to maintain the crust. If you want to store them for longer, slice and freeze them. To reheat, pop them in an oven preheated to 350°F (175°C) for about 10 minutes to revitalize that crispiness.
MEAL PREP BONUS:
You can prepare the dough a day in advance, allowing it to rise overnight in the fridge, making the process less daunting.
NUTRITION HIGHLIGHTS:
Each serving of these baguettes provides carbohydrates for energy, with a modest amount of protein from the flour. The use of whole ingredients makes them a healthier choice compared to store-bought options. BREAD FLOUR contains essential vitamins and minerals, supporting your dietary needs.
According to USDA data, bread can contribute significant nutrients when consumed as part of a balanced diet .
Nutrition science from Healthline emphasizes that homemade bread allows you to control ingredients, making it a healthier alternative .
NUTRITION INSIGHT:
These mini baguettes fit well into various diets and can be adapted—with more whole grains or seeds for additional health benefits.
FREQUENTLY ASKED QUESTIONS:
1. Can I use all-purpose flour instead of bread flour?
Yes, but the texture may differ; bread flour gives a chewier outcome due to its higher protein content, while all-purpose flour will give a softer crumb.
2. How do I know when my dough has risen enough?
A good rule of thumb is that it should double in size and feel airy when you poke it. Gently pressing your finger into the dough should leave a slight indentation.
3. Can I bake the baguettes in a regular oven?
Absolutely! You can achieve great results in a regular home oven. Just use a pizza stone or heated baking sheet, and create steam using water, as mentioned in the recipe.
4. What if I don’t have instant yeast?
You can substitute it with active dry yeast; just dissolve it in warm water before adding it to the flour.
5. How can I make these CRUSTY MINI BAGUETTES more flavorful?
Consider incorporating spices, cheeses, or herbs directly into the dough before the first rise. This allows the flavors to meld beautifully with the bread.
VARIANTS SECTION:
– Olive and Rosemary Mini Baguettes
– Roasted Garlic and Parmesan Baguettes
– Herb-Infused Mini Baguettes (thyme, basil)
– Cheddar and Jalapeño Baguettes for a spicy kick
– Sweet Whole Wheat Baguettes with honey
– Nutty Walnut and Cranberry Baguettes
– Sun-Dried Tomato and Feta Mini Baguettes
CONCLUSION:
With this foolproof recipe, you can achieve the golden crust and soft interior that make CRUSTY MINI BAGUETTES a beloved classic in kitchens around the world. Perfect for sharing with family or presenting at a gathering, they bring that bakery-fresh feeling right to your table. Try this CRUSTY MINI BAGUETTES tonight — your kitchen will smell amazing, and everyone will ask for seconds.