**Meta title:** Marshmallow Dipped Apples: Sweet Treats for Everyone
**Meta description:** Delight in marshmallow dipped apples! A fun, gooey treat that’s perfect for kids and adults. Learn how to make these delicious snacks today!
You know that moment when you’re craving something sweet and fun? Picture this: you’re sitting at a table surrounded by family and friends, and a platter of bright, shiny apples, dipped in gooey marshmallow, sits before you. It’s a treat that beckons you like a childhood memory, invoking nostalgia yet radiating a modern twist. Marshmallow dipped apples are not just desserts; they’re a delightful blend of flavor and texture, bringing back the carefree joy of childhood right to your kitchen.
In this article, you’ll learn how to create these scrumptious treats, why they are an absolute hit at gatherings, and plenty of tips and tricks to customize them to perfection. Let’s dive into this sweet, gooey adventure—perfect for kids and adults alike!
What are Marshmallow Dipped Apples?
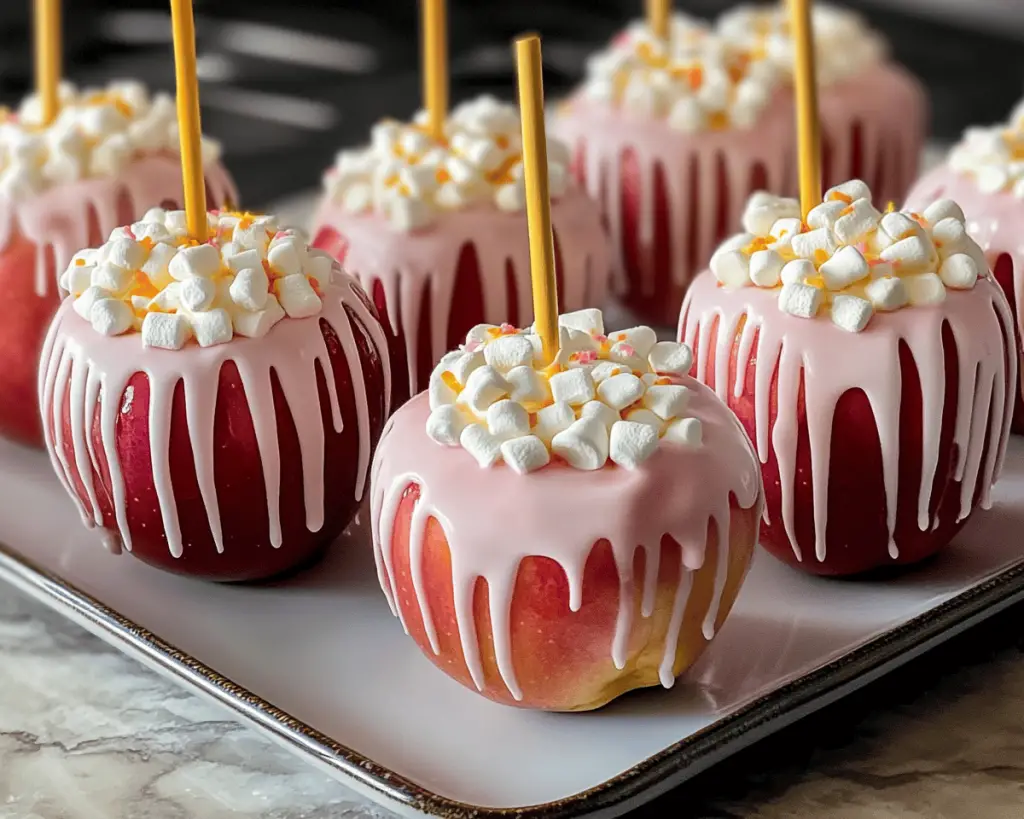
Marshmallow dipped apples are a fun, delicious snack that combines the crisp freshness of apples with the sticky sweetness of melted marshmallows. Originating from classic fair treats and seasonal autumn festivals, this delight marries crunchy fruit with a soft, sugary coating, making them fun to eat as well as visually appealing.
A bite into one of these creatively dipped apples reveals the juicy, tartness of the apple balanced by the sweet, chewy marshmallow layer. The combination creates a delightful contrast in flavor and texture— the refreshing snap of the crisp apple followed by the luscious goo of the marshmallow. Kids love their playful essence, while adults can’t resist the nostalgia surrounding these treats, often recalling evenings spent at county fairs or making them during family gatherings.
Following the tradition of caramel and candy-coated apples, this recipe takes a step further by adding a marshmallow layer, perfect for those who love a gooey indulgence. This dessert is colorful, fun, and customizable— perfect for any occasion.
Why You’ll Love This Marshmallow Dipped Apples
This recipe stands out for various reasons. First and foremost, it captures the joy of togetherness in the kitchen. Making marshmallow dipped apples is an easy-to-follow process that can involve family and friends, creating memories along the way. Also, you can easily customize them to suit your personal taste or dietary needs—whether you prefer a lighter drizzle of marshmallow or the full-on gooey experience.
Not only are these apples pleasing to the palate, but they also make fantastic party desserts or snacks for movie nights. They are visually appealing—glossy, sticky apple slices alongside an array of toppings, like crushed nuts or colorful sprinkles, are irresistible.
If you’re looking for something that embraces the essence of comfort food while being playful and fun, marshmallow dipped apples are the way to go! Moreover, they are relatively mess-free compared to other sticky desserts and a great way to sneak in some fruit into your loved ones’ diets.
Ingredients You’ll Need
To create these marshmallow dipped apples, you’ll need a few basic ingredients, many of which you probably have in your pantry. Here’s a straightforward list:
1. **Apples**: Use fresh and firm apples, such as Granny Smith or Fuji. Their crispness will provide a wonderful contrast to the gooey marshmallow. When selecting apples, look for ones without blemishes or soft spots—this tells you they’re fresh and perfect for dipping.
2. **Mini Marshmallows**: The star of the show! You’ll need approximately 4 cups of mini marshmallows. They melt beautifully, creating that delightful gooey layer. Alternatively, you can use regular marshmallows cut in half, but mini marshmallows are much easier to work with.
3. **Butter**: One tablespoon of butter helps to create a smoother melting process. This fat will keep the marshmallows from becoming too sticky—ensuring a delightful coating.
4. **Food Coloring (optional)**: If you want to add a fun twist, you can use food coloring to tint the marshmallow mixture. Let your creativity shine with bright colors or subtle pastels!
5. **Toppings (optional)**: Choose your favorites to sprinkle over the marshmallow layer. Crushed nuts, sprinkles, chocolate chips, or even shredded coconut work wonderfully as toppings, adding flavors and textures that pop.
How to Make Marshmallow Dipped Apples
Follow these simple steps to create your own melty marshmallow dipped apples:
**Step 1: Prepare Your Apples**
Start by washing the apples thoroughly under running water to remove any wax or residue. Pat them dry with a clean towel. For ease of dipping, insert a popsicle stick into the top of each apple. This serves as a handle for dipping and makes them easy to hold and munch on!
**Step 2: Melt the Marshmallows**
In a large microwave-safe bowl, combine the mini marshmallows and butter. Heat in the microwave on high for 30 seconds, then stir. Repeat this process until the marshmallows are completely melted and smooth, usually taking about 1 to 2 minutes in total. Be careful not to overheat as the marshmallows can become too sticky.
**Step 3: Add Color (Optional)**
If you want to make your marshmallow mixture extra fun, now is the time to add food coloring. Adding a few drops of gel or liquid food coloring can create vibrant blobs of color. Gently fold it through the melted marshmallow until fully combined, creating a swirled effect.
**Step 4: Dip the Apples**
Hold the apple by the stick and quickly dip it into the melted marshmallow coating. Swirl it around to ensure an even coating. Lift it out and gently shake off the excess marshmallow. Place the coated apple on parchment paper or a silicone baking mat.
**Step 5: Add Toppings**
While the marshmallow is still warm and sticky, sprinkle your desired toppings over the coated apples. This gives them an extra crunch and visual appeal.
**Step 6: Let Cool and Set**
Place the marshmallow dipped apples in the refrigerator for about 15-20 minutes to allow the coating to set. When they harden slightly and the marshmallow becomes chewy, they are ready to be enjoyed!
Tips, Tricks & Variations
1. **Storage**: To maintain freshness, store dipped apples in a cool, dry place at room temperature. If you must refrigerate, remember they might lose their crispness over time—so enjoy them soon after making.
2. **Flavor Variations**: Don’t hesitate to experiment with flavor extracts during the marshmallow melting process—vanilla, almond, or even mint can transform the flavor profile of your treat.
3. **Vegan Version**: If you’re looking for a vegan option, try using vegan marshmallows. They melt just as well and maintain that gooey consistency you crave.
4. **Gourmet Toppings**: Go the extra mile with your toppings! Consider turning your marshmallow dipped apples into gourmet treats with ingredients like crushed pretzels, peanut butter drizzle, or even a light drizzle of tempered chocolate.
5. **Plating Ideas**: Arrange your dipped apples on a colorful platter, garnished with some fresh fruits or sprigs of mint for an extra touch of elegance.
What to Serve With Marshmallow Dipped Apples
Marshmallow dipped apples are delightful on their own, but pairing them with some complementary sides can elevate your treat! Consider serving alongside:
– **Caramel Sauce**: A classic pairing that amplifies the sweetness while adding a layer of deeper flavors.
– **Chocolate Fondue**: Create a fun dipping station, allowing guests to dunk their marshmallow apples into a pool of melted chocolate.
– **Nut Butter**: Offer almond or peanut butter on the side, balancing the sweetness with a touch of nuttiness.
– **Fun Drinks**: Serve with apple cider or sparkling juice for a festive feel. For adults, pair them with a light dessert wine or a spiced cocktail.
Nutrition & Health Benefits
While marshmallow dipped apples are a sweet treat, they do provide some nutritional benefits too. Apples are a great source of fiber and vitamin C, offering health benefits like aiding digestion and boosting immunity. According to studies, eating apples may also support heart health due to their antioxidant properties .
However, due to the sugar content in marshmallows, this treat should be enjoyed in moderation. For more in-depth insights about snack nutrition, [Healthline](https://www.healthline.com) offers a wide range of articles shedding light on healthy eating habits.
Frequently Asked Questions
**Q1: Can I use any type of apple for this recipe?**
Yes! While tart apples like Granny Smith create a beautiful contrast with the sweet marshmallow, you can use any type of apple that you enjoy—sweet varieties like Honeycrisp or Fuji work well too.
**Q2: How long can marshmallow dipped apples be stored?**
These treats are best enjoyed fresh. However, if you need to store them, keep them in an airtight container in a cool, dry place for about 2-3 days. Just remember they may lose some of their crispness.
**Q3: Can I freeze marshmallow dipped apples?**
Freezing is not recommended as the texture of the apples and marshmallows can change significantly when thawed, leading to a watery and mushy result.
**Q4: How can I make these apples healthier?**
While they are a sweet treat, you can choose to use less marshmallow or swap for yogurt-covered apples for a lighter snack. You could also get creative with toppings, using chopped nuts or seeds for added nutrition.
**Q5: What can I do with leftover marshmallow?**
If you have extra melted marshmallow, consider using it for s’mores, drizzling over popcorn for a sweet snack, or incorporating it into a rice crispy treat recipe!
In conclusion, marshmallow dipped apples are an inviting and joyful treat, perfect for every age group. They’re easy to make, fun to customize, and most importantly, delicious! The combination of crunchy, juicy apples and sweet, gooey marshmallow creates a memorable taste experience. So why not gather your loved ones in the kitchen, whip up these delightful desserts, and make some new memories? If you loved this recipe, leave me a comment or tag me on Instagram with your creations! Let’s celebrate the joy of cooking together!


