Prep time: 15 minutes
Cook time: 10 minutes
Total time: 25 minutes
Servings: 24 cookies
Imagine the soft, warm aroma of freshly baked cookies wafting through your kitchen. As a child, I remember the excitement in the air when my mother would whip up a batch of milk cookies. These delightful treats capture the essence of childhood, bringing back memories of cozy afternoons spent with family. What makes these cookies particularly special is their softness and sweetness, creating a delightful balance that melts in your mouth. In this article, you will learn how to make the classic Milk Cookies, perfect for any occasion. From gathering the ingredients to a few helpful tips along the way, you’re in for a treat!
What Is Milk Cookies: Soft Milk Cookies (Classic)?
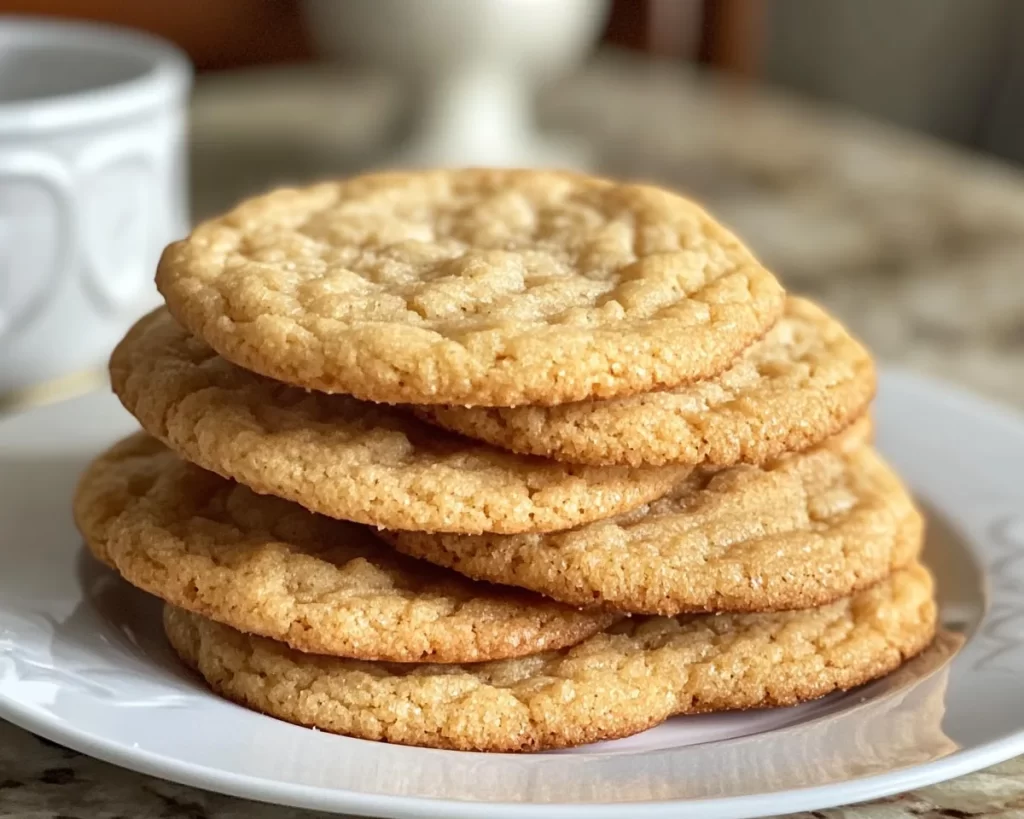
Milk cookies, often referred to as “soft milk cookies“, have a nostalgic charm that harks back to simpler times. Originating from classic family recipes, these cookies are characterized by their uniquely soft texture and a subtly sweet flavor profile. The star ingredient, milk, not only adds moisture but also enhances the flavor, making these cookies a delightful choice for any dessert lover.
The texture of these cookies is what differentiates them from other cookie varieties. Unlike crunchy cookies, milk cookies are tender and fluffy, making them a favorite among both kids and adults. Whenever I bake these cookies, the silky smoothness coupled with a hint of vanilla evokes memories of sharing them with friends on a sunny afternoon. You may find yourself experimenting with various add-ins, from chocolate chips to nuts, but the classic recipe stands out for its simplicity and ability to please the palate.
Why You’ll Love This
What makes milk cookies truly stand out? For starters, they are incredibly easy to make, which is a boon for busy parents or beginners in the kitchen. The ingredients are affordable and commonly found in most homes, making it a practical choice for budget-conscious bakers. The recipe requires minimal effort, yet the outcome is a batch of impressive cookies that can be shared at gatherings or kept for personal indulgence.
However, it’s worth mentioning that some may assume all cookies are created equal. Oftentimes, it’s a misconception that cookies must be crunchy or overly sweet to be enjoyable. Milk cookies break that stereotype with their unique softness and balanced flavor. You may even find that they are perfect for pairing with a cup of coffee or a glass of milk, enhancing the overall experience. Moreover, with just a few variations, this adaptable recipe can cater to dietary preferences or restrictions, proving to be a versatile go-to dessert in your repertoire.
Ingredients You’ll Need
- 2 ½ cups all-purpose flour – This forms the base of your cookie dough, providing structure. You can substitute with gluten-free flour for a gluten-free variation.
- 1 cup granulated sugar – Sweetens the cookies, giving them that irresistible taste. Brown sugar can be used for a richer flavor.
- ½ cup unsalted butter, softened – Adds richness and helps achieve that soft texture. If you’re dairy-free, consider using coconut oil.
- 1 large egg – Binds the ingredients together and contributes to the overall texture. Use a flax egg as a substitute for a vegan option.
- ½ cup milk – The key ingredient giving these cookies their characteristic flavor and moistness. Almond milk or soy milk can be good substitutions.
- 2 teaspoons vanilla extract – Enhances the flavor profile. For a twist, try almond extract.
- 1 teaspoon baking powder – Helps the cookies rise, ensuring they are light and fluffy. Don’t confuse it with baking soda.
- ½ teaspoon salt – Balances the sweetness. Sea salt can add a nice touch if you prefer.
Each ingredient plays a crucial role in crafting the perfect milk cookie. Understanding their functions not only enhances your baking skills but also allows for creativity as you experiment with substitutions or variations.
How to Make
1. **Preheat your oven** to 350°F (175°C) and prepare your baking sheets by lining them with parchment paper. Preheating ensures even baking, while parchment paper prevents sticking, making cleanup easier.
2. **In a large mixing bowl**, cream together the softened butter and granulated sugar until the mixture is light and fluffy. This should take about 3–4 minutes. The creaming process incorporates air into the batter, leading to a light texture in the final product.
3. **Add the egg, milk, and vanilla extract** to the butter-sugar mixture. Mix well until fully combined. Make sure your ingredients are at room temperature; this helps them blend seamlessly for a smoother batter.
4. **In a separate bowl**, whisk together the flour, baking powder, and salt. Gradually add the dry ingredients to the wet ingredients, mixing gently until just combined. Overmixing can lead to tough cookies, so stop as soon as you see no flour streaks.
5. **Scoop the dough** using a cookie scoop or spoon onto the prepared baking sheets, spacing them about 2 inches apart. This allows the cookies to spread without merging into each other.
6. **Bake in the preheated oven** for 10–12 minutes or until the edges are lightly golden. The centers will appear soft, which is key to achieving that soft texture that milk cookies are known for.
7. **Allow the cookies to cool** on the baking sheets for about 5 minutes before transferring them to wire racks to cool completely. This resting time helps firm up the cookies a bit without losing their softness.
8. **Enjoy your delectable cookies** warm or store them in an airtight container at room temperature for up to a week. The flavors develop beautifully as they rest, ensuring each bite is flavorful.
Variations & Substitutions
Chocolate Chip Milk Cookies: For a delightful twist, add 1 cup of semi-sweet chocolate chips to the dough. This variation introduces a richness that pairs beautifully with the softness of the cookies. It’s an excellent choice for chocolate lovers, taking the classic milk cookie to new levels of indulgence.
Vegan Milk Cookies: Substitute the egg with a flax egg (1 tablespoon of flaxseed meal mixed with 2.5 tablespoons of water), and replace the butter with coconut oil. Use plant-based milk alternatives such as almond or oat milk. These cookies will be just as soft and delicious, allowing everyone to enjoy them.
Nutty Milk Cookies: Incorporate ½ cup of chopped nuts, such as walnuts or pecans, into the dough. This adds texture and flavor, making the cookies even more satisfying. Nuts provide a nice contrast to the softness of the cookie, hence hitting both flavor and texture notes perfectly.
Spiced Milk Cookies: For a little extra warmth, add 1 teaspoon of ground cinnamon and ½ teaspoon of nutmeg to the flour mixture. This variation works particularly well in the fall and winter months. The spices infuse the cookies with a cozy aroma and take the traditional flavor profile to a festive new level.
Common Mistakes to Avoid
One common mistake is not allowing the butter to soften adequately before creaming it with the sugar. If the butter is too hard, you won’t achieve that desired light and fluffy texture, resulting in denser cookies. Ensure the butter is left at room temperature for at least an hour before you start baking.
Another error is overmixing the dough after adding the flour. Once the dry ingredients are incorporated, stop mixing! Overmixing can turn your cookies tough rather than tender. The dough should look slightly shaggy but fully combined for the best results.
Also, be careful not to overcrowd your baking sheets. If you place too many cookies too close together, they will spread and merge into each other while baking, ruining that perfect individual shape. Maintain adequate spacing to allow for spreading, typically 2 inches apart.
Finally, ensure you accurately measure your flour. Too much flour can result in dry cookies. When measuring, spoon the flour into a measuring cup and level it off with a knife without packing it.
Storage, Freezing & Reheating Tips
To preserve the freshness of your milk cookies, store them in an airtight container at room temperature. This will keep them soft for up to a week. If you’d like to extend their shelf life, consider freezing them. Place the cooled cookies in a single layer in a freezer-safe bag, separating layers with parchment paper, and freeze them for up to three months.
When you’re ready to enjoy a cookie (or several), simply take them out of the freezer and allow them to thaw at room temperature for about 15–20 minutes. If you prefer them warm, pop them in the microwave for **10-15 seconds**. This will revive their freshness and bring back that soft, comforting texture.
For food safety, always ensure that your cleaning and storage methods are sanitary to avoid contamination. Freezing cookies that have already been thawed isn’t recommended, so consider this when you’re planning to enjoy them later.
Frequently Asked Questions
Can I use whole wheat flour instead of all-purpose flour?
Certainly! Whole wheat flour can be used to make the cookies a bit healthier and add a nutty flavor. However, it may result in a denser cookie. To balance this, consider mixing half whole wheat flour with half all-purpose flour for the best texture.
Can I make these cookies gluten-free?
Yes, you can! Simply substitute all-purpose flour with a gluten-free flour blend that includes xantham gum. This will help achieve a similar texture. Just keep in mind that the flavor might be slightly different, but they will still be delicious.
How do I know when the cookies are done baking?
The cookies are done when the edges are lightly golden-brown but the center looks soft and slightly underbaked. They will continue to cook slightly after being removed from the oven. Trust your gut— if they’re golden around the edges, they’re likely just right!
Can I add different flavorings to the base recipe?
Absolutely! Variations like almond extract, citrus zest, or spices can elevate the flavors. Just be careful not to overpower the classic taste of the milk cookies. A little goes a long way in flavoring the base.
What is the best way to cool the cookies after baking?
Cooling them on the baking sheet for a few minutes allows them to firm up slightly while maintaining that soft texture. After 5 minutes, transfer them to a wire rack to cool completely. This method ensures they don’t become soggy while cooling.
Conclusion:
In summary, milk cookies are not just a delightful dessert; they are a cherished part of many people’s culinary memories. Their combination of simplicity, versatility, and the joy they bring make this classic recipe worth trying. Whether you’re looking to rekindle memories or create new ones, I encourage you to try making these soft milk cookies. Feel free to customize the recipe to your liking or share it with friends and family. You’ll find that with every bite, these cookies have the power to transport you back to those cozy afternoons. Happy baking!


