Prep time: 30 minutes
Cook time: 15 minutes
Total time: 45 minutes
Servings: 12 rolls
There’s something uniquely special about the smell of freshly baked bread wafting through your home. As the warmth of the oven envelops your kitchen, it brings back fond memories of family gatherings, holiday celebrations, and those cozy Sunday mornings spent together. This Mother’s Day, why not elevate your brunch experience with homemade **Honey Butter Rolls**? These rolls are soft, fluffy, and have a beautiful golden hue that invites everyone to dig in. Pair them with a delightful honey butter spread, and you’ll create an irresistible combination that will leave family and friends asking for seconds.
What makes this recipe particularly special is not just its taste but also the ease with which you can create it. In this article, you will learn how to make these rolls from scratch, along with tips for achieving that perfect texture, potential variations to suit your taste, and storage recommendations so that nothing goes to waste. Let’s dive into the world of Mother’s Day Honey Butter Rolls and make this occasion truly memorable!
What Is Mother’s Day Honey Butter Rolls?
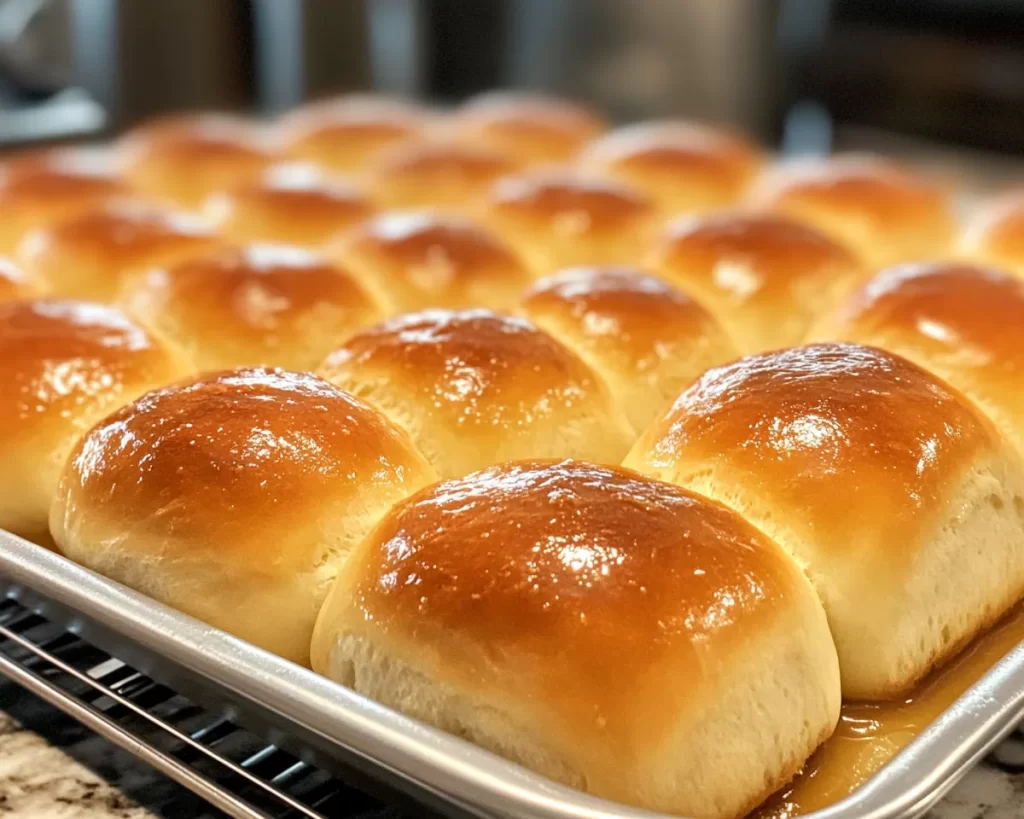
**Mother’s Day Honey Butter Rolls** are a soft and fluffy bread treat that perfectly complements any celebratory meal. These rolls, deeply rooted in American culinary traditions, can be traced back to family gatherings and festive occasions where homemade bread is a staple. The texture is light and airy, almost pillowy, making for a delightful bite. The unique twist comes with the addition of a **honey butter** spread, which melds the sweetness of honey with the richness of butter, providing a genuinely satisfying experience.
The origin of these rolls may vary, with many families adding their unique touches to the recipe over generations. However, what remains constant is their ability to evoke warmth and nostalgia. The **flavor profile** strikes a delightful balance between subtly sweet and rich, making them versatile enough to be an accompaniment to any main dish or served as a stand-alone treat with coffee or tea. The aroma of baked honey butter rolls fills the air and sets the stage for a delightful meal, celebrating all those lovely things associated with Mother’s Day.
Why You’ll Love This
One of the primary reasons you’ll fall in love with these **Honey Butter Rolls** is their incredible taste. The fusion of freshly baked bread and rich honey butter is a match made in culinary heaven. Not only are they delicious, but they are also relatively simple to prepare, making them accessible even for those who might be new to baking. Whether you’re a busy parent looking to create memorable moments with your family or someone planning a festive brunch with friends, these rolls serve as an inviting addition to any table, effortlessly elevating your meal.
Cost-effectiveness is another factor to consider; the ingredients for these rolls are usually household staples. Flour, sugar, milk, butter, and honey are all affordable, everyday items. You’ll be delighted to know that this dish offers tremendous value—home-baked goods are often more economical than store-bought options and provide personalized flavors that store products simply cannot match. Additionally, this recipe is quite versatile, accommodating dietary alterations such as gluten-free flours or plant-based butter for those with specific dietary needs, ensuring that everyone can enjoy them.
However, you might be wondering about possible assumptions regarding making rolls from scratch. Perhaps you’ve tried baking bread before and found it too difficult, or you might worry that achieving that fluffy texture is beyond your skills. Fear not! This recipe breaks down each step, providing essential tips to avoid common pitfalls and ensure you succeed in crafting perfect honey butter rolls every time.
Ingredients You’ll Need
- All-purpose flour: The foundation of your rolls. You can also use bread flour for a chewier texture.
- Granulated sugar: Enhances sweetness and feeds the yeast, promoting well-risen rolls.
- Active dry yeast: The leavening agent that makes the rolls rise, resulting in that fluffy texture.
- Milk: Whole milk is best for a rich flavor; however, you can use almond or oat milk for a dairy-free option.
- Unsalted butter: For flavor and richness. You can substitute with vegan butter if desired.
- Salt: Balances flavors and regulates yeast activity while helping to develop gluten.
- Honey: Not only for spreading but also to enhance sweetness and moisture in the dough.
- Egg: Adds richness and helps bind the ingredients together.
Understanding each ingredient’s role in the recipe helps you make informed decisions. For example, consider experimenting with **whole wheat flour** for a nuttier flavor or using local honey for a unique taste. Knowing about potential substitutes, like using **flaxseed meal mixed with water** as an egg replacement for vegan rolls, can also enhance your cooking experience and expand your repertoire.
How to Make
- In a small bowl, combine warm water (about 110°F) and active dry yeast. Let it sit for approximately 5-10 minutes until it becomes frothy. This reaction confirms that the yeast is active, crucial for achieving properly risen rolls. You will know it is ready when the surface bubbles up.
- In a large mixing bowl, whisk together all-purpose flour, granulated sugar, and salt. Make a well in the center and pour in the frothy yeast mixture along with melted butter and an egg. Gradually mix the flour into the wet ingredients until a shaggy dough forms.
- Turn the dough onto a floured surface and knead it for about 5-7 minutes. Kneading helps develop gluten, lending tenderness and structure to your rolls. You should achieve a smooth, elastic texture. This is a perfect opportunity to get your hands a little messy!
- Place the kneaded dough in a lightly greased bowl. Cover it with a clean kitchen towel and let it rise in a warm, draft-free area until doubled in size—approximately 1-2 hours.
- Once the dough has risen, gently punch it down to release air. Turn it out onto a floured surface again and divide it into 12 equal pieces. Roll each piece into a ball and place them in a greased baking dish, arranging them snugly together.
- Cover the rolls with a towel again, allowing them to rise for another 30 minutes. This second rise is crucial for creating light and fluffy rolls. Preheat your oven to 375°F (190°C) during this time so it’s ready to bake.
- Once the rolls have risen and the oven is preheated, bake them for 15 minutes or until golden brown on top. The aroma will be intoxicating—try to resist opening the oven door too soon, as that can alter the baking process.
- Remove the rolls from the oven and allow them to cool slightly in the baking dish. Meanwhile, mix softened butter and honey in a small bowl to make the honey butter spread. This sweet topping will melt beautifully over the warm rolls.
By carefully following these steps, you’ll end up with beautifully baked Honey Butter Rolls that have a golden crust and a soft, tender inside. Each bite is filled with warmth and enveloped in sweetness, perfect for celebrating Mother’s Day or any occasion.
Variations & Substitutions
Herbed Honey Butter Rolls: Add fresh herbs, such as rosemary or thyme, to your honey butter spread for a savory spin. This variation can appeal to those seeking something beyond the standard sweet option. The aromatic herbs will beautifully complement the rolls, providing a delightful blend of flavors perfect for elevating your meal to gourmet status.
Whole Wheat Honey Butter Rolls: For a healthier twist, substitute half of the all-purpose flour with whole wheat flour. This variation adds more fiber and nutrients while offering a nuttier flavor. Due to the different protein content, you may need to adjust the liquid to attain the desired dough consistency. Just be sure to let the dough rise longer, as whole wheat can take more time to expand.
Vegan Honey Butter Rolls: If you’re catering to a vegan diet, you can easily make these rolls plant-based by replacing the egg with flaxseed meal and using coconut oil or vegan butter instead of traditional butter. For the honey spread, opt for agave syrup for a vegan-friendly alternative. The texture will still be pleasing, maintaining softness while also being suitable for those with dietary restrictions.
Stuffed Honey Butter Rolls: For an exciting twist, consider stuffing your rolls with sweetened cream cheese or chocolate chips before the second rise. The additions will create a delightful surprise in every bite. Just be sure to pinch the rolls securely to avoid any filling leaking out during baking!
Each variation illustrates the versatility of this recipe and allows you to customize it according to your personal taste. The possibilities are indeed endless!
Common Mistakes to Avoid
When baking honey butter rolls, being aware of common pitfalls can save you from less than desirable outcomes. One major mistake is using water that is too hot while activating the yeast. If water exceeds 120°F, it may kill the yeast, preventing your rolls from rising properly. Always use a thermometer to ensure you’re not taking any chances.
Another common issue is over-kneading the dough. While gluten development is essential, over-kneading can result in tough rolls. Knead just until the dough becomes smooth and elastic. On the contrary, under-kneading can lead to flat rolls, as it won’t develop enough structure.
Lastly, neglecting the rising times is a frequent issue. Rushing through the steps might lead to rolls that are dense instead of light and fluffy. Make sure to allow the dough to double in size during both rises, as they are crucial for developing the perfect texture.
Storage, Freezing & Reheating Tips
To best store your Honey Butter Rolls, allow them to cool completely after baking. Once cooled, place them in an airtight container at room temperature for up to 2 days. For longer storage, consider freezing them. To do this, wrap each roll individually with plastic wrap and then place them in a freezer-safe bag or container. The rolls can stay good for up to three months frozen.
When ready to enjoy, simply remove the desired number of rolls from the freezer and let them thaw at room temperature for about 1-2 hours. To reheat them, preheat your oven to 350°F (175°C). Place the rolls on a baking sheet and warm them in the oven for about 10-15 minutes until warmed through. This process revives their delightful texture, making them taste freshly baked again.
As with all baked goods, ensuring proper storage practices is vital for maintaining both safety and quality. Be sure to serve or consume leftover rolls within a reasonable timeframe.
Frequently Asked Questions
Can I use instant yeast instead of active dry yeast? Yes, you can substitute instant yeast for active dry yeast at a 1:1 ratio. Instant yeast does not require proofing, so you can mix it straight into the dry ingredients instead of activating it in warm water.
How can I make these rolls more fluffy? The key to lighter rolls lies in the dough’s hydration and rising times. Ensuring that you allow your dough to rise sufficiently and not rush through the process is crucial. Using a bit more liquid in the dough can also enhance fluffy results, but you may need to adjust the flour accordingly.
Can I make the dough ahead of time? Absolutely! You can prepare the dough, let it rise until doubled in size, then punch it down and refrigerate it overnight. Just be sure to bring it back to room temperature before shaping and allowing it to rise again.
What can I serve with these rolls? Honey butter rolls are incredibly versatile. They are fantastic served alongside dishes like roasted meats, soups, or even as part of a breakfast spread with eggs and bacon. They’re also delightful when spread with your favorite fruit preserves or additional honey.
How do I know when the rolls are done baking? You can determine if the rolls are done by observing their color and texture. They should be a beautiful golden brown, and if you gently tap on the bottom of one, it should sound hollow. An instant-read thermometer can also help—when they reach around 190°F (88°C) internally, they are typically baked through.
Conclusion:
In summary, **Mother’s Day Honey Butter Rolls** are a delightful addition to any meal, encapsulating warmth, flavor, and the essence of family. Whether enjoyed fresh from the oven or warmed later, they promise to bring smiles and satisfaction. I encourage you to try this simple yet enjoyable recipe, customize it to your heart’s content, or share it with friends and family. With a little effort and love, these rolls can create cherished moments during special occasions. Happy baking!