Prep time: 20 minutes
Cook time: 0 minutes
Total time: 20 minutes
Servings: 4 servings
As Valentine’s Day approaches, it’s time to indulge in sweet treats that feel special without requiring hours in the kitchen. Imagine serving elegant, creamy chocolate dessert cups that please not just the eye, but the palate as well. These No-Bake Valentine’s Chocolate Dessert Cups are the perfect blend of rich flavors and lovely presentation, making them an easy yet impressive choice for this romantic holiday.
Whether you are celebrating with a significant other, hosting a gathering with friends, or preparing a family treat, this recipe caters to everyone. The texture is luscious, the taste is delightful, and the preparation is hassle-free. Let me walk you through what makes these dessert cups so special, and you’ll be ready to wow your loved ones in no time!
What Is No-Bake Valentine’s Chocolate Dessert Cups?
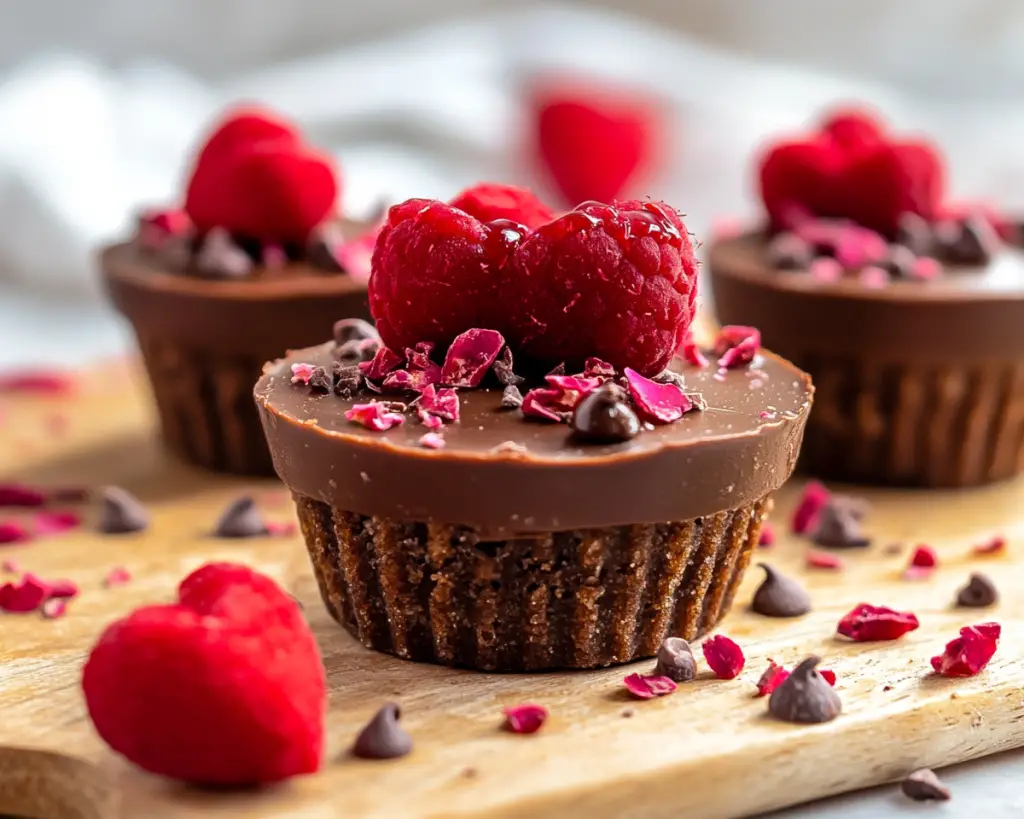
No-Bake Valentine’s Chocolate Dessert Cups are a delightful treat that combines layers of finely blended chocolate mousse and a crunchy base, topped with a light whipped cream garnish. Originating from classic mousse recipes, these dessert cups have evolved into easy, no-bake versions that can be put together quickly, making them an ideal choice for busy cooks or anyone looking for a simple yet elegant dessert.
The magic lies in the layers. First, a crispy base typically made from crushed cookies or graham crackers gives a wonderful crunch that pairs beautifully with the smooth, velvety chocolate filling. The filling itself is often prepared using cream cheese, whipped cream, and chocolate, creating a rich and creamy texture that melts in your mouth. The dessert is then finished with sweet toppings, such as berries or chocolate shavings, giving it a sophisticated touch.
Not only do these dessert cups look beautiful, but they also allow you to customize them. You can incorporate various flavors, like coffee or peppermint, and choose toppings based on personal preference or seasonal availability. They embody the spirit of Valentine’s Day by being both visually appealing and delicious.
Why You’ll Love This No-Bake Valentine’s Chocolate Dessert Cups
There are countless reasons why these No-Bake Valentine’s Chocolate Dessert Cups will become your go-to recipe for the holiday. First and foremost, the taste is absolutely divine. The combination of creamy chocolate with a crispy base creates a textural harmony that is irresistible. The sweetness of the chocolate is beautifully balanced by the lightness of the whipped cream, making each spoonful a heavenly experience.
Moreover, the preparation is incredibly easy. With no baking required, you can easily whip these up while managing other tasks, such as prepping a romantic dinner or setting the mood with candles and music. The simplicity of this recipe ensures that everyone, even beginner cooks, can achieve delightful results without stress.
Another fantastic aspect is the versatility of the dessert. You can adapt the recipe to cater to various dietary preferences and restrictions. For instance, using gluten-free cookies for the base will accommodate those with gluten sensitivities. Additionally, by swapping out ingredients, you can create a dairy-free version that still maintains its rich and creamy character.
Lastly, these dessert cups are visually stunning. The clear cups reveal the beautiful layers of chocolate and cream, enticing anyone who sees them. Their elegance makes them perfect for special occasions, and they are bound to impress your guests or that special someone without needing extensive decorating skills.
Ingredients You’ll Need
To create your No-Bake Valentine’s Chocolate Dessert Cups, gather the following ingredients:
- Chocolate cookies: 1 cup, crushed. These create the crunchy base. You can use store-bought varieties or make your own if you have time.
- Butter: 4 tablespoons, melted. This binds the cookie crumbs together for a sturdy base.
- cream cheese: 8 ounces, softened. This provides the rich, creamy texture in the filling.
- Chocolate chips: 1 cup, semi-sweet or dark. Melt this to incorporate the chocolate flavor into the mousse. Adjust the richness based on your preference.
- Heavy cream: 1 cup, whipped. This lightens the filling, giving it a mousse-like texture.
- Powdered sugar: 1/4 cup. For sweetness in the filling, you can adjust this based on your sweetness preference.
- Vanilla extract: 1 teaspoon. Adds depth to the flavor of the chocolate, enhancing its richness.
- Whipped cream: For topping. This light layer on top adds both visual appeal and extra creaminess.
- Chocolate shavings or berries: For garnish. Fresh fruits or chocolate shavings can elevate the presentation and add a pop of color.
Each ingredient plays a crucial role in achieving that perfect balance of flavors and textures. The cookies provide the essential crunch, while the chocolate and cream create a rich and satisfying filling.
How to Make No-Bake Valentine’s Chocolate Dessert Cups
Creating these delightful dessert cups is quick and straightforward. Follow these step-by-step instructions:
- Prepare the base: Start by crushing the chocolate cookies in a resealable bag or food processor until they resemble fine crumbs. Transfer the crumbs to a mixing bowl, then add the melted butter. Stir until fully combined, ensuring all crumbs are coated in butter.
- Assemble the base: Spoon the cookie mixture into your serving cups, dividing it evenly. Press the crumbs firmly into the bottom of each cup to create a solid base. Aim for an even layer so that it holds together well when you spoon the filling over it.
- Melt the chocolate: Place the chocolate chips in a microwave-safe bowl and heat in 30-second intervals, stirring in between until fully melted. Take care not to overheat the chocolate, which can lead to a gritty texture. Let it cool slightly while you prepare the next step.
- Make the filling: In a large mixing bowl, beat the softened cream cheese with an electric mixer until smooth. Gradually add the powdered sugar and vanilla extract, mixing until combined. Then, fold in the melted chocolate until the mixture is fully incorporated.
- Incorporate the whipped cream: Gently fold the whipped cream into the chocolate mixture until no white streaks remain. This step is crucial in keeping the filling light and airy, akin to a mousse.
- Fill the cups: Spoon the chocolate filling over the prepared base in each cup. Smooth the top with a spatula for an even finish. Once all cups are filled, refrigerate for at least 2 hours, or until set.
- Garnish and serve: Just before serving, add a generous swirl of whipped cream on top of each dessert cup. Finish with chocolate shavings or a few fresh berries for a touch of color and elegance.
And there you have it! Simple yet stunning dessert cups that will enchant anyone who tries them. The key is to let them chill properly, as this will help the mousse set and allow the flavors to meld beautifully.
4 Variations & Substitutions
Mint Chocolate Variation: If you’re a fan of mint chocolate, consider adding a splash of peppermint extract to the chocolate filling. You can also garnish with crushed mint candies to give a festive look and refreshing taste.
Fruit-Infused Cups: For a fruity twist, add a layer of fruit puree at the bottom of the cups before the chocolate base. Consider using raspberry or strawberry puree, which pairs beautifully with chocolate. This adds a fresh burst of flavor and a lovely contrast in both color and taste.
Vegan Version: To create a vegan version of this dessert, substitute regular cream cheese with a plant-based alternative and use dairy-free chocolate chips. For the whipped cream, opt for coconut cream that has been whipped until fluffy. This variation ensures everyone can enjoy the treat!
Cheesecake Filling Variation: If you’re in the mood for cheesecake, mix adicional cream cheese with the chocolate and add lemon zest for a creamy chocolate cheesecake filling. You can also swirl in some melted chocolate at the last moment for a marbled effect.
Each of these variations can transform your No-Bake Valentine’s Chocolate Dessert Cups into something new and equally delightful. Feel free to experiment and find a rendition that suits your taste!
Common Mistakes to Avoid
When preparing No-Bake Valentine’s Chocolate Dessert Cups, it’s important to be aware of common pitfalls to ensure your dessert turns out perfect.
One of the most critical aspects is the temperature of your ingredients. Using cream cheese that is too cold can result in a lumpy filling. Always ensure the cream cheese is brought to room temperature for easy blending and a smooth texture.
Another common mistake is not allowing enough time to chill. Although the recipe is a no-bake option, the filling needs adequate time to firm up in the refrigerator. Skipping this step can lead to a runny or unstable dessert.
Always taste your filling before spooning it into the cups. If you find it too rich or sweet, adjust the sweetness by adding a bit of extra whipped cream or choosing less sweet chocolate chips. This balance is crucial for a well-rounded dessert.
Finally, be gentle when folding the whipped cream into the chocolate mixture. Overmixing can lead to a dense filling rather than the light and fluffy texture you desire.
Storage, Freezing & Reheating Tips
To store your No-Bake Valentine’s Chocolate Dessert Cups, keep them in an airtight container in the refrigerator. They should last for about 3 to 4 days, making them a perfect make-ahead dessert for parties or family gatherings. Just be mindful to prevent the dessert from picking up any unwanted odors.
If you would like to prepare them further in advance, you can freeze the assembled dessert cups before adding the whipped cream topping. To freeze, cover them tightly with plastic wrap and place them in the freezer where they can last for about a month. When you’re ready to serve, transfer them to the refrigerator the night before to let them thaw slowly. Top with freshly whipped cream just before serving.
Reheating is not necessary since this dessert is best enjoyed chilled. However, if you plan on making a variation that includes a warm component, like a molten chocolate cake filling, you may want to consider gently reheating for an alternate dessert experience.
Frequently Asked Questions
Can I use milk chocolate instead of dark chocolate for the filling?
Yes, you can absolutely use milk chocolate instead of dark chocolate. The flavor will be sweeter and creamier, which is perfect if you prefer a milder chocolate taste. Just be sure to adjust the amount of powdered sugar, as milk chocolate tends to be sweeter.
How do I make the cups gluten-free?
To make your dessert cups gluten-free, simply substitute the chocolate cookies with gluten-free alternatives readily available in stores. Brands like gluten-free Oreos or similar cookie options can work perfectly without sacrificing taste.
Can I make these dessert cups in advance?
Yes! In fact, making them a day or two in advance can enhance the flavors as they meld together. Just be sure to store them in the refrigerator and keep them covered to maintain freshness until you’re ready to serve them.
What if I don’t have chocolate chips?
If you don’t have chocolate chips on hand, you can use chopped chocolate bars instead. Just ensure they are high-quality chocolate for the best flavor. If you have cocoa powder, you could make a recipe variation using it, but you will need to adjust the proportions accordingly, keeping in mind that it won’t provide the same creamy texture.
Can I use a different flavor besides chocolate?
Absolutely! You can substitute the chocolate filling with various flavors such as vanilla or coffee. Just adjust the ingredients accordingly, replacing cocoa powder or chocolate with the desired flavor base while maintaining the same proportions for a creamy texture.
Conclusion:
These No-Bake Valentine’s Chocolate Dessert Cups are truly a delightful way to celebrate love with a chocolatey treat. Their ease of preparation and versatility make them a must-try, whether you’re celebrating in a big way or having an intimate gathering. Customize them according to your taste, and don’t hesitate to share the love by passing this recipe along to friends and family.
Now, gather your ingredients, get creative, and enjoy the delightful process of making these sweet cups. They are sure to impress! Go ahead and make this Valentine’s Day extra special with a dessert that is as enjoyable to make as it is to eat.


