### Prep Time
15 minutes
### Cook Time
30 minutes
### Total Time
45 minutes
### Servings
Approximately 24 pieces
Orange jelly candy is a delightful treat that brings a burst of citrus flavor and a chewy texture that makes it a favorite among kids and adults alike. As a child, I remember eagerly waiting for summer to savor these sweet treats at family picnics. They evoke nostalgia, and they’re surprisingly easy to make at home! In this blog post, you’ll learn everything you need to know to create your own delicious orange jelly candy. You’ll discover the ingredients, step-by-step instructions, variations, and even helpful tips to ensure your candied dreams come true.
So, grab your citrus juicer and get ready to dive into this vibrant and tangy confection that can easily brighten anyone’s day!
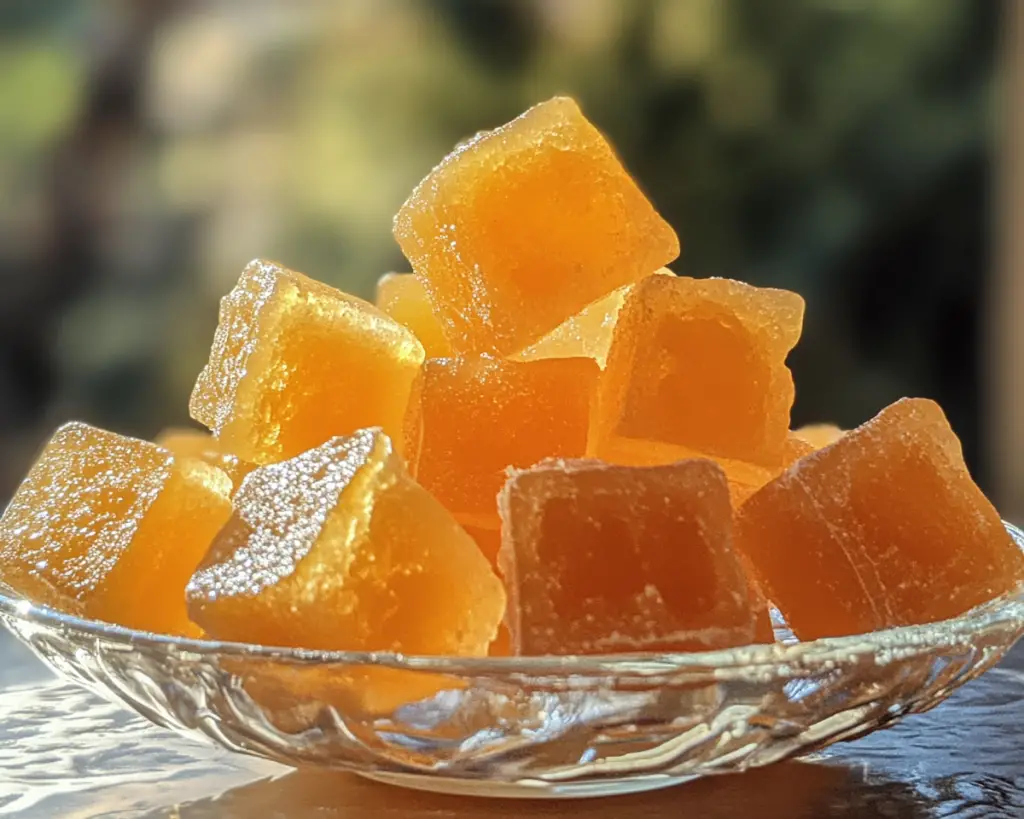
What Is Orange Jelly Candy?
Orange jelly candy, sometimes referred to as orange gummies, is a chewy candy that’s infused with the delightful flavor of fresh oranges. The origin of jelly candies can be traced back to Europe, where they first became popular in the 19th century. These candies are made by combining fruit juice, sugar, and a gelling agent — typically gelatin or pectin — to create a soft and chewy texture that melts wonderfully in your mouth.
**Texture and Flavor:**
The texture of orange jelly candy is smooth and slightly firm, yet it offers a delightful chewiness that is incredibly satisfying. The flavor is authentically bright and citrusy, thanks to fresh orange juice and zest. This candy captures the sweet and tangy essence of oranges, providing a refreshing treat that’s perfect for summer parties or as a snack throughout the year.
Moreover, this candy can easily be made at home, allowing you to control the sweetness and enhance the flavor profile to your liking. Its vibrant orange color not only makes it visually appealing but also a fun option for candy buffets, birthday parties, or everyday snacking.
Why You’ll Love This Orange Jelly Candy
There are countless reasons to love homemade orange jelly candy! Here are some key benefits:
– **Fresh and Delicious Taste:** When you make orange jelly candy from scratch, it’s easy to capture the bright taste of fresh oranges, making this treat much more flavorful than store-bought versions that often contain artificial flavors and preservatives.
– **Natural Ingredients:** By using natural orange juice and zest, you can create a candy that is free from artificial additives. This option can be appealing for parents seeking healthier snacks for their children.
– **Simple to Make:** This recipe uses just a few ingredients and is quite easy to follow. Whether you’re a seasoned home cook or a beginner in the kitchen, making orange jelly candy can be a fun cooking adventure.
– **Customizable Flavor:** You can easily adjust the sweetness or incorporate other flavors like lemon or lime to create a unique twist on the classic orange flavor. This candy is not only versatile but also allows you to get creative!
– **Great for Sharing:** Orange jelly candy is the perfect gift for family and friends, making it an excellent choice for birthday treats, holidays, or just because you want to share a little joy with someone.
When making these candies, it’s essential to be mindful of common misconceptions, such as the belief that homemade candies are complicated and time-consuming. In reality, once you grasp the technique, you’ll find that the process is straightforward and can be accomplished in under an hour.
Ingredients You’ll Need
To make delightful orange jelly candy, you’ll need the following ingredients:
– **Fresh Orange Juice (1 cup):** This will provide the main flavor of your candy. Freshly squeezed orange juice will give you the best flavor and aromatics. If you’re short on time, you can use store-bought juice, but be sure it’s 100% pure for optimal taste.
– **Granulated Sugar (1 cup):** Sugar is necessary for sweetness and for helping the mixture to gel. This recipe uses a standard amount, but you may adjust based on your sweetness preference.
– **Gelatin (3 tablespoons):** This ingredient is crucial as it encourages the jelly-like consistency. Use unflavored gelatin, which is available in most grocery stores. If you prefer a vegetarian option, you can use agar-agar as a substitute.
– **Lemon Juice (2 tablespoons):** Fresh lemon juice adds a nice balance to the sweetness of the orange juice and enhances the overall flavor.
– **Orange Zest (1 tablespoon):** The zest adds a concentrated citrus flavor, making the jelly candy more aromatic and bright. Consider using organic oranges to avoid pesticides.
– **Cornstarch (for dusting):** This will prevent the jelly candy from sticking together when they set. You can also use powdered sugar, but cornstarch is less messy and gives a nice coating.
How to Make Orange Jelly Candy
Follow these step-by-step instructions to create your homemade orange jelly candy:
1. **Prepare Your Equipment:** Start by gathering all your ingredients and equipment. You will need a medium saucepan, a whisk, a rubber spatula, and a jelly roll pan or a shallow container lined with parchment paper. Make sure that your surface is clean and your utensils are dry for the best results.
2. **Mix the Juices:** In your medium saucepan, combine the **fresh orange juice** with the **lemon juice**. Whisk them together until they are fully blended. The combination of these citrus juices will offer depth to the flavor profile.
3. **Add Sugar and Zest:** Next, add the **granulated sugar** and **orange zest** to the juice mixture. While you whisk continuously, heat the mixture over low-medium heat. Make sure to continue stirring until the sugar has completely dissolved. This step not only infuses the juice with sweetness but ensures that no sugar crystals remain.
4. **Prepare the Gelatin:** While the mixture is heating up, take a small bowl and combine the **gelatin** with a few tablespoons of cool water. Mix it gently and let it sit for about 5 minutes to bloom. This step is crucial as it ensures that the gelatin hydrates properly, leading to a consistent texture.
5. **Incorporate the Gelatin:** Once the orange mixture is warm and the sugar has dissolved, add the bloomed gelatin to the saucepan. Whisk vigorously until all the gelatin is dissolved completely. Keep the mixture on the heat for an additional minute, being careful not to boil it, as high temperatures could affect the gelling process.
6. **Pour and Set:** Immediately pour the candy mixture into the prepared jelly roll pan, smoothing it out with your spatula. Let it rest at room temperature for about 10-15 minutes before transferring it to the refrigerator. Chill for at least 4-6 hours, or preferably overnight, until the jelly has fully set.
7. **Cut and Dust:** Once firmly set, remove the jelly from the refrigerator. Lift the jelly out of the pan using the parchment paper. Using a sharp knife, cut the jelly into the desired shapes – squares or rectangles work perfectly.
8. **Coat the Candy:** To prevent the jelly pieces from sticking together, toss them in a shallow bowl or plate filled with **cornstarch**. Ensure that all sides are coated lightly to provide a nice finish.
9. **Store and Enjoy:** Your homemade orange jelly candy is now ready! Store them in an airtight container in the fridge for up to two weeks. Enjoy these candies as a refreshing treat or share them with family and friends!
5 Variations & Substitutions
If you want to mix things up a bit, consider these variations and substitutions for your orange jelly candy:
1. **Mixed Citrus Jelly Candy:**
– **How It Changes the Flavor/Texture:** Using a blend of citrus fruits, such as lemon, lime, or grapefruit, will create a tangy taste and a more complex flavor profile.
– **Who It’s For:** This variation is perfect for citrus lovers who crave a bit more zing in their candy.
– **Tips for Success:** Replace half of the orange juice with equal parts of your desired citrus juices for a refreshing twist.
2. **Ginger-Orange Jelly Candy:**
– **How It Changes the Flavor/Texture:** Adding fresh grated ginger will offer a spicy kick that perfectly complements the sweet and tangy flavors of the orange.
– **Who It’s For:** Ideal for those who enjoy bold, spiced flavors in their sweets.
– **Tips for Success:** Add 1-2 teaspoons of grated ginger to the juice mixture before heating it to infuse the flavor while not overpowering the zest.
3. **Chocolate-Covered Orange Jelly Candy:**
– **How It Changes the Flavor/Texture:** Dipping the finished jelly candy into melted dark chocolate adds an indulgent richness that contrasts beautifully with the tartness of the orange.
– **Who It’s For:** Suitable for chocolate lovers who want a decadent twist on traditional jelly candies.
– **Tips for Success:** Make sure to let the candies dry after coating them in chocolate on a wire rack. Use high-quality chocolate for the best results.
4. **Sugar-Free Orange Jelly Candy:**
– **How It Changes the Flavor/Texture:** By substituting granulated sugar with a sugar-free sweetener, such as stevia or erythritol, you can create a lower-calorie version while maintaining the candy’s flavor.
– **Who It’s For:** Great for those following a sugar-free diet or looking to cut back on sugar.
– **Tips for Success:** Make sure to check the conversion ratios when using sugar substitutes, as some may use different measurement amounts than granulated sugar.
5. **Tropical Orange Jelly Candy:**
– **How It Changes the Flavor/Texture:** Incorporating other fruit juices, like pineapple or passion fruit, adds an exotic flair that pairs beautifully with orange.
– **Who It’s For:** This option is great for those who enjoy tropical flavors and want to escape to a fruity paradise.
– **Tips for Success:** Use a mix of approximately 2:1 orange juice to tropical juice for balance, and make sure the overall liquid content remains the same.
Common Mistakes to Avoid
To make sure your candy turns out perfectly, avoid these common mistakes:
– **Not Blooming the Gelatin Properly:** Failing to hydrate the gelatin can lead to a grainy texture. Ensure that you let it sit in water until it swells and softens before adding it to the juice mixture.
– **Boiling the Mixture:** Boiling can weaken the gelling properties of gelatin. Always keep the mixture at a low simmer to ensure it doesn’t reach a boiling point during preparation.
– **Not Stirring Constantly:** If you don’t stir the mixture while combining, sugar can crystallize, leading to a gritty taste and texture. Stir continuously to keep everything well blended.
– **Not Allowing Enough Time to Set:** Patience is key! If you rush the setting process, your candy may not firm up properly. Allow it to chill in the refrigerator for several hours or overnight if possible.
– **Cutting Too Early:** Cutting into the jelly before it has fully set can make it fall apart or stick together. Wait until it is completely firm for easy slicing.
Storage, Freezing & Reheating Tips
Proper storage is essential for maintaining the freshness of your orange jelly candy:
– **Storage:** Keep your jelly candy in an airtight container at room temperature for up to a week. Refrigeration can be an option, but it can alter the texture. If you notice any stickiness, use cornstarch as a barrier to prevent pieces from sticking together.
– **Freezing:** While you can freeze these candies, it’s important to note that this may change their texture. If you decide to freeze, make sure they are well coated in cornstarch and stored in a freezer-safe container. Thaw them in the fridge rather than at room temperature to avoid changes in texture.
– **Reheating:** There’s no need to reheat jelly candies, as they are best enjoyed at room temperature. If they become too hard after refrigeration, let them sit outside for a few minutes before serving.
Frequently Asked Questions
1. **Can I make this jelly candy using other fruit juices?**
– Yes! You can use any fruit juice you like, such as pineapple, apple, or grape. Just be sure to adjust the quantities based on the sweetness of the juice you choose. For best results, stick with juices that gel well and have a pleasant flavor profile.
2. **Is it possible to make these vegan?**
– Definitely! Instead of gelatin, you can substitute it with agar-agar, a plant-based thickener. Follow the instructions on the package for blooming agar-agar, as it may differ slightly from gelatin usage.
3. **How can I know when the candy is set?**
– The jelly candy is properly set when it has a firm yet slightly springy texture. You should be able to lift it out of the pan and peel the parchment off easily. If it still feels sticky and mushy, give it more time in the refrigerator.
4. **Can I add food coloring to the candy mixture?**
– Yes! If you want to brighten the color, feel free to add a few drops of orange food coloring to the mixture before pouring it into the pan. Just make sure to use a gel-based coloring for the best results, as liquid dyes can alter the consistency.
5. **What should I do if my jelly candy is too sticky?**
– If your jelly candy turns out too sticky, it might mean that it wasn’t cooked long enough to evaporate excess moisture. To fix it for the future, ensure that you allow enough time for the mixture to simmer adequately. To counteract the stickiness, you can toss the finished pieces in more cornstarch to prevent sticking.
In conclusion, creating homemade orange jelly candy is not only a fun activity, but it also provides an opportunity to share delicious treats that are made with love. With vibrant flavors and chewy textures, these candies are sure to impress anyone who tries them. Don’t hesitate to get creative by experimenting with different flavors and variations. I encourage you to give this recipe a try, customize it to your liking, and share your candy-making adventures! Making your own treats can be incredibly rewarding, so gather your ingredients and get started on this sweet journey into the world of jelly candy. Happy cooking!


