Prep time: 20 minutes
Cook time: 45 minutes
Total time: 1 hour 5 minutes
Servings: 12
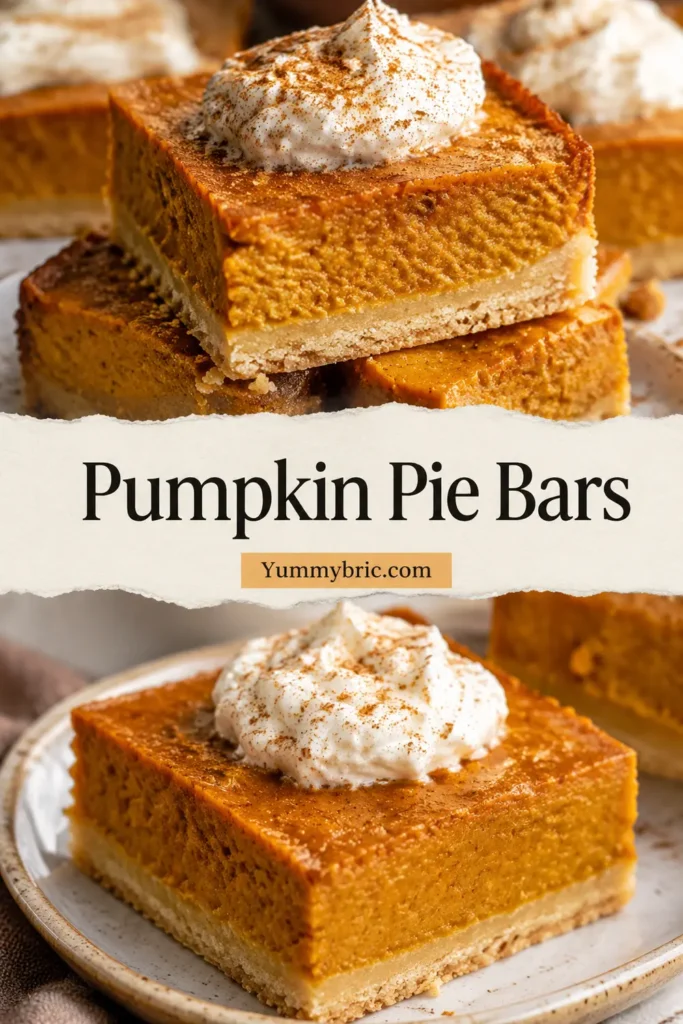
Pumpkin Pie Bars are a delightful and convenient twist on the beloved pumpkin pie, bringing comfort and flavor to your dessert table without the fuss of pie crust. This dessert is perfect for those who love the flavors of autumn and want to impress their family and friends with minimal effort. With a buttery crust and a spiced pumpkin filling, these bars are an easy way to capture the essence of pumpkin pie in a form that’s easy to share and serve. Whether it’s for a holiday gathering, a special occasion, or just a cozy night in, Pumpkin Pie Bars are sure to please.
What Is Pumpkin Pie Bars?
Pumpkin Pie Bars are a decadent dessert that features a smooth, spiced pumpkin filling atop a buttery crust. This delightful dish is essentially pumpkin pie reimagined as a bar, making it easier to cut and serve. They combine the classic flavors of traditional pumpkin pie—think cinnamon, nutmeg, and clove—with a twist of ease that a bar format provides. Perfect for celebrations or as a cozy treat with coffee, these bars are deliciously satisfying.
Why You’ll Love This
This recipe for Pumpkin Pie Bars is not only delicious but also simple to prepare. The crust is made with just a few ingredients and doesn’t require rolling out, making it accessible for busy parents or kitchen beginners. The filling, which is rich and creamy, uses canned pumpkin, making it a convenient choice that doesn’t compromise on flavor. Additionally, these bars can be made ahead of time, allowing you to enjoy moments with your family without spending all day in the kitchen. With flavors reminiscent of the holidays, these Pumpkin Pie Bars are sure to become a favorite in your dessert rotation.
Ingredients You’ll Need
- 1½ cups all-purpose flour: This provides the base for your crust, giving it structure and texture.
- ½ cup dark brown sugar: Adds depth of flavor and sweetness to the crust.
- ½ cup unsalted butter, melted: The fat that binds the crust together while giving it a rich flavor.
- 1 teaspoon vanilla extract: Enhances the overall flavor profile of the crust.
- ½ teaspoon salt: Balances the sweetness and enhances the other flavors in the crust.
- 1 can (15 ounces) pure pumpkin puree: This is the star ingredient, giving the bars their distinctive flavor and texture.
- ¾ cup granulated sugar: Sweetens the pumpkin filling.
- 2 large eggs: Adds richness and helps bind the filling.
- 1 teaspoon ground cinnamon: Brings warmth and classic pumpkin pie flavor.
- ½ teaspoon ground nutmeg: Adds spice and depth.
- ¼ teaspoon ground ginger: Offers a zesty flavor component.
- ½ teaspoon salt: Ensures a well-rounded flavor in the filling.
- ¾ cup evaporated milk: Gives the filling creaminess and a smooth texture.

How to Make
- Preheat your oven to 350°F (175°C). This ensures that your bars bake evenly and gives you a perfect texture.
- In a mixing bowl, combine the flour, brown sugar, melted butter, vanilla, and salt. Mix until the ingredients are smooth and crumbly. This mixture forms the base of your crust.
- Press the mixture firmly into the bottom of a greased 9×13 inch pan, ensuring an even layer. Use the back of a measuring cup or your fingers to smooth it out. Bake for about 15 minutes or until slightly golden.
- While the crust is baking, prepare the pumpkin filling. In another mixing bowl, combine the pumpkin puree, granulated sugar, eggs, cinnamon, nutmeg, ginger, salt, and evaporated milk. Whisk until the mixture is completely smooth.
- Once the crust is done, remove it from the oven and pour the pumpkin filling over the hot crust. Use a spatula to spread it evenly.
- Return the pan to the oven and bake for an additional 30 to 35 minutes, or until the filling is set in the center. A toothpick inserted should come out clean.
- After baking, let the bars cool completely in the pan before cutting them into squares. This cooling time helps the filling firm up.
- Once cool, serve with whipped cream or a sprinkle of powdered sugar if desired. Enjoy your delicious dessert!
Variations & Substitutions
Gluten-Free Option: If you or your guests are gluten-sensitive, substitute the all-purpose flour with a gluten-free flour blend. Ensure the blend contains xanthan gum for better structure in the crust.
Dairy-Free Option: Replace the butter with coconut oil and use coconut milk or a dairy-free milk alternative in place of evaporated milk for a deliciously dairy-free treat.
Spiced Pumpkin Pie Bars: For an extra kick, consider adding ¼ teaspoon of ground cloves or allspice to your filling mixture. This adds a wonderful depth of flavor that complements the pumpkin beautifully.
Chocolate Pumpkin Pie Bars: If chocolate is your weakness, swirl in some melted dark chocolate into the filling before baking for a rich and indulgent version of these bars. The combination of chocolate and pumpkin is heavenly!
Nuts & Seeds: Sprinkle chopped pecans or walnuts on top of the filling before baking, adding a delightful crunch that contrasts with the creaminess of the filling.
Common Mistakes to Avoid
One of the common issues when making Pumpkin Pie Bars is overbaking the filling. This can lead to a dry texture that lacks the creamy consistency you’re aiming for. Keep a close eye during the last few minutes of baking, and check for doneness using the toothpick method. Other mistakes include using fresh pumpkin puree instead of canned, which can lead to a watery filling. Always opt for pure pumpkin puree for the best results. Also, ensure that the crust is pressed firmly into the pan; not doing so may result in a crumbly crust that doesn’t hold together well.
Storage, Freezing & Reheating Tips
To store your Pumpkin Pie Bars, place them in an airtight container in the refrigerator. They will stay fresh for up to 4 days. To freeze, slice the bars and wrap them individually in plastic wrap before placing them in a freezer-safe container. They can be frozen for up to 3 months. When it’s time to enjoy your frozen bars, thaw them in the refrigerator overnight. For reheating, simply place the bars in a microwave-safe dish and warm them for about 15-20 seconds or until they reach your desired temperature. Enjoy them warm with a dollop of whipped cream for an extra treat!
Frequently Asked Questions
Can I use fresh pumpkin instead of canned puree for my Pumpkin Pie Bars?
Using fresh pumpkin can be tricky as it tends to be more watery than canned pumpkin. If you prefer to use fresh, ensure you thoroughly strain it to remove excess moisture. However, canned pumpkin is recommended for consistent results.
How do I know when my Pumpkin Pie Bars are done baking?
The bars are done when the edges appear set and the center is slightly jiggly but not liquid. A toothpick inserted into the center should come out clean. It’s important not to overbake, as this can make the filling dry.
Can I make these bars ahead of time?
Absolutely! Pumpkin Pie Bars can be made a day or two in advance. Simply store them in an airtight container in the refrigerator after they cool completely. They taste even better after resting, as the flavors have time to meld together.
What’s the best way to cut the bars?
For clean cuts, use a sharp knife and wipe the blade between cuts. This prevents the filling from sticking, allowing for beautiful, even servings.
Can I add toppings or frostings to my Pumpkin Pie Bars?
Certainly! Whipped cream, a drizzle of caramel sauce, or a sprinkle of nuts can all elevate these bars further. Feel free to get creative with toppings that enhance the flavors.
Conclusion: Pumpkin Pie Bars are an easy, crowd-pleasing dessert that will win the hearts of all who taste them. With their rich pumpkin flavor and buttery crust, these bars embody the spirit of fall. You can customize them to your liking and make them ahead of time, which is incredibly convenient for busy families. So, gather your ingredients, and enjoy making this delightful treat that will surely become a staple in your dessert repertoire!