Prep time: 20 minutes
Cook time: 25 minutes
Total time: 45 minutes
Servings: 12 scones
There’s something magical about the smell of freshly baked scones wafting through the kitchen, warming the air and igniting fond memories of cozy afternoons spent with family and friends. As the fall season approaches, our cravings often shift to heartwarming flavors like pumpkin, cinnamon, and nutmeg. That’s where these delightful Pumpkin Scones come into play — a delicious twist on a classic favorite that both novice and experienced bakers will adore. In this recipe, you’ll learn how easy it is to create these light and fluffy treats right at home, find expert tips along the way, and discover exciting variations to make them your own.
You might wonder what sets these scones apart. They are incredibly moist yet have a tender crumb, thanks to the addition of pumpkin puree. They boast a warm, inviting flavor profile that just shouts “fall.” You’ll also learn just how versatile this recipe can be, as you can easily adapt it based on your taste preferences or pantry staples. Buckle up for a journey into the world of scrumptious pumpkin scones that you can enjoy with your morning coffee, as a snack, or even as a delightful dessert!
What Is Pumpkin Scones – Fall Baking Favorite?
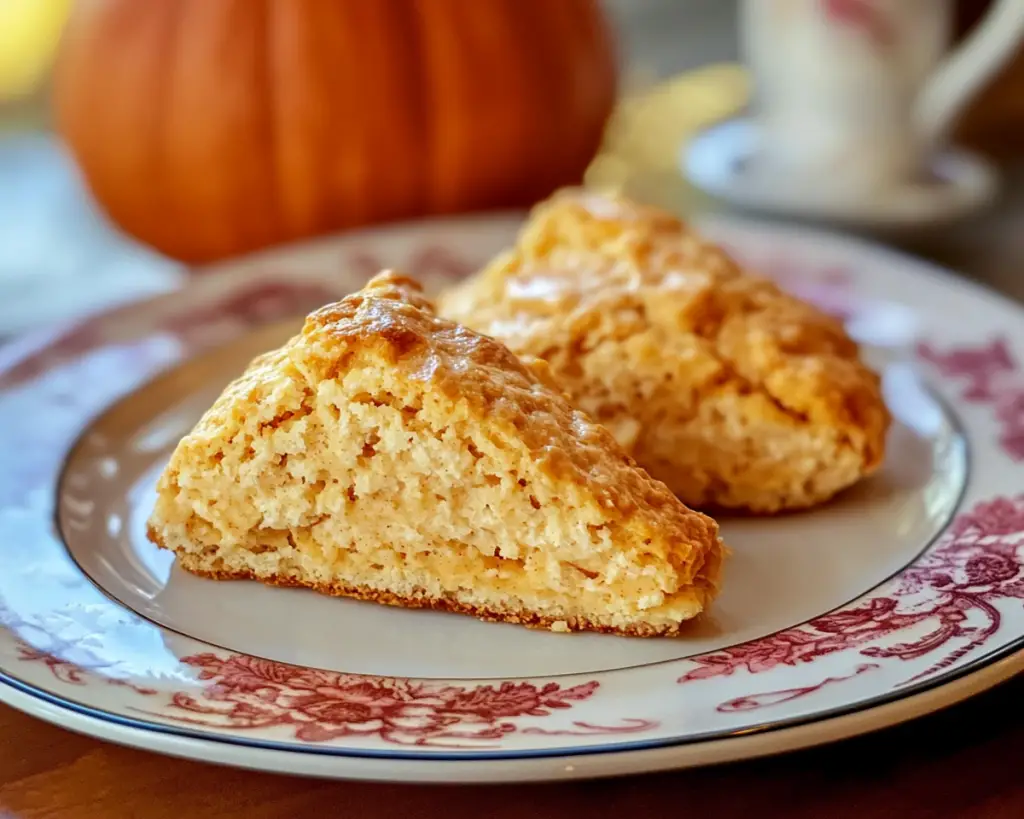
Pumpkin scones are a delightful addition to any fall menu, combining the comforting flavors of pumpkin with the texture of a traditional scone. Originating from British pastry, scones are often enjoyed during afternoon tea, but they’ve also made their way into American baking culture, especially with the introduction of seasonal ingredients like pumpkin. The result is a treat that’s not only easy to make but incredibly flavorful.
The texture of pumpkin scones is a balance of tenderness and slight crispness on the outside, with a moist, soft interior that melts in your mouth. Each bite brings a wave of warmth brought on by the earthy sweetness of pumpkin, complemented by the warmth of spices like cinnamon and nutmeg. Topped with a simple glaze or served with clotted cream, these scones elevate any gathering, be it a festive brunch or a simple afternoon break.
With the pumpkin flavor at its core, you can also play around with various spices and add-ins to create a personalized touch. Imagine the earthy richness of pumpkin enhanced by a hint of maple or topped with crunchy pecans for added texture. It’s all about making this recipe your own!
Why You’ll Love This
One of the key reasons you’ll fall in love with these pumpkin scones is their incredible taste and aroma. The combination of pumpkin with spices offers a comforting embrace that pairs wonderfully with a hot cup of tea or coffee. They are not overly sweet, allowing the natural flavors to shine while providing a perfect snack for busy parents, leisurely brunches, or even an afternoon pick-me-up.
Another standout advantage of these scones is their ease of preparation. Even if you are a beginner in the kitchen, you can whip these up in just about 45 minutes, including baking time! With only a handful of pantry staples, and guidance from this recipe, you’ll be on your way to impressing family and friends without breaking a sweat. Plus, they are budget-friendly, making them an excellent option for home cooks looking to create delightful baked goods without splurging.
Many people fear making scones because they worry about inconsistent texture or dense results. This recipe addresses those concerns, providing clear instructions and tips that ensure light and fluffy scones every time. Whether you want traditional flavors or a modern twist, you’ll find that this recipe is a versatile canvas for your creativity.
Ingredients You’ll Need
- All-purpose flour: The base for your scone, providing structure. For a gluten-free option, use a gluten-free flour blend.
- Baking powder: Essential for that light, fluffy texture — don’t skip it! Ensure it’s fresh for optimal results.
- Ground cinnamon: Adds warmth and depth. Feel free to experiment with other spices like nutmeg or pumpkin pie spice for a flavor boost.
- Ground ginger: Provides a nice kick and works beautifully with the pumpkin and cinnamon.
- Salt: Enhances flavors and balances sweetness. A crucial ingredient that shouldn’t be overlooked.
- Cold unsalted butter: Provides richness and flakiness; make sure it’s cold for the best texture.
- Pumpkin puree: The star ingredient that gives flavor and moisture. Use pure pumpkin puree, not pumpkin pie filling.
- Sugar: For just the right amount of sweetness, balancing the earthiness of the pumpkin.
- Egg: Acts as a binder to help everything hold together.
- Milk: Helps to achieve the desired moisture level. You can use plant-based milk for a dairy-free version.
How to Make
- Begin by preheating your oven to 400°F (200°C) and line a baking sheet with parchment paper. This step ensures that your scones bake evenly and prevent sticking. A well-prepared baking surface is crucial for achieving that perfect crunchy outer layer.
- In a large mixing bowl, whisk together the all-purpose flour, baking powder, cinnamon, ginger, and salt. This step is essential for mixing the dry ingredients thoroughly, ensuring even distribution of the leavening agent and spices. Using a whisk will help incorporate air, making your scones lighter.
- Next, using a pastry cutter or your fingertips, cut in the cold unsalted butter until the mixture resembles coarse crumbs. The key here is to work quickly so that the butter remains cold, which creates flaky layers in your scones. You’re aiming for pea-sized pieces of butter mixed throughout the flour without overworking the dough.
- In a separate bowl, combine the pumpkin puree, sugar, egg, and milk. Mix well until the ingredients are fully integrated. In this step, you’ll be introducing moisture and flavor, so make sure to mix until it’s smooth yet not overmixed, as this can lead to dense scones.
- Pour the wet ingredients into the dry ingredients and gently stir until just combined. Avoid overmixing; it’s okay if the dough is slightly shaggy. Overmixing can result in tough scones, which is something you certainly want to avoid. At this stage, the dough should feel soft but manageable, and it’s okay if there are a few floury bits left.
- Turn the dough out onto a floured surface and gather it into a ball. Gently pat it into a circle about 1-inch thick. This gentle handling helps maintain the scone’s lightness. If preferred, you can use a rolling pin, but take care to keep the dough as light as possible.
- Using a sharp knife or a pastry cutter, cut the circle into wedges, typically eight pieces. This step is key for even baking, allowing each scone to cook uniformly. Place the scones on your prepared baking sheet, leaving space in between, as they will puff up during baking.
- For a beautiful finish, you can brush the tops with a little additional milk and sprinkle with sugar for a sweet crust. This will create a lovely golden-brown finish, which is visually pleasing and adds a nice crunch.
- Bake in the preheated oven for about 20-25 minutes, or until the tops are golden and a toothpick inserted comes out clean. When they’re baking, your kitchen will be filled with an irresistible aroma of fall flavors that’s sure to make everyone eager for a taste.
- Once baked, let the scones cool for a few minutes on the baking sheet before transferring to a wire rack. This is key for air circulation, preventing sogginess at the bottom. Trust me; giving them a moment to rest enhances the final texture.
Variations & Substitutions
Chocolate Chip Pumpkin Scones: For a delightful twist, add ½ cup of semi-sweet chocolate chips to the dough. The sweetness of the chocolate complements the spiced pumpkin perfectly, creating a rich and indulgent flavor that makes each bite a treat. This is a great option for chocolate lovers and those looking to add a hint of decadence to their scones. Be mindful not to overload the dough too much; just enough to provide sweetness without overpowering the pumpkin flavor.
Maple Pumpkin Scones: Swap out the granulated sugar for maple sugar or add pure maple syrup in place of some milk. This sweet change not only enhances the flavor by adding a nuanced sweetness but also contributes to the overall fall theme. Maples and pumpkins are a match made in heaven! For best results, remember to reduce the other liquids in your recipe slightly to keep the dough from becoming too wet, leading to optimal texture.
Vegan Pumpkin Scones: To create a vegan version of this recipe, replace the egg with a flax egg (1 tablespoon ground flaxseed mixed with 2.5 tablespoons of water) and use a plant-based milk alternative. Additionally, substitute the butter with coconut oil or a vegan butter spread. This ensures that the scones remain fluffy without compromising on flavor or texture. The result is just as delightful—perfect for friends who follow a plant-based diet!
Cheddar Pumpkin Scones: If you’re leaning toward a savory treat, try adding 1 cup of shredded sharp cheddar cheese to the dough. The delightful contrast between the savory cheese and sweet pumpkin makes these scones an interesting option. You can even sprinkle some chopped chives or black pepper for additional flavor. These are excellent as a side for soups or salads!
Cranberry Pumpkin Scones: Incorporate ½ cup of dried cranberries into the dough for a tart contrast to the sweet pumpkin. The tart cranberries add a delightful complexity and enhance the visual appeal of your scones. If using fresh cranberries, adjust the sugar levels accordingly, as they tend to be more tart than dried ones. The bright red color adds a lovely festive touch, perfect for holiday gatherings.
Common Mistakes to Avoid
One common mistake is overmixing the dough. This can lead to tough scones that lack the desired light and flaky texture. Always mix until the ingredients are just combined, as it’s important to maintain some air in the dough. If your scones turn out dense, consider this; it is often a direct result of overworking the dough.
Another pitfall is not using cold ingredients, especially the butter. If the butter warms too much during mixing, it will not create the flaky layers you want. A good tip is to even place your mixing bowl in the fridge for a few minutes before starting, especially on warm days when everything seems to heat up faster.
Additionally, not preheating your oven can cause a delay in rising, leading to flatter scones. Always ensure the oven is fully preheated before placing your scones inside. Remember, the initial burst of heat is vital for that perfect rise.
Finally, don’t forget to measure your flour correctly. It’s easy to pack flour into a measuring cup or use too much, resulting in dry scones. Using a digital scale for precision can truly elevate your baking experience.
Storage, Freezing & Reheating Tips
To store your pumpkin scones, let them cool completely before transferring them to an airtight container. They can be kept at room temperature for up to 2 days or stored in the refrigerator for about a week. If you find you’ve baked more than you can eat, consider freezing the scones. Allow them to cool, then arrange them in a single layer on a baking sheet and freeze until solid before transferring to a freezer-safe bag. This method prevents them from sticking together.
When reheating, there are a couple of methods you can use. If you prefer a slightly crispy exterior, pop them in the oven at 350°F (175°C) for about 10 minutes. Alternatively, for a quicker option, you can microwave them for about 15-20 seconds. Either way, ensure they’re heated through; you want to enjoy the comforting warmth of freshly baked scones.
Food safety tip: Always ensure you’re storing baked goods correctly to prevent mold or spoilage, especially if they contain pumpkin puree, as it adds extra moisture to the scones. Keeping them sealed and stored properly will maximize freshness.
Frequently Asked Questions
Can I use pumpkin pie filling instead of pumpkin puree?
While you can technically use pumpkin pie filling, it contains added sugars and spices, which will alter the flavor and sweetness of your scones. For the best results, stick to pure pumpkin puree for optimal control of your flavors.
Can I make the dough ahead of time?
Yes, you can prepare the dough a day ahead and refrigerate it. Just wrap it tightly to prevent drying out. When you’re ready to bake, simply shape and bake as instructed. This is great for meal prep or when hosting guests!
Are pumpkin scones gluten-free?
You can easily make these scones gluten-free by substituting the all-purpose flour with a gluten-free baking blend. Ensure that the blend contains xanthan gum for the right texture and structure in your scones.
Can I add nuts or seeds to the scone mixture?
Absolutely! Feel free to add in your favorite nuts or seeds for extra texture and flavor. Walnuts, pecans, or even pepitas can complement the pumpkin beautifully. Just make sure not to add too many, so the balance of flavors remains intact.
How can I tell if they are done baking?
Your scones are ready when they have a golden-brown color on top, and a toothpick inserted into the center comes out clean. They should be firm to the touch but still slightly soft in the center for optimal texture.
Conclusion:
These Pumpkin Scones are not just a seasonal delight; they encapsulate everything wonderful about fall baking. With their warm spices and comforting flavors, they’re destined to become a family favorite. You have the flexibility to customize them according to your taste with various ingredients and variations, making them a versatile addition to your baking repertoire. So, roll up your sleeves, give this recipe a try, and I promise you’ll be rewarded with the delicious aroma of homemade goodness wafting through your kitchen! Don’t forget to share your creations or unique adaptations with friends and family for a truly delightful experience. Happy baking!