# Quick & Easy Turkey Gravy Recipe
**Meta Title:** Quick & Easy Turkey Gravy Recipe in 15 Minutes
**Meta Description:** Make delicious turkey gravy in just 15 minutes! Perfect for Thanksgiving or weeknight dinners. Learn tips for rich flavor and smooth texture.
Every Thanksgiving, I find myself hunched over the stove, fragrant scents of roasted turkey wafting through the air, family bustling around me, laughter spilling out as we prepare for our feast. But let me tell you a little secret: the star of the show isn’t just the turkey but the *gravy*. Yes, that luscious, savory sauce that drapes itself over mashed potatoes and stuffing, elevating every bite to pure culinary bliss. This Quick & Easy Turkey Gravy Recipe is my go-to one that you will crave all year round!
In this recipe, I’ll show you how to whip up a rich, velvety turkey gravy in just 15 minutes using leftover turkey drippings or turkey broth. You don’t need to be a kitchen wizard to make this – it’s simple, straightforward, and utterly satisfying. Trust me, once you experience the homemade version, you’ll never go back to the store-bought stuff again!
What is Turkey Gravy?
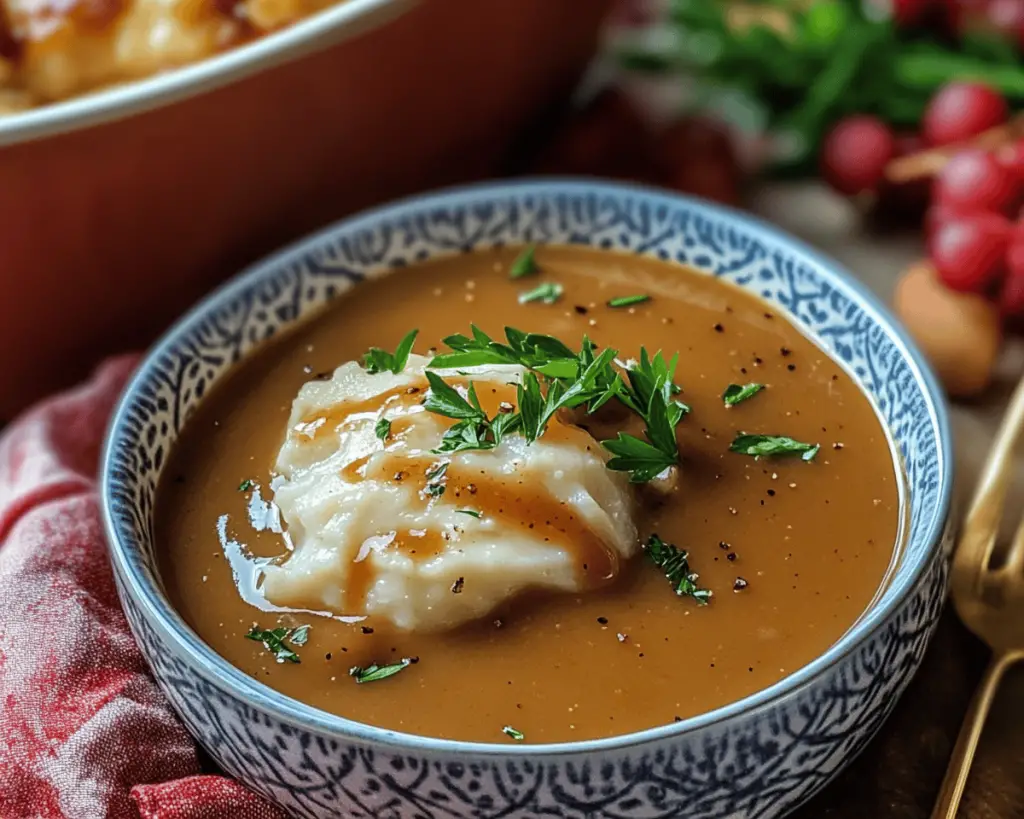
Turkey gravy is a delicious sauce made from the *pan drippings* of roasted turkey, typically thickened with flour or cornstarch. Its **texture** can range from silky to chunky, depending on how you prepare it. Traditionally served during holidays like Thanksgiving, it elevates your meal with a burst of flavor that is both comforting and familiar.
The **taste** of turkey gravy is deeply umami, bringing together the savory essence of the turkey with added richness from butter and broth, often enhanced by aromatic herbs and spices. The combination leaves your palate dancing with joy, and the aroma wafting through your kitchen is enough to make anyone’s tummy growl. This *homemade gravy* captures the essence of your meal and feeds not just your stomach but your spirit too, making it a beloved favorite for many families.
Why You’ll Love This Quick & Easy Turkey Gravy Recipe
– **Quick Preparation**: In just 15 minutes, you’ll be spooning gravy over dinner—perfect for those busy weeknights or holiday rush!
– **Simple Ingredients**: You likely have these items on hand, meaning no last-minute trips to the store!
– **Rich Flavor**: Using turkey drippings results in a deeply flavorful gravy that enhances every dish it touches.
– **Versatile Pairing**: This gravy doesn’t just go with turkey; it’s delicious over chicken, beef, potatoes, or even vegetables.
– **Make-Ahead Friendly**: You can easily make this gravy ahead of time and reheat it, making it perfect for holiday meal prep.
– **Family Approved**: Kids and adults alike will love the comforting, familiar flavor that’s perfect for any gathering.
Ingredients You’ll Need
Here’s your quick shopping list for the *Quick & Easy Turkey Gravy*:
1. **Turkey Drippings** (1 cup): The flavorful base of your gravy, packed with essence from the roasted turkey.
2. **Unsalted Butter** (1/4 cup): To enrich the sauce and help with thickening; you want to avoid too much salt until the end.
3. **All-Purpose Flour** (1/4 cup): The thickening agent; it helps create that perfect gravy consistency.
4. **Turkey Broth or Chicken Broth** (2 cups): If you’re not using drippings, broth adds that essential turkey flavor while keeping it moist and savory.
5. **Salt** (to taste): Balances and enhances the flavors in the gravy.
6. **Black Pepper** (to taste): A little bit of spice elevates the gravy.
7. **Optional: Fresh Herbs** (like thyme or sage): Chopped finely, these can amplify the flavor profile for a fresh touch.
How to Make Quick & Easy Turkey Gravy
Ready to create a gravy that will have your family reaching for seconds? Here’s how you do it:
1. **Collect Your Turkey Drippings**
If you’ve roasted a turkey and have drippings left behind, pour them into a measuring cup, ensuring to get every bit of flavor. If you don’t have drippings, don’t worry! You can skip to the next step using broth.
2. **Make a Roux**
In a medium saucepan, melt the **butter** over medium heat. Once melted and bubbling slightly, whisk in the **flour**. Stir constantly until golden brown, about 2 to 3 minutes. You want a smooth and slightly nutty aroma wafting up—this is your roux.
3. **Add Broth and Drippings**
Gradually whisk in the **turkey broth** (or just water if you’re using drippings, but broth adds more flavor!) and **turkey drippings**. Continue to whisk vigorously to combine; this will prevent lumps from forming.
4. **Thicken the Gravy**
Bring the gravy to a gentle simmer, allowing it to thicken for 5 to 7 minutes. Keep stirring lovingly! If the mixture thickens too quickly, you can dilute it with a splash more broth. Don’t worry if it looks thick at first — that’s exactly right; it will loosen as it simmers.
5. **Season to Perfection**
Taste your gravy and season it with **salt** and **pepper**. Feel free to add a sprinkle of **fresh herbs** for that chef’s touch.
6. **Serve and Enjoy**
Once you’ve achieved your desired flavor and consistency, remove it from the heat and transfer it to a serving bowl, or use a ladle to drizzle generously over your turkey and sides.
Expert Tips, Tricks & Variations
– **Strain for Smoothness**: For an ultra-smooth gravy, pour it through a fine-mesh strainer to catch any lumps from the roux or bits from the drippings.
– **Thicker Gravy**: For extra thickness, you can create a slurry with *equal parts cornstarch and cold water* and add it directly to the simmering gravy, whisking until thickened.
– **Flavor Boosters**: Don’t hesitate to toss in a splash of **soy sauce** or **Worcestershire sauce**; they add depth and enhance umami flavors beautifully!
– **Onion & Garlic Lover’s Gravy**: Sauté finely chopped onion and garlic in the butter before adding flour for a flavor explosion. Just a few teaspoons will do!
– **Make-Ahead Gravy**: This gravy can be prepared ahead and stored in the refrigerator for up to 3 days; just reheat slowly on the stove, adding a splash of water to loosen the texture.
What to Serve With Turkey Gravy
The magic of turkey gravy lies in its versatility! Here are some ideas for pairing:
– **Creamy Mashed Potatoes**: A classic pairing; the gravy complements the creaminess perfectly.
– **Roasted Vegetables**: Pour over broccoli, carrots, or Brussels sprouts to elevate their flavor.
– **Stuffing or Dressing**: A generous drizzle of gravy brings these comfort foods to life.
– **Biscuits or Bread Rolls**: Perfect for mopping up that delicious sauce!
– **Rice or Quinoa**: Add some doughy goodness to your grains for that extra flavor infusion.
Storage, Freezing & Meal Prep
– **Storage**: Store leftover gravy in an airtight container in the refrigerator for up to 3 days. Reheat on low heat, adding a tablespoon of broth to loosen it if needed.
– **Freezing**: Gravy freezes well! Pour any leftover gravy into a freezer-safe container, leaving some headspace for expansion; it’ll last for about 3 months in the freezer. Reheat on the stove before serving.
– **Meal Prep**: You can prepare the gravy and have it ready for serving. It only takes a few minutes to reheat, making it perfect for meal prepping holiday feasts.
Frequently Asked Questions
**1. Can I use turkey stock instead of chicken broth?**
Yes, turkey stock will give your gravy an extra boost of flavor. It’s especially delightful if made from the turkey carcass after the meal!
**2. How can I prevent my gravy from being lumpy?**
Whisk the roux continuously as you add the liquid, and don’t hesitate to strain the gravy at the end for a perfectly smooth consistency.
**3. What if my gravy is too salty?**
If you accidentally over-season it, try adding a bit of water or unsalted broth to dilute the saltiness.
**4. How do I make gluten-free turkey gravy?**
Simply replace the all-purpose flour with cornstarch or a gluten-free flour blend. Make a slurry with cold broth before adding it to the hot mixture for maximum thickening power.
**5. Can I make this gravy in advance?**
Absolutely! You can make gravy a few days in advance, keeping it in the fridge, then reheat when ready to serve.
With just these few easy steps, you’ll take your next meal from ordinary to extraordinary! Now it’s your turn—grab your ingredients and create this magic in your kitchen tonight. Cooking is not just about the food; it’s about creating moments and memories to share. Don’t forget to tag me when you try it! 🦃🥘