Prep time: 15 minutes
Cook time: 45 minutes
Total time: 1 hour
Servings: 8 slices
Imagine the aroma of freshly baked chocolate bread wafting through your home, instantly lifting your spirits and bringing a smile to your face. If you’ve ever craved a delightful treat that feels indulgent yet can be made quickly and easily, then this Quick Homemade Chocolate Bread is perfect for you. This dish is not just a loaf of bread; it’s a moment of pure joy wrapped in a warm, sweet, and soft texture that you won’t be able to resist. As you savor each slice, you’ll find that the combination of chocolate enhances both the taste and experience.
In this article, you will discover the art of making a delectable chocolate loaf. You’ll learn about the specific ingredients you’ll need, how they contribute to the flavor and texture, as well as a foolproof method that even beginners can master. Whether you’re looking for a simple yet satisfying treat for your family or a special dessert to impress your friends, this recipe is here to meet your needs.
What Is Quick Homemade Chocolate Bread | Easy Chocolate Loaf Recipe?
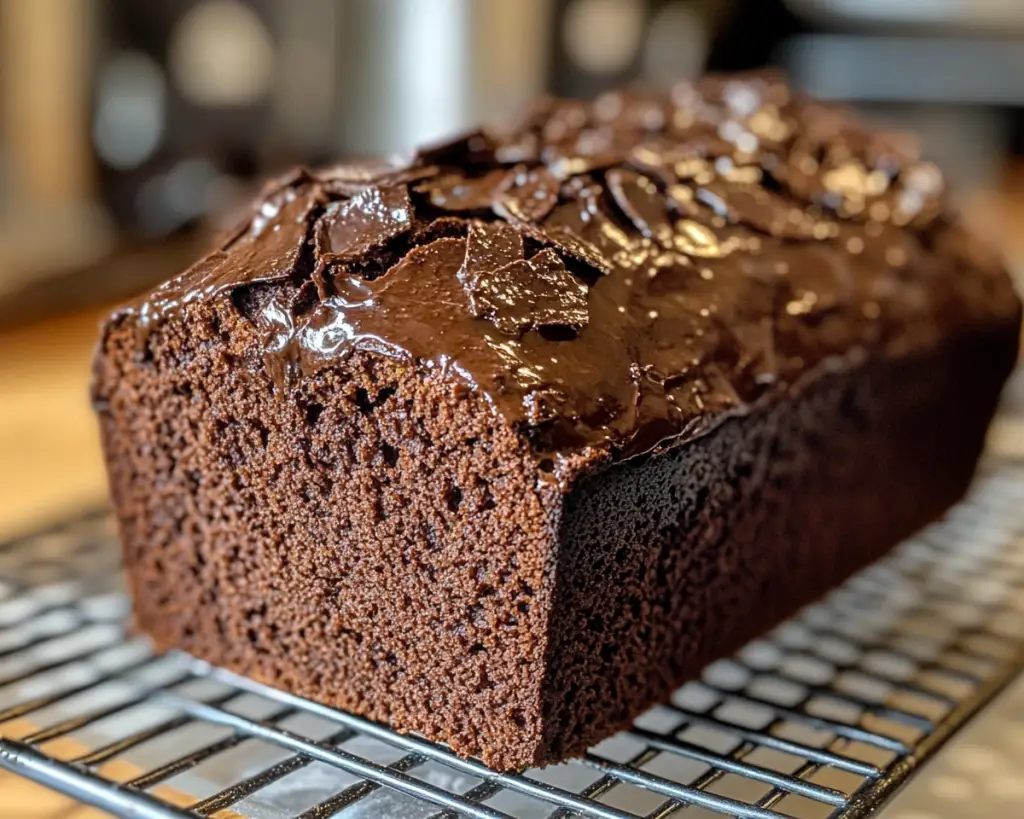
The Quick Homemade Chocolate Bread, also known as chocolate loaf, has its roots in various traditions of baking. Originating from recipes that utilize cocoa powder or melted chocolate, this delectable treat offers a soft, moist texture and a rich, chocolaty flavor that can brighten even the dullest days. The bread is versatile enough to be enjoyed at breakfast, as an afternoon snack, or even as a dessert after a lovely dinner.
The mixture of flour, sugar, and chocolate creates a delightful balance of flavors, while gently introducing your taste buds to an experience reminiscent of a cozy bakery. This chocolate loaf stands out due to its simplicity and the ease with which it can be prepared. Unlike traditional cakes that require more intricate techniques and time, this recipe offers the convenience of a quick bake with a deliciously rewarding product.
What’s beautiful about this quick chocolate bread is its adaptability; whether you prefer a mild chocolate flavor or a rich, intense experience, this recipe can be adjusted to suit your palate. You’ll learn how to throw together the required ingredients in no time, and before you know it, the sweet scent of chocolate will bubble up from your oven, beckoning you to enjoy a freshly baked slice.
Why You’ll Love This
There’s a myriad of reasons why you’ll fall head over heels with this chocolate bread. For starters, it’s incredibly simple to make—with just a few core ingredients, you can craft something that tastes far more luxurious than the effort you put in. This makes it perfect for busy parents looking to whip up a treat after a long day, or for beginner cooks eager to explore the world of baking.
Furthermore, the affordability of the ingredients helps keep your budget in check, meaning that you can enjoy a homemade delight without breaking the bank. The health-conscious can also revel in the fact that this recipe allows for several substitutions—for instance, opting for whole wheat flour for added nutrition or reducing the sugar if you wish to create a less sweet loaf.
Moreover, this chocolate bread pairs wonderfully with various toppings—think whipped cream, fresh fruit, or even a drizzle of warm chocolate sauce. This versatility allows it to morph into anything from a breakfast delight to a signature dessert for your next gathering, making it a masterful addition to your recipe repertoire.
Additionally, common misconceptions around chocolate breads often suggest they are heavy and overly sweet. However, with this recipe, you will discover a perfectly balanced loaf that is neither too rich nor too simple, presenting itself as just the right treat for any occasion.
Ingredients You’ll Need
- All-purpose flour: The foundation of your bread, providing structure. You can substitute with whole wheat flour for a healthier option.
- Cocoa powder: This ingredient intensifies the chocolate flavor. Use unsweetened cocoa powder for better control over sweetness.
- Sugar: It adds sweetness and contributes to the moisture of the loaf. You can use less sugar or alternatives like honey or maple syrup.
- Baking powder: Essential for leavening, making your bread light and fluffy. Ensure your baking powder is fresh for the best results.
- Salt: Enhances the flavor of the chocolate. It’s crucial not to omit this ingredient as it balances the sweetness.
- Eggs: They bind the ingredients and add richness. For a vegan version, consider using flaxseed meal or applesauce.
- Oil: Provides moisture and a tender crumb. Vegetable oil or melted butter works well; both contribute to a delicious texture.
- Milk: This wet ingredient helps with the overall texture. You can use any kind, including almond or oat milk for dairy-free alternatives.
- Vanilla extract: Adds a lovely depth of flavor. Choose pure vanilla for the best taste.
By understanding each ingredient’s role and potential alternatives, you will not only empower yourself in the kitchen but also adapt the recipe to your personal preferences and dietary needs.
How to Make
1. **Preheat your oven** to 350°F (175°C). This step creates an ideal baking environment necessary for the chemical reactions that make your chocolate bread rise. Preheating ensures that the bread starts cooking as soon as it goes in the oven, yielding a consistent texture throughout.
2. **Prepare your loaf pan** by greasing it lightly with oil or butter. If you prefer, you can line the bottom with parchment paper to ensure easy removal after baking. Properly greasing your pan prevents sticking, and investing a little time here pays off when it’s time to slice your loaf.
3. **In a large mixing bowl, combine dry ingredients:** Mix together the all-purpose flour, cocoa powder, sugar, baking powder, and salt until well blended. This is vital as it ensures even distribution of the leavening agents and flavors. Using a whisk can be particularly effective in breaking up any cocoa powder clumps.
4. **In another bowl, combine your wet ingredients:** Beat the eggs, then mix in the oil, milk, and vanilla extract. Whisk these ingredients together until combined. Incorporating the wet ingredients separately helps you achieve a smoother batter, resulting in a more pleasant texture in the final product.
5. **Gradually pour the wet ingredients into the dry ingredients, and mix gently.** Stir until just combined—do not overmix! Overmixing can lead to a tough loaf, which you’ll want to avoid. It’s okay if there are a few lumps; this will not impact the overall texture much.
6. **Transfer the batter into the prepared loaf pan.** Use a spatula to spread it evenly in the pan for uniform baking. This is crucial for an even rise, so take a moment to ensure smoothness across the surface.
7. **Bake in the preheated oven** for about 45 minutes or until a toothpick inserted into the center comes out clean. Timing may vary slightly based on your oven, so keep an eye on it during the last few minutes. The inviting aroma will start to fill your kitchen, making your waiting game a little easier.
8. **Allow the loaf to cool in the pan for about 10-15 minutes,** then carefully transfer it to a wire rack to cool completely. It’s essential to let it cool adequately, allowing the texture to set. A warm loaf may crumble when sliced, so patience pays off.
9. **Slice and serve!** Enjoy your chocolate bread plain, or elevate it with toppings like whipped cream, berries, or a sprinkle of powdered sugar. Each slice offers a soft crumb and a rich chocolate flavor, sure to win over any chocolate lover.
Variations & Substitutions
Gluten-Free Chocolate Bread: If you’re looking to make this recipe gluten-free, substitute all-purpose flour with gluten-free all-purpose flour. Remember to check for a blend that contains xanthan gum, as it will help with the texture. The flavor remains wonderfully rich, and you won’t sacrifice on taste or satisfaction.
Chocolate Chip Variation: For a delightful twist, fold in chocolate chips into the batter before pouring it into the loaf pan. The melting chips will create pockets of gooey chocolate goodness, enhancing the overall chocolate experience. Perfect for those who can never get enough chocolate!
Mint Chocolate Bread: To add a refreshing twist, consider incorporating a teaspoon of peppermint extract along with the vanilla. This variation works beautifully, especially around the holidays, and will leave you with a uniquely flavored bread that tantalizes the taste buds.
Nutty Chocolate Bread: For an added crunch and flavor, mix in your favorite nuts—like walnuts or pecans—into the batter. They not only contribute to the texture but also bring a delightful contrast that balances well with the soft chocolate loaf. This variation is particularly good if you’re looking for a richer element in each bite.
Vegan Chocolate Bread: To prepare a vegan variant, replace the eggs with flax eggs (1 tablespoon of ground flaxseed mixed with 2.5 tablespoons of water for each egg). Also, make sure you use plant-based milk and oil instead of butter. This results in a moist and delicious loaf that anyone can enjoy, regardless of dietary preferences.
Harnessing these variations can elevate your homemade chocolate bread and cater to different tastes, ensuring that there’s something for everyone.
Common Mistakes to Avoid
When making your chocolate bread, some common pitfalls can lead to disappointing results. One frequent mistake is using old baking powder. If your leavening agents are expired, your bread won’t rise, leaving you with a dense loaf rather than a light and fluffy one. Always check the expiration dates; freshness is key for successful baking.
Another common error involves overmixing the batter. While it’s tempting to ensure everything is perfectly combined, overmixing can lead to tough bread. When mixing, stop as soon as you no longer see dry flour. Remember, it’s okay to have a few lumps in the batter!
Lastly, avoid opening the oven door before the halfway point in the baking process. Doing so can cause a sudden drop in temperature, affecting the rise of your loaf. Let the bread do its magic without interruptions!
By being mindful of these pitfalls, you can confidently tackle this recipe and produce a stunning chocolate loaf every time.
Storage, Freezing & Reheating Tips
To preserve your delicious chocolate bread, store it in an airtight container at room temperature. This will keep it fresh for about 4-5 days. If you want to extend its life, consider freezing individual slices wrapped tightly in plastic wrap followed by foil for added protection. When properly wrapped, the chocolate loaf can be frozen for up to three months.
For reheating, simply remove a slice from the freezer and let it thaw out at room temperature for a bit. If you prefer it warm, pop it in the microwave for about 15-20 seconds. Alternatively, you can reheat it in a toaster oven for an even better texture that mimics the freshly baked feel.
Always remember the importance of food safety: if you notice any signs of mold or unconventional smells, it’s best to discard the loaf rather than risk your health.
Frequently Asked Questions
Can I substitute cocoa powder for melted chocolate? Yes, you can! However, when using melted chocolate, reduce the amount of oil or butter to account for the additional fat from the chocolate. Typically, 1 ounce of melted chocolate equals about 3 tablespoons of cocoa powder.
Can I make this chocolate bread with whole wheat flour? Absolutely! Whole wheat flour can substitute all-purpose flour one-to-one. However, be aware that using whole wheat flour might give your bread a denser texture. To counteract this, you might want to add an extra tablespoon of liquid to your batter.
How can I ensure my chocolate bread stays moist? Adding the right amount of oil and eggs is crucial to keeping your chocolate loaf moist. Be sure not to overbake it, as that can dry out the bread. Covering it with foil for the last 10 minutes of baking can help retain moisture, too.
What are some good toppings for this chocolate bread? You can top it with whipped cream, fresh berries, or even a light dusting of powdered sugar. For a gourmet touch, drizzle some melted chocolate or caramel over the top before serving.
How do I know when the bread is done baking? The best indicator is a toothpick test. Insert a toothpick into the center—the bread is finished when it comes out clean or with just a few moist crumbs clinging to it. Be cautious not to let it bake too long, as this can result in a dry texture.
Conclusion:
In summary, the Quick Homemade Chocolate Bread offers a delectable solution to satisfy your chocolate cravings while being simple enough for anyone to make. With a few basic ingredients and straightforward steps, you can create a mouthwatering dessert or snack that everyone will love. Don’t hesitate to experiment with variations and toppings to personalize your bread—there’s no wrong way to enjoy it! So roll up your sleeves and give this easy recipe a try; you’ll be amazed at how rewarding baking can be. Remember, your kitchen is your canvas, and every loaf is an opportunity for creativity. Enjoy the delicious journey!