Prep time: 20 minutes
Cook time: 30 minutes
Total time: 50 minutes
Servings: 12 Blondies
Indulging in a scrumptious dessert during Valentine’s Day can make the day feel extra special. Imagine serving up a batch of delicious *Red Velvet Blondies* that not only looks appealing but also tastes divine. Inspired by the classic red velvet cake, this dessert combines a rich, buttery flavor with a hint of cocoa and beautiful red hue, making it perfect for any romantic occasion.
This recipe is not just about taste; it’s about enjoyment, ease, and crafting something memorable from the comfort of your kitchen. Throughout this article, you will learn about the essence of red velvet, how to make these blondies effortlessly, tips for ensuring success, and various ways to customize them to suit your taste buds.
What Is Red Velvet Blondies Recipe Easy Valentine’s Day Dessert Idea?
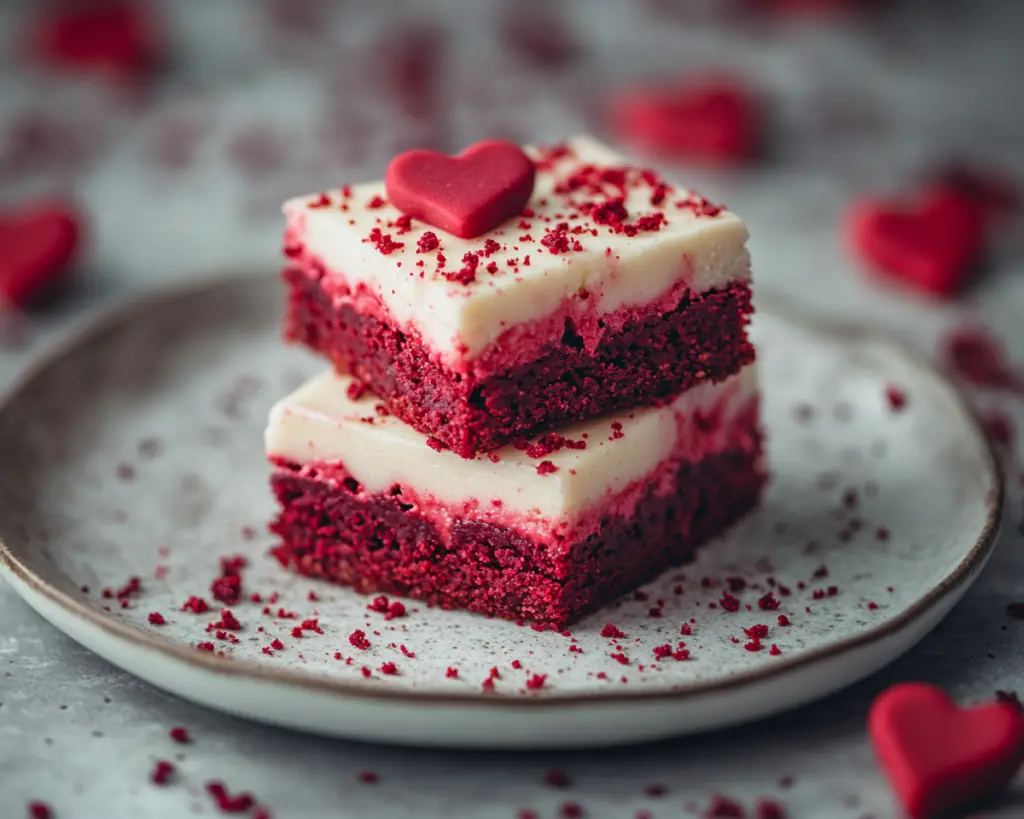
Red velvet blondies are essentially a fusion of two beloved desserts: the classic *blondie* and the ever-coveted *red velvet cake*. The blondie base gives you that chewy, gooey texture, while the addition of red food coloring adds a striking and festive touch. The flavor profile typically leans toward rich vanilla with a hint of chocolate from cocoa powder. This delightful combination ensures each bite is both sweet and decadent.
Originating from the famous red velvet cake, these blondies serve as a playful twist that encapsulates the essence of red velvet in a much simpler format. Imagine cutting into a soft, warm blondie with its inviting red color and a creamy swirl of cream cheese frosting drizzled on top—it’s enough to transport your taste buds straight to dessert heaven.
Not only do these blondies deliver on flavor and visual appeal, but they’re also incredibly versatile, making them suitable for a variety of occasions beyond Valentine’s Day—think holidays, parties, or even a sweet treat for yourself after a long week.
Why You’ll Love This
One of the main reasons you’ll adore these red velvet blondies is their incredible *taste*. The creamy richness of the butter, combined with the slight tang from the red velvet elements, creates an unforgettable flavor experience. Unlike traditional red velvet cake, these blondies eliminate the need for layers and frosting, simplifying both the preparation and cleanup while keeping all the delicious flavors.
Moreover, the *ease* of preparation sets these blondies apart from other desserts. You don’t need advanced baking skills or specialized equipment; just a mixing bowl, some basic ingredients, and your oven. Perfect for busy parents or beginner bakers, this recipe allows everyone to create a delectable dessert without stress.
Another great reason to make these blondies is their *cost-effective* nature. You likely already have many ingredients in your pantry, which makes this a budget-friendly dessert option. Plus, since they’re visually appealing, they make for an impressive presentation on any table without breaking the bank.
Ingredients You’ll Need
- 1 cup unsalted butter: This is the foundation of your blondies, providing moisture and richness. You can substitute with coconut oil for a dairy-free option.
- 2 cups brown sugar: Using brown sugar gives a deeper flavor and chewy texture. If you prefer, you can use granulated sugar instead, but the taste will be less rich.
- 3 large eggs: Eggs act as binders and help give structure to your blondies. Make sure they are at room temperature for even mixing.
- 2 teaspoons vanilla extract: This adds a lovely aroma and depth of flavor. You could also use almond extract for a different twist.
- 2 ½ cups all-purpose flour: The main dry ingredient, it gives structure to the blondies. For a gluten-free option, substitute with a 1:1 gluten-free flour blend.
- 2 tablespoons cocoa powder: Just a hint of cocoa adds flavor without overpowering the red velvet taste. You can omit this if you want a pure vanilla flavor.
- 1 teaspoon baking powder: This is necessary to help your blondies rise slightly, making them chewy rather than dense.
- ½ teaspoon salt: A vital ingredient that balances the sweetness. Never skip it, as it aids in enhancing flavors.
- Red food coloring: The star ingredient that gives red velvet blondies their signature color. Choose a high-quality gel food coloring for the best results.
How to Make
Creating these Red Velvet Blondies is an easy and enjoyable process. Here’s a step-by-step guide to ensure your baking adventure is a success:
- Preheat your oven: Start by preheating your oven to 350°F (175°C). This ensures that your blondies bake evenly. Make sure to line a 9×13-inch baking pan with parchment paper for easy removal later.
- Melt the butter: In a medium saucepan, melt the unsalted butter over low heat. Stir constantly to prevent burning. Once melted, let it cool slightly before moving on to the next step.
- Mix sugars and butter: In a large mixing bowl, combine the melted butter and brown sugar. Mix well until the mixture is smooth and creamy. You can use a hand mixer or just a spatula, but ensure everything is well incorporated.
- Add eggs and vanilla: Next, add the eggs one at a time, beating well after each addition. Then pour in the vanilla extract. This step is critical as it adds flavor and binds the ingredients.
- Sift dry ingredients: In another bowl, sift together the flour, cocoa powder, baking powder, and salt. Sifting helps to avoid clumps and ensures a better texture.
- Combine wet and dry ingredients: Gradually add the dry ingredients to the butter and sugar mixture, stirring until just combined. Be careful not to overmix, as this can lead to dense blondies.
- Add food coloring: Carefully mix in the red food coloring until you achieve your desired shade. This not only gives the blondies their signature color but also enhances the overall presentation.
- Pour into the baking pan: Transfer the batter into your prepared baking pan, spreading it evenly with a spatula. Smooth the top to ensure even baking.
- Bake: Place the pan in your preheated oven and bake for about 25-30 minutes. Keep an eye on them, and when a toothpick inserted into the center comes out with a few moist crumbs, they are ready.
- Cool: Once baked, remove the blondies from the oven and let them cool in the pan for about 10 minutes. Then, lift them out using the parchment paper and place them on a wire rack to cool completely. This helps maintain their chewy texture.
Variations & Substitutions
Nutty Bliss Variation: Add 1 cup of finely chopped walnuts or pecans to the batter before pouring it into the baking pan. This adds a delightful crunch and complements the chewy texture of the blondies. If you’re catering to those with nut allergies, feel free to omit the nuts entirely, as the blondies are delicious on their own.
Fruity Twist Variation: For a fruity flavor, consider adding 1 cup of chopped strawberries or raspberries to the batter. This addition creates a burst of freshness that beautifully contrasts with the rich flavors of the red velvet. For those looking for a sugar-free alternative, using unsweetened applesauce can help maintain moisture while reducing calories.
Vegan Friendly Variation: To transform this recipe into a vegan delight, substitute the eggs with flax eggs by mixing 2 tablespoons of ground flaxseed with 6 tablespoons of water and letting it sit until it thickens. Additionally, replace the butter with coconut oil and use a dairy-free cream cheese for frosting, if desired.
Chocolate Chip Indulgence Variation: You can add 1 cup of semi-sweet chocolate chips to the batter for an extra touch of sweetness. This gives every bite a little more decadence. If you’re a fan of dark chocolate, opt for dark chocolate chips to enhance the flavor profile.
Cheesecake Swirl Variation: Take your blondies to the next level by creating a cheesecake swirl. Mix 8 oz of cream cheese with 1/4 cup of sugar and 1 egg until smooth, then swirl it into the top of the blondie batter before baking. This variation adds a rich, creaminess that perfectly balances the sweetness.
Common Mistakes to Avoid
To ensure your red velvet blondies turn out perfectly, it’s essential to avoid some common pitfalls. One common mistake is using cold ingredients. Cold eggs or butter can lead to uneven mixing, resulting in a dense texture. Always allow your eggs to reach room temperature prior to adding them to the mix.
Another mistake is overbaking your blondies. A toothpick should come out with a few moist crumbs, not completely clean. Overbaking will yield dry, crumbly blondies instead of the desired chewy texture. Trust your instincts, and keep a close eye on them during the last few minutes of baking.
Lastly, don’t skip the cooling process. Allowing the blondies to cool in the pan for at least 10 minutes before transferring them will help them set and maintain their moistness. Cutting into them too early can result in a messy, unappetizing appearance.
Storage, Freezing & Reheating Tips
To store your red velvet blondies, ensure they are completely cooled before placing them in an airtight container. Properly stored at room temperature, they will remain fresh for up to a week. You can also store them in the refrigerator for a couple more days if you prefer a chilled treat.
If you want to freeze these blondies, wrap them individually in plastic wrap and place them in a freezer bag. They can last in the freezer for up to three months. When you’re ready to enjoy them, simply let them thaw at room temperature or heat them in the microwave for a few seconds. This will bring back their original texture, making them incredibly delicious even after freezing.
It’s essential to practice good food safety methods by ensuring all utensils and surfaces are clean before preparing your blondies. This helps in extending the lifespan of your baked goods and ensures no unwanted contaminants are introduced.
Frequently Asked Questions
Can I make red velvet blondies without food coloring? Yes, you can certainly make red velvet blondies without the food coloring. While the distinctive color won’t be present, you’ll still get the delicious flavor. The name “red velvet” comes primarily from the flavor profile rather than color.
What do I serve with red velvet blondies? Red velvet blondies are delicious on their own, but for an added touch, serve them with a scoop of vanilla ice cream or a dollop of whipped cream. A drizzle of cream cheese frosting on top will also elevate them to a new indulgent level.
Can I make these blondies gluten-free? Absolutely! Simply replace the all-purpose flour with a gluten-free flour blend. Gluten-free flour mixtures often have xanthan gum included, which is helpful in mimicking the texture of regular flour.
How do I know when the blondies are done baking? The best way to check for doneness is by inserting a toothpick into the center of the blondies. If it comes out with a few moist crumbs, they are ready. If it comes out completely clean, they might be overbaked.
Can I add nuts or chocolate chips to the batter? Yes, you can customize your blondies by including nuts or chocolate chips. Just remember that adding too much extra bang can alter the baking time slightly, so monitor their doneness closely.
Conclusion:
These Red Velvet Blondies are an excellent choice for any special occasion, especially Valentine’s Day. Combining rich flavors with beautiful presentation, they promise to impress anyone fortunate enough to taste them. With easy-to-follow instructions and numerous variations, you can personalize them to make them truly your own. Don’t hesitate to gather your loved ones for a fun baking session, and put a smile on their faces with these delectable treats. Enjoy sharing your creation and happy baking!


