### Prep time
10 minutes
### Cook time
No cooking required
### Total time
10 minutes
### Servings
24 pieces
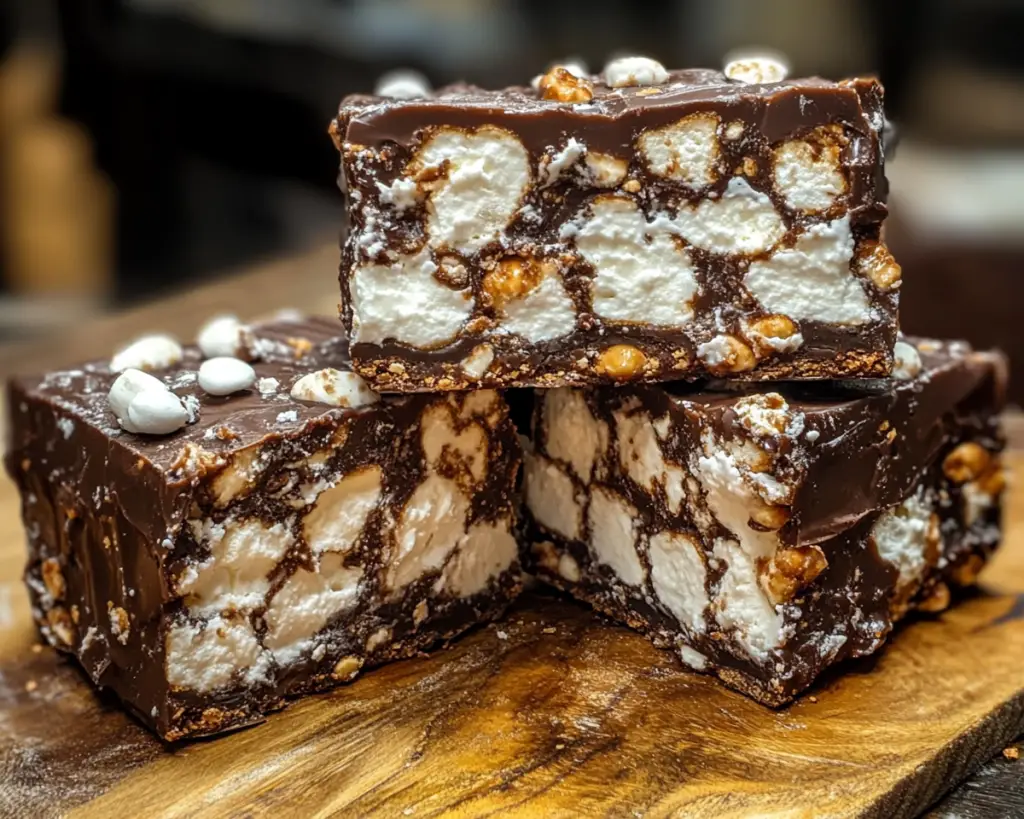
Rocky Road Candy is a delightful treat that merges chocolate with a combination of textures and flavors, making it a favorite among dessert lovers everywhere. With a rich chocolate base, chewy marshmallows, and crunchy nuts, it’s no wonder that this sweet candy is a go-to for both special occasions and everyday indulgences. Whether you’re preparing for a holiday celebration or just craving something sweet, this Rocky Road Candy recipe is quick, easy, and certain to satisfy.
In this article, we’re going to explore the magic of Rocky Road Candy, delve into why it’s so beloved, and guide you through the process of making your own. From the essential ingredients to tips for perfecting your version of this classic dessert, you’ll find everything you need to know. Let’s get started!
What Is Rocky Road Candy?
Rocky Road Candy dates back to the 1920s and gained popularity in the U.S. in the 1940s. Originating as a flavor of ice cream, it has since evolved into a chocolate confection that features a delectable mix of ingredients. The primary components typically include **melting chocolate**, **mini marshmallows**, and **nuts**—often almonds, but you can use any kind you prefer.
The texture of Rocky Road Candy is what sets it apart. The smooth, melty chocolate contrasts perfectly with the soft, fluffy marshmallows and the crunch of nuts, creating a delightful experience for your taste buds. Additionally, you may find variations that include dried fruits or even coconut, expanding the flavor profile even further. It embodies everything indulgent about homemade sweets, making it a perfect choice for parties, holidays, or just when you need a little pick-me-up after a long day.
Why You’ll Love This Rocky Road Candy Recipe
There are many reasons to love Rocky Road Candy. Here are just a few:
– **Simplicity**: This recipe is incredibly easy to make, requiring no baking and minimal ingredients. It’s perfect for beginners or anyone looking to whip up a quick treat.
– **Customization**: The recipe is highly versatile. You can easily tailor it to fit your personal taste by switching up the type of nuts, adding different kinds of chocolate, or even incorporating sprinkles or fruit.
– **Cost-effective**: With inexpensive ingredients, you can make a large batch without breaking the bank. This is especially great for serving a crowd or for gifting.
– **No-Fuss**: There’s no need to worry about precise cooking temperatures or techniques. Simply melt the chocolate, mix in the ingredients, and let it set—no culinary experience required!
– **Deliciousness**: The blend of flavors—chocolate, nuts, marshmallows—creates a harmonious treat that’s bound to please anyone with a sweet tooth.
Ingredients You’ll Need
To create your own delicious Rocky Road Candy, you’ll need the following ingredients:
– **2 cups semi-sweet chocolate chips**: This is the base of your candy, providing rich flavor and a smooth texture. You can also use milk chocolate or dark chocolate, depending on your preference.
– **1 cup mini marshmallows**: These add a delightful light and fluffy texture, contributing to the traditional taste of Rocky Road.
– **1 cup chopped nuts**: Almonds are a classic choice, but you could also use walnuts, pecans, or even peanuts. Nuts not only add crunch but also boost nutritional value.
– **Optional: 1/2 cup shredded coconut or dried fruits**: For those looking to enhance their candy, coconut adds chewiness, while dried fruits like cherries or cranberries provide a sweet and tart contrast.
– **Optional: 1 teaspoon vanilla extract**: Adding a hint of vanilla can elevate the flavor of your chocolate and give the candy a more complex taste.
Each of these ingredients plays a crucial role in developing the final taste and texture of the Rocky Road Candy, so choose them wisely based on your preference!
How to Make Rocky Road Candy
Making Rocky Road Candy is as simple as pie! Follow these step-by-step instructions to whip up your batch:
1. **Prepare Your Baking Dish**: Start by lining a 9×9-inch square pan with parchment paper. Make sure it hangs over the edges slightly to make removal easy later. This prevents the candy from sticking and makes for an effortless cleanup.
2. **Melt the Chocolate**: In a microwave-safe bowl, add the chocolate chips. Microwave in 30-second intervals, stirring in between until fully melted. This method ensures that you don’t overheat the chocolate, which could cause it to seize. Alternatively, you can melt the chocolate using a double boiler on the stovetop.
3. **Mix in the Ingredients**: Once the chocolate is melted and smooth, remove it from the heat and let it cool slightly. Stir in the mini marshmallows and chopped nuts (and coconut or dried fruit if using) until fully coated with the chocolate. The warm chocolate helps bind the ingredients together and ensures every bite has the perfect balance of flavors.
4. **Transfer to the Baking Dish**: Pour the chocolate mixture into the prepared baking dish. Use a spatula to evenly spread the mixture, making sure it reaches the corners and is evenly distributed. Press down gently to ensure the ingredients stick together.
5. **Chill and Set**: Refrigerate the candy for about 2 hours or until fully set. The cold helps solidify the chocolate and meld all the flavors together.
6. **Cut and Serve**: Once the candy has set, remove the slab from the pan using the parchment paper overhang. Cut it into squares or bars of your desired size.
7. **Enjoy or Store**: Indulge in your homemade Rocky Road Candy! You can also store it in an airtight container at room temperature or in the refrigerator.
5 Variations & Substitutions
1. **Nut-Free Rocky Road**:
– **How it changes the flavor/texture**: By eliminating nuts altogether, you allow the marshmallows and chocolate flavors to shine through more prominently. This version becomes much softer, focusing solely on the creaminess of the chocolate and the fluffiness of the marshmallows.
– **Who it’s for**: Great for those with nut allergies or families with young children.
– **Tips for success**: You can replace the nuts with extra marshmallows or even rice cereal to add some crunch without using nuts.
2. **White Chocolate Rocky Road**:
– **How it changes the flavor/texture**: Using white chocolate instead of semi-sweet chocolate delivers a sweeter, creamier flavor. This version feels more like a dessert than typical chocolate candy.
– **Who it’s for**: Ideal for those who prefer a sweeter treat or are less fond of dark chocolate.
– **Tips for success**: Pairing white chocolate with more tart mix-ins, like dried cranberries, can balance the sweetness beautifully.
3. **Vegan Rocky Road**:
– **How it changes the flavor/texture**: This variant maintains the original flavors while accommodating plant-based diets. Using vegan chocolate and marshmallows allows everyone to enjoy this treat.
– **Who it’s for**: Perfect for vegans or those who are dairy-sensitive.
– **Tips for success**: Check labels to ensure that your chocolate and marshmallows contain no animal-derived ingredients.
4. **Spicy Rocky Road**:
– **How it changes the flavor/texture**: Adding a pinch of cayenne pepper or red pepper flakes to the melted chocolate introduces a surprising kick that contrasts the sweetness.
– **Who it’s for**: This is for adventurous eaters who enjoy a blend of sweet and heat.
– **Tips for success**: Start small with the spice, and remember, you can always add more if desired.
5. **Chocolate Mint Rocky Road**:
– **How it changes the flavor/texture**: Incorporating peppermint extract into the chocolate mixture gives the candy a refreshing minty flavor reminiscent of winter holidays.
– **Who it’s for**: Appealing to mint lovers, this variation makes for an excellent holiday treat.
– **Tips for success**: Adjust the amount of peppermint extract to taste; too much can overpower the chocolate flavor.
Common Mistakes to Avoid
While making Rocky Road Candy is simple, a few pitfalls can alter your results:
– **Overheating the Chocolate**: Always melt chocolate slowly. **Overheating** can lead to a gritty texture and may cause it to seize up, ruining your mixture. Make sure to stir frequently and use lower heat settings.
– **Using the Wrong Type of Chocolate**: Not all chocolates melt the same way. For example, chocolate chips are designed to hold their shape in baking, making them less ideal for melting. You’ll get better results with a higher-quality chocolate bar or specialty melting chocolate.
– **Not Cooling the Mixture**: If you skip cooling the melted chocolate slightly before adding the marshmallows and nuts, they can end up melting and losing their texture. Allow the chocolate to rest briefly before you mix in the other ingredients.
– **Forgetting to Line the Baking Dish**: Lining your dish with parchment paper is crucial for easy removal. Otherwise, you may end up with a sticky mess that’s difficult to cut into neat pieces.
– **Skipping the Chill Time**: Allowing the Rocky Road to chill thoroughly in the refrigerator helps the ingredients set together. Cutting it too soon can lead to a messy situation with fragmented pieces.
Storage, Freezing & Reheating Tips
Storing your Rocky Road Candy properly ensures it retains its deliciousness for days to come.
– **At Room Temperature**: Once your candy is set, you can store it in an airtight container at room temperature for up to two weeks. Just make sure to keep it in a cool, dry place away from direct sunlight.
– **Refrigeration**: If your kitchen tends to be warm, you can refrigerate the candy to prolong its shelf life. In this case, ensure it’s in a well-sealed container to avoid absorbing odors from your fridge.
– **Freezing**: For long-term storage, Rocky Road Candy can be frozen. Cut the candy into pieces and wrap them individually in plastic wrap. Place them in a freezer bag or airtight container. They can last up to three months in the freezer. When you’re ready to enjoy, let them thaw at room temperature.
Reheating is generally not necessary for Rocky Road Candy, but if you’ve stored it in the fridge or freezer, simply allow it to return to room temperature before serving for the best texture and flavor.
Frequently Asked Questions
1. **Can I use other types of chocolate?**
Absolutely! You can use dark chocolate, milk chocolate, or even white chocolate, depending on your taste preference. Each variety brings its unique sweetness and flavor nuances to the candy.
2. **What nuts work best in Rocky Road Candy?**
Almonds are traditionally used, but feel free to experiment with any kind of nuts you like! Walnuts, pecans, or even peanuts can add delicious textures and flavors to your Rocky Road.
3. **Can this recipe be made gluten-free?**
Yes! As all the ingredients listed are naturally gluten-free, Rocky Road Candy is an excellent option for those with dietary restrictions. Just double-check your chocolate and marshmallows to ensure they don’t contain any gluten-derived ingredients.
4. **How can I make this without refined sugar?**
There are various sugar alternatives available, such as coconut sugar, agave nectar, or maple syrup. However, the consistency may differ, and you’ll need to experiment to get the right melting point and texture.
5. **Is Rocky Road Candy suitable for children?**
Yes, Rocky Road Candy is a fun and colorful sweet treat that kids typically enjoy. However, watch out for any nut allergies among children before sharing it with them!
In conclusion, Rocky Road Candy is not just a treat; it’s a delightful mix of tradition and creativity that brings people together. Whether you make it for yourself, to impress guests, or as a special gift, this recipe is versatile, easy to prepare, and unbelievably delicious. Don’t hesitate to customize it to your taste or dietary needs. Share it with family or friends, or keep it all to yourself—you definitely deserve a sweet reward! Happy candy making!
[Read also: Easy Dessert Recipes for Beginners]


