Prep time: 20 minutes
Cook time: 30 minutes
Total time: 50 minutes
Servings: 12 bars
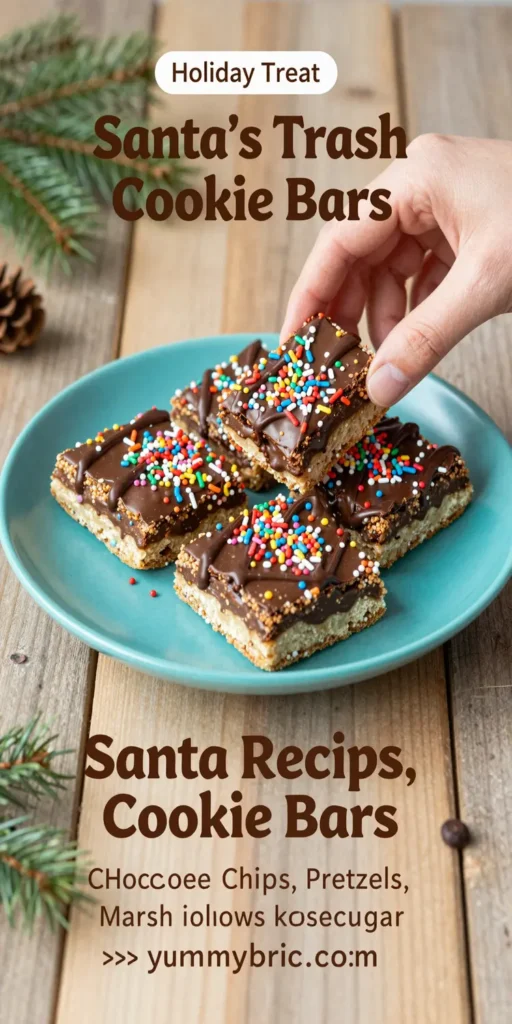
Santa’s Trash Cookie Bars are a delightful dessert that brings a fun twist to holiday baking. With a combination of leftover candies, nuts, and other sweet treats, these bars are both delicious and a great way to use up holiday goodies. Whether you’re looking to create something festive for a gathering or just want to indulge in a rich, sweet treat, these cookie bars are sure to please everyone. Imagine biting into a chewy, gooey concoction filled with chocolate chunks and crunchy textures – it’s a treat you’ll want to make year after year.
What Is Santa’s Trash Cookie Bars?
Santa’s Trash Cookie Bars are a creative dessert that combines various ingredients commonly found in holiday treats. The concept is primarily about using up leftover candies, nuts, and other sweets, making it a resourceful option for any holiday enthusiast. With flavors ranging from chocolatey to nutty, you can customize your bars to fit your preferences and available ingredients. The result is a gooey, delicious bar that has a little bit of everything, making every bite a surprise.
Why You’ll Love This
What sets Santa’s Trash Cookie Bars apart is their versatility and ease of preparation. Here are some reasons you’ll love making them:
- Simple to Prepare: You can whip these up quickly, making them perfect for busy parents or last-minute holiday baking.
- Flexible Ingredients: You can use whatever candies and nuts you have on hand, minimizing waste and maximizing taste.
- Decadently Delicious: The combination of sweet and crunchy textures delivers a satisfying treat that everyone will enjoy.
- Fun to Customize: Feel free to tailor the bars to your family’s taste preferences; it’s an exciting baking adventure!
Ingredients You’ll Need
To make Santa’s Trash Cookie Bars, gather the following ingredients:
- 2 cups of crushed graham crackers: These provide a lovely crunchy base and texture for your bars.
- 1 cup of unsweetened shredded coconut: Coconut adds chewiness and flavor, balancing the chocolate.
- 1 cup of semi-sweet chocolate chips: Chocolate is essential for that delightful gooey richness in every bite.
- 1 cup of assorted chopped candies: Use your holiday leftovers, including M&Ms, Skittles, or chopped chocolate bars.
- 1 cup of nuts (pecans, walnuts, or any nuts of choice): Nuts bring healthy fats and a satisfying crunch.
- 1 cup of sweetened condensed milk: This is the magic ingredient that binds everything together, adding sweetness and moisture.

How to Make
Follow these simple steps to bake your delicious Santa’s Trash Cookie Bars:
- Preheat the Oven: Start by preheating your oven to 350°F (175°C). This ensures an even baking temperature for your bars.
- Prepare the Baking Dish: Line a 9×13 inch baking dish with parchment paper. This step will help you easily lift the bars out after baking.
- Mix the Ingredients: In a large mixing bowl, combine the crushed graham crackers, shredded coconut, chocolate chips, chopped candies, and nuts. Mix well to evenly distribute the ingredients.
- Add Sweetened Condensed Milk: Pour the sweetened condensed milk over the dry mixture. Stir until fully combined and all the ingredients are moistened.
- Spread in the Baking Dish: Transfer the mixture to the prepared baking dish and press it down firmly. Use a spatula to ensure it’s evenly distributed.
- Bake: Place the dish in the preheated oven and bake for about 25-30 minutes, or until the edges are golden and the center is set. The bars should feel slightly firm to the touch.
- Cool and Cut: Allow the bars to cool completely in the pan before lifting them out using the parchment paper. Cut into squares and enjoy!
Variations & Substitutions
Chocolate Lovers’ Variation: If you can’t get enough chocolate, try adding white chocolate chips along with the semi-sweet ones. You can also drizzle melted chocolate over the top of the bars for a beautiful finish and extra chocolate flavor.
Nut-Free Version: For those with nut allergies, simply omit the nuts and substitute with more chocolate chips or additional candy. You still get a delicious bar with plenty of texture.
Healthy Twist: Replace half the graham cracker crumbs with whole wheat flour for a healthier bar. You could also use dark chocolate chips and reduce the amount of condensed milk for a less sugary version.
Chewy Fruit Addition: Consider adding chopped dried fruits like cranberries or apricots to add a sweet and tangy flavor profile to your trash bars, enhancing the overall taste.
Common Mistakes to Avoid
When making Santa’s Trash Cookie Bars, even the smallest mistakes can lead to unsatisfactory results.
Overbaking: Keep an eye on the baking time, as overbaking can lead to dry bars. They should be golden around the edges while still slightly soft in the center.
Inadequate Pressing: Failing to press the mixture firmly into the baking dish can cause the bars to crumble. Make sure to pack it down well, using a spatula or your hands to ensure they hold together.
Skipping the Parchement Paper: Not lining the baking dish with parchment paper could make it nearly impossible to remove the bars without them breaking apart. Always line your dish for easy removal.
Storage, Freezing & Reheating Tips
To ensure the best quality and safety when storing your Santa’s Trash Cookie Bars, follow these guidelines:
– **Storage:** Keep the bars in an airtight container at room temperature for up to one week. If you live in a humid climate, refrigerate them to avoid spoilage.
– **Freezing:** For longer storage, wrap individual bar pieces in plastic wrap and then place them in a freezer-safe bag. They can be frozen for up to three months. To eat, simply thaw at room temperature.
– **Reheating:** If you like your bars warm, heat them gently in the microwave for about 10-15 seconds. This will melt the chocolate chips slightly and give them that fresh-out-of-the-oven feel.
Frequently Asked Questions
Can I use different types of chocolate?
Absolutely! Feel free to swap semi-sweet chocolate chips for milk or dark chocolate chips. Each type will give the bars a unique flavor profile. You can also incorporate white chocolate or even a peanut butter chip if you desire a different taste.
How do I know when the bars are done baking?
The bars are done when the edges turn a lovely golden brown and the center is just set. Insert a toothpick into the center; it should come out mostly clean, unlike cookies which should be slightly underbaked for that gooey texture.
Can I make them ahead of time?
Yes, these bars can be made a day or two in advance. Store them in an airtight container, and they should stay fresh. If you’re making them for a gathering, consider baking them the day before to save time on the day of the event.
What is the best way to cut these bars?
Using a sharp knife can yield cleaner cuts. For best results, let the bars cool completely to room temperature, and run a knife under warm water before cutting, which helps to smooth the process.
Can I add other ingredients?
Definitely! The beauty of Santa’s Trash Cookie Bars lies in their flexibility. Feel free to add extras like pretzels, seeds, or even crushed cookies. Just keep in mind the balance of wet and dry ingredients to maintain texture.
Conclusion:
Santa’s Trash Cookie Bars not only allow for creativity in baking but also offer a chance to gather around the kitchen with loved ones. Whether for a holiday party or a cozy movie night, these bars make a delightful treat that everyone can enjoy. So gather your ingredients, get baking, and relish the delicious chaos that these cookie bars bring into your home!