Prep time: 20 minutes
Cook time: 25 minutes
Total time: 45 minutes
Servings: 12 mini cakes
When spring arrives, there’s a magical transformation that takes place — vibrant flowers bloom, and fresh, seasonal ingredients are abundant. It’s the perfect time to whip up some delightful desserts that capture the essence of this lovely season. One of my all-time favorite treats to bake during this time is the Mini Vanilla Berry Layer Cakes. These cakes are not only visually stunning but deliver an exceptional taste that’s both refreshing and delightful. The combination of fluffy vanilla cake layers paired with luscious berries and creamy frosting truly embodies spring on a plate.
This recipe is special for several reasons. Firstly, it stands out for its charming presentation, making it an ideal centerpiece for any gathering. Additionally, it’s straightforward enough for beginner bakers who may feel intimidated in the kitchen. By the end of this post, you’ll learn not only how to create these beautiful cakes but also tips to personalize them to your liking, including possible variations and substitutions. Ready to dive in? Let’s create something pretty and delicious!
What Is Spring Baking: Mini Vanilla Berry Layer Cakes (Easy + Pretty)?
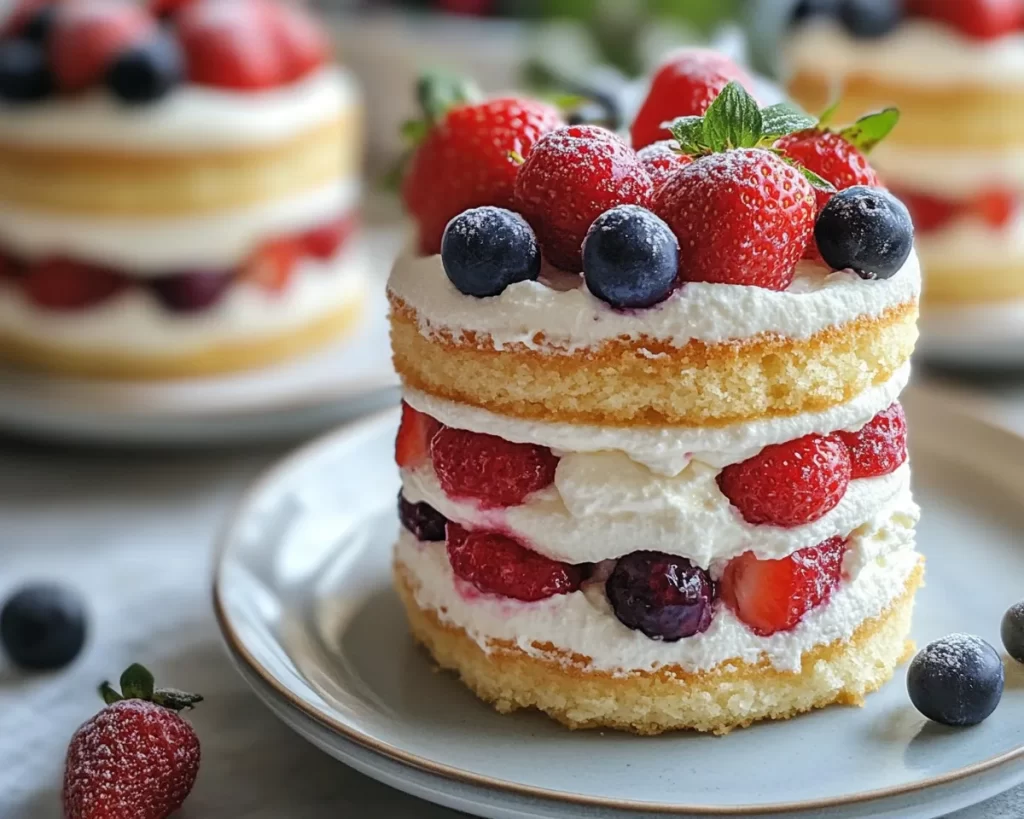
Mini Vanilla Berry Layer Cakes are delightful desserts that capture the flavors of spring. These petite cakes are composed of soft, moist vanilla cakes layered with fresh berries and creamy frosting. The origins of layer cakes can be traced back to Europe, where they were often served at festive occasions like weddings and birthdays. Their delicate structure allows for an elegant presentation, making them perfect for garden parties or holiday celebrations.
These mini cakes are light and airy, thanks to the inclusion of whipped egg whites in the batter. They have a slight sweetness that perfectly complements the tartness of the berries. Imagine biting into a soft cake layer infused with **vanilla**, followed by a burst of juicy strawberries or raspberries. The texture is a beautiful contrast between the sponge cake and the luscious frosting, creating a dessert that appeals to all senses. They are ideal for celebrating special moments or simply treating yourself and your loved ones.
Why You’ll Love This
There are countless reasons to love Mini Vanilla Berry Layer Cakes! First and foremost, they are stunning to behold, making them an ideal dessert for any gathering. The bright colors of the berries not only make the cakes visually appealing but also enhance their **flavor** profile. The use of seasonal fruits means you can enjoy these treats in their prime, which is both cost-effective and environmentally friendly.
Ease is another reason why you’ll adore this recipe. Even beginner bakers can master these cakes without feeling overwhelmed. Each step is straightforward, which means you can focus on enjoying the process rather than stressing over complicated techniques. Additionally, if you’re conscious about your diet, you can easily tweak the recipe to accommodate healthier options or alternative diets. Despite their **elegant** look, these cakes are surprisingly straightforward to prepare and assemble.
Common mistakes include underbaking the cakes or not letting them cool completely before frosting, which can lead to a messy outcome. However, with careful attention to timing and thorough cooling, you’ll craft a delightful dessert worthy of any occasion. Enjoying the buzzing atmosphere of a family gathering, a picnic in the park, or simply a cozy evening at home would be made even better with a slice of these beautiful cakes.
Ingredients You’ll Need
- All-purpose flour: The base ingredient for the cake. It provides structure and texture. You can substitute it with gluten-free flour for a gluten-free version.
- Sugar: Provides sweetness to the cake. You can reduce the amount for a less sweet option or use coconut sugar as an alternative.
- Baking powder: A leavening agent that helps the cakes rise. Ensure it is fresh for optimal results.
- Salt: Enhances flavor. A pinch is enough to balance the sweetness.
- Eggs: Adds richness and moisture to the cake. You can use flax eggs for a vegan option.
- Butter: Use unsalted butter for a creamy texture. Can be substituted with margarine or vegetable oil.
- Milk: Provides moisture and a subtle creaminess. Non-dairy milk works well as a substitute.
- Vanilla extract: Essential for flavor. Opt for pure vanilla for the best taste.
- Fresh berries: Strawberries, blueberries, and raspberries work great. Choose whatever is in season for the best flavor.
- Heavy cream: Provides richness for the frosting. The texture holds up well. For a lighter version, consider using whipped topping.
- Powdered sugar: Sweetens and stabilizes the frosting. You can omit it for a less sweet frosting.
How to Make
- Preheat your oven to 350°F (175°C) and prepare your mini cake pans by greasing them with butter or cooking spray. If you have parchment paper, cut circles to fit the bottom of the pans for easier removal.
- In a mixing bowl, combine 1 ½ cups of all-purpose flour, 1 cup of granulated sugar, 1 ½ teaspoons of baking powder, and a pinch of salt. Use a whisk to blend the dry ingredients thoroughly — this ensures the baking powder is evenly distributed.
- In another bowl, crack 2 large eggs and whisk them gently. Add in ½ cup of melted butter, 1 cup of milk, and 1 tablespoon of pure vanilla extract. Mix until well combined; don’t overbeat, just enough to combine all ingredients.
- Slowly add the wet ingredients to the dry mixture. Gently fold together until just mixed. The batter should be slightly lumpy but without any dry flour visible. This technique keeps the cake from becoming dense.
- Pour the batter evenly into the prepared mini cake pans, filling them about two-thirds full. Bake in the preheated oven for around 20-25 minutes or until a toothpick inserted in the center comes out clean. The smell will be heavenly!
- Once baked, allow the cakes to cool in the pans for about 10 minutes. This prevents sticking before you transfer to a wire rack. After that, let them cool completely on the wire rack to ensure they are ready for frosting.
- While the cakes cool, whip 1 cup of heavy cream in a chilled bowl until soft peaks form. Gradually add in ½ cup of powdered sugar and continue to whip until you achieve stiff peaks. This means the whipped cream should hold its shape nicely.
- Once the cakes are completely cooled, carefully remove them from the pans. Level the tops with a knife if needed for a smooth assembly. Place one cake layer on your desired serving plate.
- Spread a thin layer of whipped cream on top of the first cake layer, and add a layer of fresh berries. This is where you can get creative: feel free to mix and match your favorite berries.
- Gently place another cake layer on top and repeat the process. After layering all the cakes, use any remaining whipped cream to frost the top and around the sides of the cake. Decorate with additional berries for an eye-catching finish.
- Refrigerate for at least 1 hour before serving. This helps to set the whipped cream and meld all flavors together. When you’re ready to serve, slice and enjoy the delightful layers of flavor!
Variations & Substitutions
Gluten-Free Variation: If you’re aiming for a gluten-free option, substituting all-purpose flour with a high-quality gluten-free blend can do wonders. Such blends often include a mixture of different flours like rice flour and almond meal, which can add unique flavors and textures. You might need to add additional moisture, as some gluten-free flours can be drier. Use this opportunity to include some almond milk for added richness!
Vegan Variation: For those following a vegan diet, replacing eggs with flax eggs is a simple yet effective substitution. Just mix 1 tablespoon of ground flaxseed with 2.5 tablespoons of water for each egg. Allow it to sit for a few minutes to thicken before adding to the batter. Additionally, plant-based milk and coconut oil can replace the butter and milk, ensuring that every bit of goodness remains enticing and satisfying.
Citrus Zest Addition: Adding zest from a lemon or an orange to the cake batter can elevate the flavor profile significantly. The fragrant citrus notes pair wonderfully with the berries, creating a refreshing and vibrant dessert. Simply add about one tablespoon of zest along with the other liquid ingredients for a burst of **flavor** that will have everyone coming back for seconds.
Chocolate Variation: If you’re looking to indulge a bit more, consider adding cocoa powder to the cake batter to make chocolate cake layers. Use about ½ cup of unsweetened cocoa powder along with the flour. Pair these layers with the same fresh berries but add a touch of chocolate frosting for a decadent treat. The contrast of flavors is sure to impress.
Seasonal Variations: Don’t hesitate to experiment with seasonal fruits! For summertime, peaches or cherries make excellent substitutions. In the fall, consider apple slices or even a spiced pumpkin cake base. Changing the fruits not only changes the flavor but allows you to take advantage of seasonal ingredients while keeping the dessert fresh and exciting.
Common Mistakes to Avoid
One common mistake is not properly measuring your ingredients. Precision in baking, especially concerning flour and leaveners, is critical to achieving the perfect texture. Use a kitchen scale for measuring flour or spoon it into a measuring cup and level it off without packing for an accurate measurement.
Another mistake is baking the cakes too long. Every oven can be different, so start checking around the lower end of the baking time. Once a toothpick comes out clean, it’s wise to remove these cakes; overbaking can lead to a dry texture that could detract from the delightful spring flavors.
Additionally, not letting your cakes cool completely before frosting can lead to melting frosting. That’s a common pitfall! It’s essential to exercise patience — allowing those layers to cool can make all the difference in both appearance and texture.
Lastly, be cautious about overcrowding your cake layers with filling. A heaping amount may cause the layers to slide or even topple over. It’s advisable to add a moderate amount of frosting and berries in each layer, which will maintain the cake’s structural integrity while still allowing all of the delicious flavors to shine.
Storage, Freezing & Reheating Tips
When it comes to storing your Mini Vanilla Berry Layer Cakes, you can keep them in the refrigerator for about 3-4 days. Make sure the cake is covered with plastic wrap or stored in an airtight container to maintain freshness. **Whipped cream** frosting tends to lose its texture over time, so serve it sooner rather than later for the best flavor and appearance.
If you decide to freeze the cakes, consider freezing them before frosting. Wrap individual layers tightly in plastic wrap and then place them in a resealable bag or airtight container. They can last in the freezer for up to 2-3 months. When ready to use, simply thaw them in the refrigerator overnight before frosting and assembling. **Avoid** refreezing cakes that have already been frosted, as this can compromise their texture and taste.
If you have leftover frosted pieces and want to save them, cut individual servings, wrap them in plastic, and place them in a container. However, be mindful that the whipped cream may not hold its structure as well after freezing. To revive any dry pieces, you can drizzle a bit of fruit puree or a simple syrup before serving for enhanced moisture.
Frequently Asked Questions
Can I use frozen berries instead of fresh ones?
Absolutely! Frozen berries can serve as an excellent alternative, especially if fresh ones aren’t available. Just ensure they’re thawed and drained well to avoid excess liquid in your cake. The flavor will still be delightful, but fresh berries do provide a fresher texture.
How do I make the frosting stable in warm weather?
If you’re planning to serve these cakes on a hot day, consider using cream cheese in your frosting, which will help maintain its structure. Alternatively, adding a small amount of instant pudding mix can act as a stabilizer, helping to keep your frosting intact even in warmer temperatures.
Can I make the cake layers ahead of time?
Certainly! You can bake the layers in advance and store them as mentioned above. Just make sure to fully chill before wrapping them in plastic. This allows for easier handling when you’re ready to frost and assemble.
What can I do if the cake layers sink?
If your cake layers are sinking in the middle, it can be due to underbaking or an excess of leavener. Always check for doneness with a toothpick and make sure your baking powder isn’t expired. Too much aeration can cause the cake to rise rapidly and then sink.
Can I make these into a single larger cake?
Yes, you can absolutely transform this recipe into a larger cake! Adjust your baking time and use a larger round cake pan. Frosting a larger cake can be a bit more challenging, so keep an eye on your layers as they bake to ensure perfect results.
Conclusion:
In conclusion, these Mini Vanilla Berry Layer Cakes present a wonderful opportunity to celebrate the flavors of spring in your kitchen. With their delightful combination of taste and aesthetic appeal, they can enhance any gathering or moment of indulgence. Whether you’re a seasoned baker or just beginning your culinary journey, these cakes are manageable and rewarding. Feel free to experiment with different flavors or adapt them to your liking. Dive in and enjoy this beautiful spring dessert that promises to put smiles on faces. Share your creations with friends, and remember, your kitchen is a place for joy and creativity!


