Prep time: 30 minutes
Cook time: 1 hour
Total time: 1 hour 30 minutes
Servings: 12
Indulge in the vibrant flavors of spring with this delightful Spring Garden Cake Design. Picture a serene garden bursting with blooming flowers and lush greenery, and now imagine capturing that beauty in a cake. This recipe isn’t just a treat for your taste buds; it’s an aesthetically pleasing centerpiece for any spring celebration. Whether it’s a birthday party, baby shower, or an afternoon tea, this cake brings a refreshing twist that celebrates the beauty of the season.
What makes this cake special is its light, fluffy texture coupled with stunning decorative elements that mirror spring’s vivacity. You will learn how to create not only a deliciously moist cake but also how to embellish it with lovely, edible flowers and vibrant frosting that convey the essence of a garden. Each bite captures the essence of spring, combining flavors and textures that your guests will absolutely adore.
This recipe walks you through making the perfect cake layer, a rich but light frosting, and the beautiful garnishes that come together to create the Spring Garden Cake Design. It’s more straightforward than it seems, with tips sprinkled throughout to ensure your success. So, roll up your sleeves, and let’s embark on this culinary adventure!
What Is Spring Cake Designs: Spring Garden Cake Design?
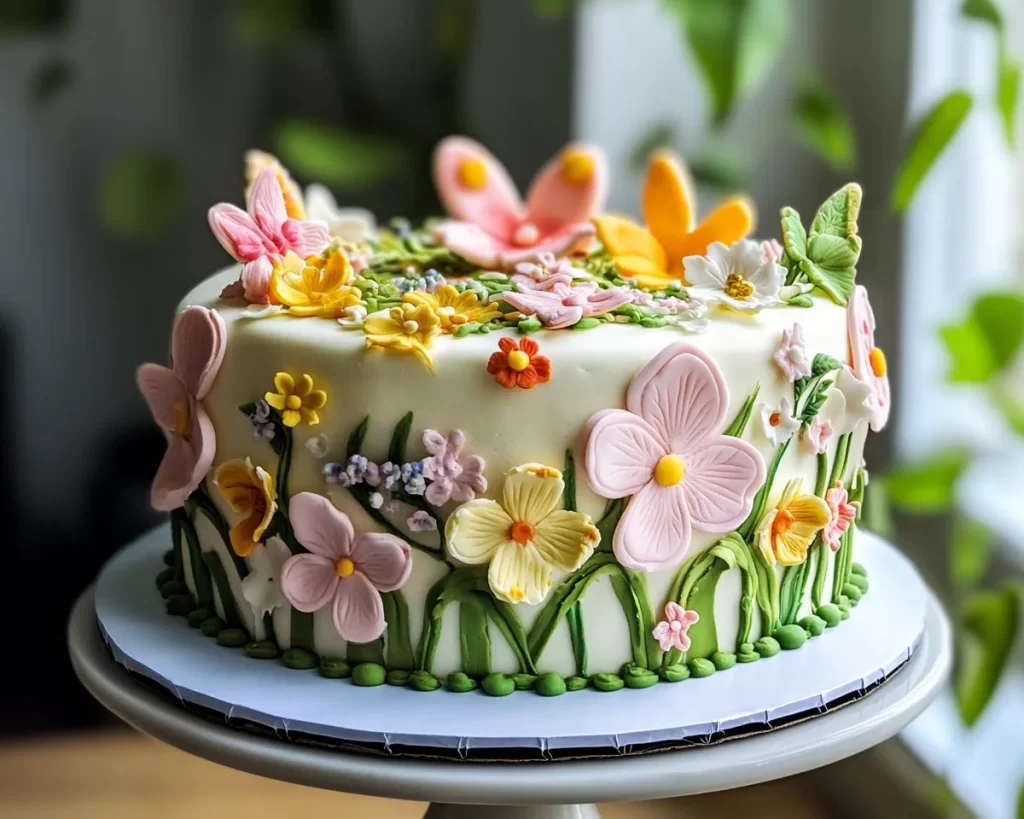
The Spring Garden Cake Design is a visually stunning cake often characterized by its lush floral decorations and vibrant colors. Originating from modern cake decoration trends, its essence draws from the freshness of spring. The texture of the cake itself is fluffy and moist, often achieved through careful mixing and the right balance of ingredients. Flavors typically range from lemon to vanilla, creating a light yet satisfying palate experience.
In terms of flavor, this cake is all about celebrating the brightness of spring. With key ingredients such as fresh fruits, floral notes, and a hint of citrus, each slice is a joyful celebration of blooming gardens. The garnishing involves using edible flowers—think nasturtiums, violets, or pansies—that bring not just a splash of color but also an exciting texture, enhancing the overall experience. The marriage of flavor and visual appeal is what makes the Spring Garden Cake Design a sought-after treat for all occasions.
With a little creativity and some simple techniques, you too can create a breathtaking Spring Garden Cake that will have everyone clamoring for a slice. Just imagine the delight on your loved ones’ faces as they partake in this seasonal treat!
Why You’ll Love This
There are numerous reasons this Spring Garden Cake Design will charm both bakers and guests alike. First and foremost, the taste is remarkable. The combination of light cake with refreshing frosting creates a delightful sensory experience that dances on your palate. The flavors are versatile—perfect for spring gatherings or anytime you want to bring a little sunshine to your dessert table.
Another reason to love this cake is its ease of preparation. Even if you’re a beginner in the kitchen, this recipe guides you through each step with clarity. You’ll be amazed at how quickly you can whip up such an impressive dessert, meaning less time in the kitchen and more time enjoying special moments with family and friends.
The affordability aspect cannot be ignored either. Utilizing seasonal ingredients often means you’re working with fresher, less expensive produce. Plus, the ability to customize and make adjustments according to your preferences or dietary needs means that anyone can enjoy this cake, regardless of restrictions or tastes. Say goodbye to the notion that cake needs to be overly complicated to be outstanding.
You may find misconceptions about cake baking leading to results that leave something to be desired. With this recipe, you’ll learn essential techniques that ensure your cake rises beautifully and stays moist. Say goodbye to tough or overcooked cakes; the methods shared here will give you the confidence to produce a bakery-worthy cake every time.
Ingredients You’ll Need
- All-purpose flour: 2 cups – This forms the base of your cake, giving it structure.
- Sugar: 1 ½ cups – Adds sweetness and moisture to the batter.
- Baking powder: 2 teaspoons – Essential for leavening, ensuring the cake rises.
- Salt: ½ teaspoon – Enhances the overall flavor of the cake.
- Unsalted butter: ½ cup, softened – Provides richness and moisture.
- Milk: 1 cup – Adds moisture and helps in mixing the batter smoothly.
- Eggs: 3 large – They bind the ingredients together and improve the cake’s texture.
- Vanilla extract: 2 teaspoons – Infuses the cake with a lovely aroma.
- Powdered sugar: 4 cups – For the frosting, it creates a smooth and sweet top layer.
- Heavy cream: 1 cup – When whipped, it adds a lightness to the frosting.
- Fresh fruits: Assorted (like strawberries, blueberries) – Adds flavor, juiciness, and a fresh finish.
- Edible flowers: Assorted (like pansies or nasturtiums) – For decoration and a pop of color.
Understanding the role of each ingredient helps in troubleshooting and substitutions. For instance, if you need a gluten-free option, you can substitute the all-purpose flour with a gluten-free blend. The same goes for dairy; plant-based alternatives for milk and butter can also work well. These adaptations ensure that everyone, regardless of their dietary needs, can savor this beautiful cake.
How to Make
- Preheat your oven: Start by preheating your oven to 350°F (175°C). Ensuring the oven is at the right temperature before baking is crucial for uniform cooking. This initial step sets the stage for a perfectly risen cake.
- Prepare your baking pans: Grease and line two 9-inch round cake pans with parchment paper. This will prevent the cake from sticking and make it easier to remove later. Use either butter or a non-stick spray for greasing.
- Mix dry ingredients: In a large bowl, whisk together the all-purpose flour, baking powder, and salt. This ensures that the leavening agents are evenly distributed throughout the flour mix.
- Cream the butter and sugar: In another bowl, beat the softened butter and sugar together until light and fluffy—a process known as creaming. This introduces air into the mixture, which helps the cake rise. It usually takes about 3–5 minutes with an electric mixer.
- Add eggs and vanilla: Beat in the eggs one at a time, ensuring each is fully incorporated before adding the next. Stir in the vanilla extract. This will add flavor and additional moisture to your batter.
- Combine wet and dry mixtures: Gradually add the flour mixture to the creamed butter and eggs, alternating with the milk. Begin and end with the flour mixture. This layering method ensures a smooth batter without over-mixing, which keeps the cake tender and fluffy.
- Pour and level: Divide the batter evenly between the prepared pans. Use a spatula to smooth the tops, ensuring an even surface for baking. This will help the cakes rise evenly without doming.
- Bake: Place the pans in your preheated oven and bake for 25–30 minutes. To check for doneness, insert a toothpick into the center of the cake; it should come out clean or with a few crumbs attached, signaling that it’s ready.
- Cool the cakes: Remove the cakes from the oven and allow them to cool in the pans for about 10 minutes. Then, turn them out onto a wire rack to cool completely. Cooling is crucial for frosting; otherwise, it will melt!
- Prepare the frosting: In a clean mixing bowl, whip the heavy cream until it forms soft peaks. Gradually add in the powdered sugar until it reaches your desired sweetness and spreadability. Be careful not to over-whip, as it can turn grainy.
- Assemble the cake: Once the cakes are completely cool, place one layer on a cake stand or serving plate. Spread an even layer of frosting on top, then add the second cake layer. Frost the top and sides of the entire cake, creating an even finish.
- Decorate: Garnish with assorted fresh fruits and top it off with beautiful edible flowers. A sprinkle of powdered sugar can also add an elegant finish. Let your creativity shine here; the more colorful, the better!
- Serve: Slice the cake carefully and serve to your eager guests. Enjoy the happy reactions as they take their first bites of your stunning Spring Garden Cake Design!
Following these step-by-step instructions will help you master this recipe with ease. Though it may seem daunting, remember that baking is all about practice. The texture, aroma, and visual appeal of this cake will surely make it worth every moment spent in the kitchen.
Variations & Substitutions
Citrus Burst Variation: For those who love zesty flavors, consider adding orange or lemon zest to both the batter and frosting. This brightness enhances the spring theme and elevates the taste profile significantly. Incorporate roughly a tablespoon of citrus zest for each layer, and you’ll have a cake that feels like sunshine on a plate. This variation is especially suitable for anyone who enjoys a tangy flavor or is hosting a summer celebration.
Gluten-Free Option: If you need a gluten-free cake, substitute the all-purpose flour with a gluten-free baking blend. Brands like Bob’s Red Mill offer great results, allowing those with gluten sensitivities to enjoy this cake as well. It’s essential to ensure that the baking powder you use is gluten-free as well. The texture might be slightly different, but with proper baking techniques, your cake will still turn out light and delicious.
Vegan Delight Variation: For a delightful vegan twist, replace the eggs with a flaxseed egg (using one tablespoon of flaxseed meal mixed with three tablespoons of water for each egg) and substitute dairy milk with almond or oat milk. Use coconut cream instead of heavy cream for the frosting. This option caters to those on a plant-based diet while not sacrificing flavor or texture.
Chocolate Garden Cake Variation: Love chocolate? Incorporate cocoa powder into the batter for a rich chocolate version. Use ½ cup of cocoa powder and reduce the flour slightly. A chocolate cake topped with whipped cream and fresh strawberries will have everyone swooning. Consider using a chocolate ganache made with rich dark chocolate for an additional layer of decadence.
Each of these variations allows you to customize the Spring Garden Cake Design according to your tastes or dietary needs while keeping the essence of spring alive in every bite.
Common Mistakes to Avoid
When embarking on this baking venture, there are several common pitfalls to avoid to ensure your Spring Garden Cake turns out beautifully. One common mistake is not measuring your ingredients accurately. Baking is a bit like science; precise measurements matter. Utilize measuring cups and spoons, and consider using a scale for ingredients like flour and sugar to get the best results.
Another frequent issue can arise from over-mixing the batter. While it might be tempting to whip it into a frenzy, over-mixing can lead to a dense, tough cake rather than the light, airy texture you’re aiming for. Just mix until the ingredients are combined, with some small lumps still visible.
Lastly, don’t rush the cooling process! Frosting a warm cake can lead to a melty disaster. Ensure your cakes are completely cooled before layering or frosting. Patience in this step will ensure that your Spring Garden Cake stays stunning and doesn’t turn into a puddly mess.
Storage, Freezing & Reheating Tips
Proper storage of your Spring Garden Cake is key to maintaining its freshness and flavor. Once fully cooled, you can store the cake at room temperature for 1–2 days. Place it in an airtight container to help preserve moisture. If your cake has been frosted, it’s best to refrigerate it, especially in warmer weather. In the refrigerator, your cake will last about a week.
If you plan to save a portion for later, freezing is a great option. After the cake has completely cooled, wrap it tightly in plastic wrap, then place it in a freezer-safe container or bag. It can be frozen for up to three months. When you’re ready to enjoy it again, let it thaw in the refrigerator overnight before serving.
Always remember that when storing cakes, keeping them wrapped well not only preserves moisture but also prevents them from absorbing any odors from your fridge. Aim for a low-traffic spot in your refrigerator since frequent opening can alter the temperature and humidity levels around the cake.
Frequently Asked Questions
Can I use different types of flour for this recipe?
Yes, you can use different types of flour, but it’s important to understand that they will yield different results. For instance, almond flour will make the cake denser, while gluten-free flour will maintain a lighter texture. When substituting, ensure you have the right leavening agents for the flour you choose to keep the cake fluffy.
How can I make this cake gluten-free?
To make a gluten-free Spring Garden Cake, substitute the all-purpose flour with a gluten-free flour blend. Many blends—like those made with brown rice flour or coconut flour—work well. Just ensure that the other ingredients, such as baking powder, are also gluten-free to avoid any contamination.
Can I make this cake ahead of time?
Absolutely! This cake can be made a day in advance. Just ensure that you store it properly to keep it fresh. Frosting it just before serving can help maintain its appearance, particularly if you’re using fresh or floral decorations.
What do I do if my cake doesn’t rise properly?
If your cake doesn’t rise, it may be due to old baking powder, incorrect oven temperature, or overmixing the batter. Always check the expiration date on your baking powder, and consider using an oven thermometer to ensure your oven is at the correct temperature for baking.
What is the best way to decorate this cake?
The best way to decorate your Spring Garden Cake is to use fresh fruits and edible flowers to celebrate the spring theme. Start with an even layer of frosting, then layer your fruits like strawberries and blueberries artistically on top. Lastly, add the beautiful edible flowers to capture the essence of a blooming garden.
Conclusion:
With its radiant colors and delightful flavors, the Spring Garden Cake Design is sure to impress both friends and family. This recipe not only brings a sense of joy but also gives you an opportunity to flex your creativity in the kitchen. Whether you stick to the classic version or try out one of the variations, the end result is a cake that is both gorgeous and delicious.
So gather your ingredients, embrace the season’s beauty, and whip up a cake that’s not just a dessert but a showpiece. Enjoy the process, experiment, and most importantly, share the love and flavors with those around you. Happy baking!


