Prep time: 10 minutes
Cook time: 0 minutes
Total time: 10 minutes
Servings: 4
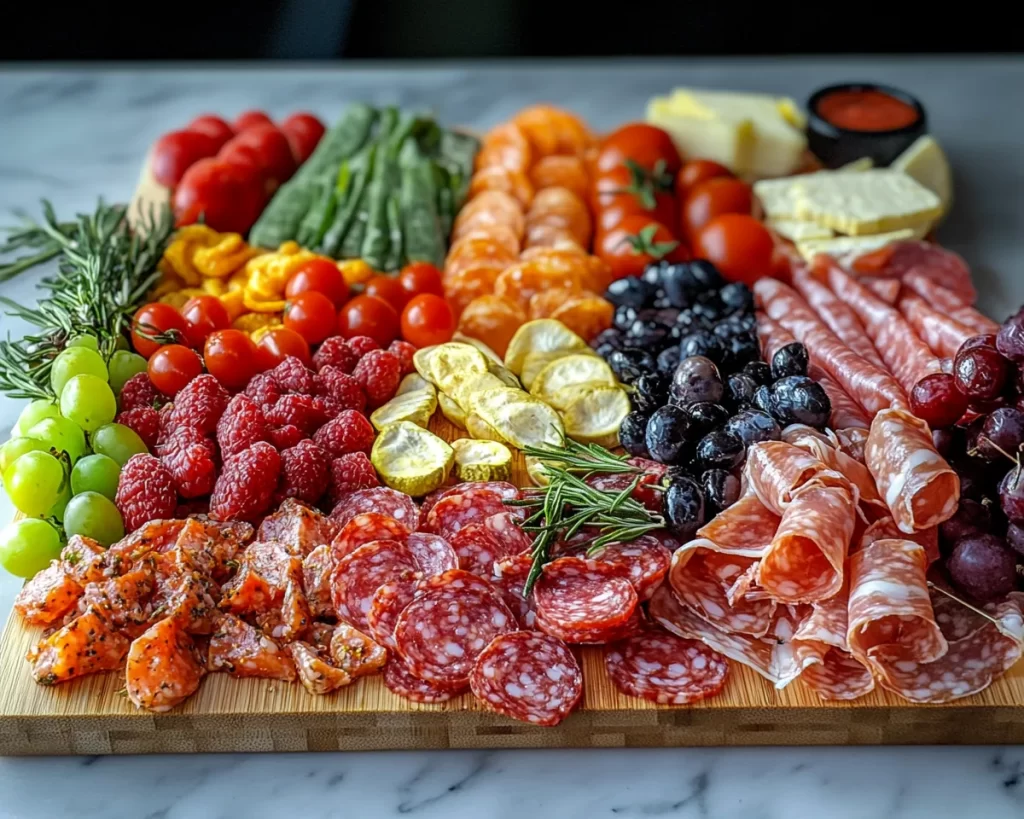
Spring is the perfect season to set out a colorful and vibrant charcuterie board. Imagine a beautifully arranged platter filled with an array of fresh vegetables, delectable cheeses, and a variety of cured meats, all waiting to be savored. Creating a spring charcuterie board is an effortless and impressive way to entertain guests, celebrate special occasions, or simply enjoy a relaxed evening with family. The best part? You can whip up this crowd-pleaser in just twenty minutes!
What Is Spring Charcuterie Board Ideas: Garden Fresh Spring Grazing Board in 20 Minutes?
A spring charcuterie board is a stunning display of seasonal ingredients, designed to make the most of the colors and flavors that spring offers. This grazing board typically includes items like creamy cheeses, juicy fruits, crisp vegetables, and an assortment of nuts and spreads, all artfully arranged to create an inviting centerpiece for any gathering. It not only tantalizes the taste buds but also provides a feast for the eyes. With a bit of creativity and minimal preparation time, anyone can create a beautiful spring charcuterie board.
Why You’ll Love This
There are numerous reasons to love a spring charcuterie board! First and foremost, it allows for endless creativity. You can mix and match ingredients based on your preferences and what you have on hand. It’s also a versatile option; whether you’re hosting a brunch, picnic, or casual gathering, this board fits all occasions. Additionally, assembling a charcuterie board requires no cooking, making it an easy choice for busy individuals or those just starting in the kitchen. Plus, it encourages sharing and conversation, transforming any meal into a social event.
Ingredients You’ll Need
To create your spring charcuterie board, gather the following ingredients:
- Cheese: Choose a variety of cheeses like goat cheese, brie, and cheddar. Each offers distinct flavors and textures; creamy, tangy, and sharp respectively.
- Cured Meats: Include options like prosciutto and salami. Their richness complements the fresh elements of the board.
- Fresh Vegetables: Use a mix of snap peas, cherry tomatoes, and radishes for crunch and color.
- Fresh Fruits: Strawberries, blueberries, or sliced apples provide a touch of sweetness that balances the savory elements.
- Nuts: Almonds and walnuts add an extra layer of flavor and crunch, enhancing the board’s texture.
- Spreads: Include hummus or a herbed cream cheese for dipping, adding creaminess and richness.
- Crackers or Bread: Use assorted crackers or baguette slices to support the toppings and complete the experience.

How to Make
- Start by selecting a large, beautiful board or platter to arrange your ingredients. A wooden cheese board, a marble slab, or even a simple cutting board can be ideal. Visual presentation is key for a charcuterie board.
- Begin with the cheeses, slicing them into varying shapes and arranging them around the board. Consider using cheese markers or labels for added flair and to inform guests of their options.
- Next, place the cured meats in folds or rolls next to the cheese. This helps to create visual interest and makes it easier for guests to pick up without creating a mess.
- Now it’s time to add the fresh vegetables. Create small clusters of colorful veggies, ensuring variety in color and shape. The crunch of the fresh produce will provide a perfect contrast to the creaminess of the cheese.
- Follow up by adding the fruits. Scatter them throughout the board to create pops of color and freshness that entice guests to dig in.
- Finally, fill in any gaps with nuts and spreads. Use small bowls for dips and arrange crackers or bread along the edges for easy access.
Variations & Substitutions
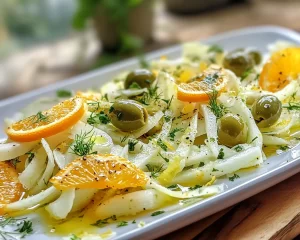
Vegetarian Charcuterie Board: If you want to cater to vegetarians, simply leave out the cured meats and replace them with additional fruits and veggies. Roasted red peppers, artichokes, and olives can offer delightful flavors and textures while still being satisfying. You can also add a variety of cheese options, and don’t forget the nuts for crunch.
Meat Lovers’ Board: For those who love meats, feel free to increase the variety of cured meats. Add options like chorizo, bresaola, or spicy capicola. Combine rich cheeses with the meats to enhance the flavors, and complement with pickles or mustard for an extra kick.
Sweet & Savory Board: Blend sweet and savory by adding chocolate-covered pretzels or dark chocolate pieces to your board. Pair them with sweet fruits and creamy cheeses. Honey drizzled over cheese or fruit adds a delicious element of sweetness to balance the savory notes.
Common Mistakes to Avoid
One of the most common mistakes when creating a charcuterie board is overcrowding. Less is often more; leaving some space allows each ingredient to shine on its own. Another issue is failing to vary textures and flavors. Avoid using the same kind of cheese or meat, as this can make the board uninteresting. Remember that combining creamy, crunchy, sweet, and savory elements enhances the overall experience. Lastly, make sure to account for dietary restrictions of your guests, ensuring everyone has options they can enjoy.
Storage, Freezing & Reheating Tips
When it comes to storing your charcuterie board, it’s best to separate the items. Cheese and cured meats can be wrapped and refrigerated. Most fresh vegetables will keep in airtight containers for a few days, but berries should be consumed relatively quickly to avoid spoiling. If you have leftovers of dips or spreads, they should also be stored in airtight containers. Avoid freezing a charcuterie board; the texture of freshly cut fruits and vegetables will not hold up after freezing and thawing.
To serve leftovers, simply arrange them again as you did originally, adding fresh items to refresh the board. Always use your senses; if something looks or smells off, it’s best to discard that ingredient.
Frequently Asked Questions
Can I make a charcuterie board ahead of time?
Yes, you can prepare your charcuterie board a few hours in advance. However, for the freshest taste, it is best to cut fruits and vegetables closer to serving time. Store the components in the refrigerator until – just before serving.
What kind of cheese should I choose for spring?
Opt for light, creamy cheeses that define spring. Goat cheese, brie, or a fresh mozzarella can be lovely choices. These cheeses pair exceptionally well with the fresh produce typically used in a spring charcuterie board.
How do I choose the right wine to pair with my board?
Generally, the best wines to pair with a charcuterie board include white wines like Sauvignon Blanc or a light Pinot Noir. The key is to select wines that will complement but not overpower the flavors on your board.
Is a charcuterie board suitable for children?
Absolutely! Many children love the variety of colors and flavors. Offer child-friendly options such as mild cheese, breadsticks, and fruits. Just be sure to keep an eye on any choking hazards that certain items might pose.
How can I enhance the presentation of my charcuterie board?
Utilizing different shapes and sizes of bowls, mixing textures, and incorporating fresh herbs or edible flowers can elevate your board visually. A beautiful arrangement will invite your guests and enhance their overall experience.
Conclusion: Designing a spring charcuterie board can be an exciting and fulfilling endeavor. With just a few steps and the right ingredients, you can create a stunning and delicious centerpiece for any gathering. This board offers endless possibilities for personalization while ensuring a delightful experience for all your guests. Enjoy the process of assembly and take pleasure in both the flavors and the conversation that your creation encourages!