Prep time: 30 minutes
Cook time: 0 minutes
Total time: 30 minutes
Servings: 8
Creating a beautiful charcuterie board is an art form, especially when you elevate it with delightful mini desserts. This guide to “Spring Charcuterie Board Ideas with Mini Desserts in 5 Steps” is designed to help you impress your guests while also being easy enough for busy parents and kitchen beginners. Artfully arranged meats, cheeses, fruits, and desserts can transform any gathering into a memorable occasion. So let’s dive in!
What Is Spring Charcuterie Board Ideas with Mini Desserts in 5 Steps?
A charcuterie board typically consists of cured meats and various accompaniments, while adding mini desserts makes it even more enticing. The spring theme allows for fresh, vibrant colors and flavors, incorporating seasonal ingredients that scream freshness. You’ll find vibrant fruits like strawberries, rhubarb, and citrus, along with savory elements like creamy cheeses, crunchy nuts, and, of course, the delightful touch of mini desserts that add sweetness to your savory sampler.
Why You’ll Love This
Not only is this board a feast for the eyes, but it also caters to diverse taste preferences. It’s perfect for:
- Entertaining guests: With an abundance of flavors, it sparks conversations and delights various palates.
- Easy prep: Preparing a charcuterie board is straightforward, and no actual cooking is required.
- Spring vibes: Engaging with seasonal ingredients adds a refreshing twist to your gatherings.
Ingredients You’ll Need
To craft your stunning spring charcuterie board, here’s what you will require:
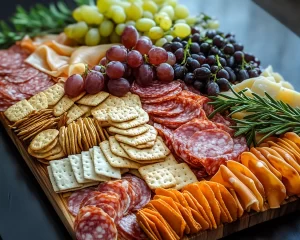
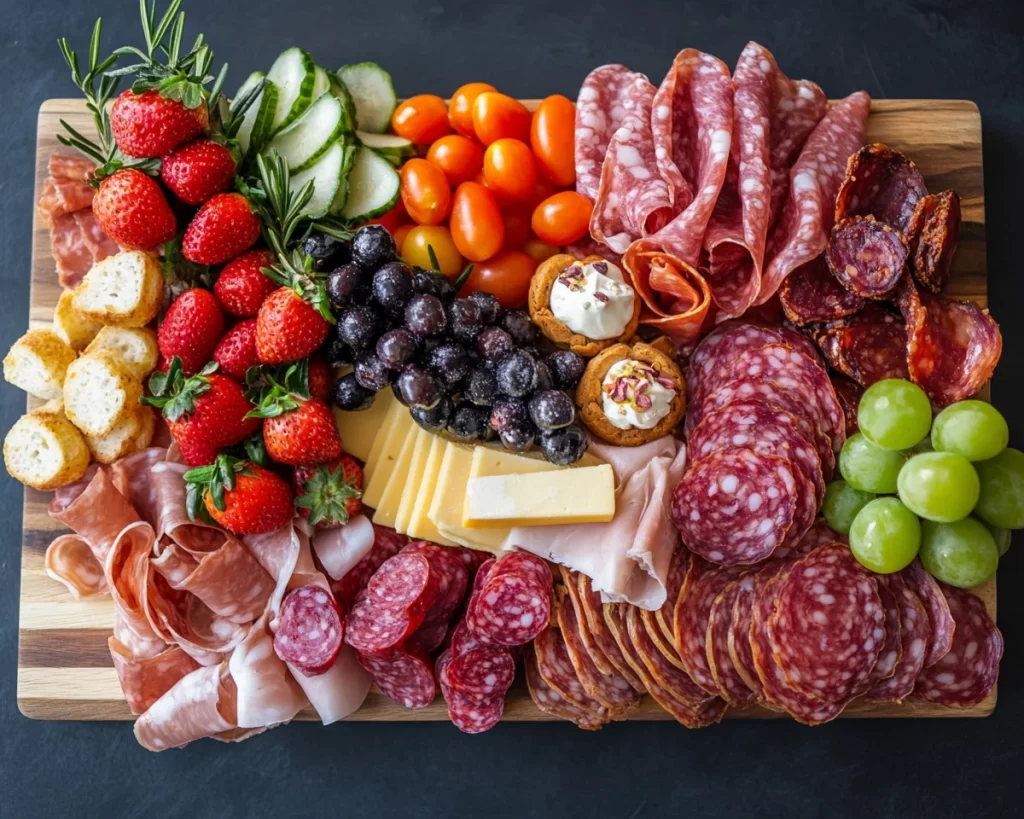
- Cured meats: Select a mix of prosciutto, salami, and capicola for a range of flavors and textures.
- Cheeses: Include soft brie, sharp cheddar, and creamy goat cheese for contrasting tastes.
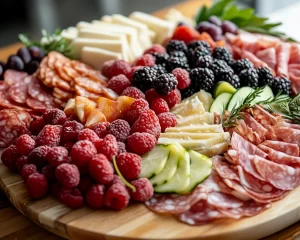
- Fresh fruits: Strawberries, blueberries, and sliced kiwis bring a burst of color and freshness.
- Nuts: Almonds and walnuts add a delightful crunch.
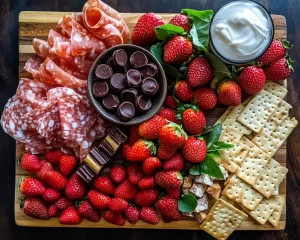
- Mini desserts: Brownie bites, mini cheesecakes, and chocolate-covered strawberries provide a sweet finish.

How to Make
Creating your charcuterie board is simple with the following steps:
- Start by choosing a large, flat board or platter as your base. A wooden board provides a rustic feel, while a marble slab adds elegance. Ensure it’s big enough to accommodate all your ingredients without looking cramped.
- Begin placing your cheeses. Start with larger pieces and slice some into wedges or cubes for variety. Arrange them around the board, ensuring there’s a good mix of soft and hard cheeses for texture.
- Next, add your cured meats. You can roll them into beautiful rosettes or simply arrange them in a fan shape. Ensure they’re near the cheeses they pair well with—for instance, prosciutto pairs wonderfully with soft brie.
- Fill in the gaps with fresh fruits. Strategically place your strawberries and blueberries around the meats and cheeses for a pop of color. Include small bowls for berries or nuts to create visual interest.
- Finally, introduce your mini desserts. Place them in clusters or in small, decorative cups sprinkled throughout the board. This not only adds a sweetness balance to the savory elements but also makes for a stunning visual display.
Variations & Substitutions
Vegetarian Charcuterie Board: Replace cured meats with a selection of marinated vegetables like artichokes and olives. Pair with hearty hummus and a variety of cheeses. Fresh fruit can still be included for a refreshing touch.
Gluten-Free Option: Use gluten-free crackers or breadsticks instead of regular ones. You can also incorporate more fruits and nuts to fill the gaps on your board.
Kid-Friendly Board: Include mini sandwiches, cheese cubes, fruits, and simple desserts like cookies or cupcakes. Simplifying flavors while making it fun and colorful can engage younger kids, making it an attractive option for parties.
Sweet Tooth’s Dream: While maintaining the savory elements, lean heavily on sweets with a variety of chocolates, cookies, and slices of cake. It can be a delightful treat for dessert gatherings or brunch.
Seasonal Variations: Adjust the fruits and cheeses based on what’s available in your area or what’s in season. Apricots, figs, or even pomegranates can replace spring options to suit other seasons and tastes.
Common Mistakes to Avoid
When constructing your spring charcuterie board, watch out for these common pitfalls:
Overcrowding the Board: It’s tempting to pack as much as possible, but too many elements can make the board appear chaotic. Opt for a few quality items over many average.
Ignoring Pairings: Not all flavors complement one another. Ensure that your choices of cheeses, meats, and sweets balance well. For instance, pairing a sharp cheese with a sweet fig jam creates a delightful contrast.
Not Considering Texture: A mix of textures keeps your platter interesting. Include creamy, crunchy, chewy, and soft elements to create an inviting experience.
Storage, Freezing & Reheating Tips
To keep your charcuterie board fresh:
– **Storage:** Place covered leftover items in the refrigerator. Foods like meats and cheeses can generally last 3-5 days, but freshness may vary based on specific ingredients.
– **Freezing:** Avoid freezing assembled boards. Instead, components such as cheeses and meats can be frozen separately and thawed for future use.
– **Reheating:** If you’re including warm items like baked mini desserts, reheat them in the oven briefly. Be cautious with high-moisture items that may not hold up well.
Frequently Asked Questions
Can I make the charcuterie board a day in advance? Absolutely! You can prepare your board several hours ahead of time. Cover it and refrigerate until you’re ready to serve. It’s ideal to add fresh fruits and mini desserts just before serving to avoid them becoming soggy.
What should I do with leftovers? Leftover meats, cheeses, and nuts can be stored in airtight containers in the fridge. Use them within a few days for the best flavor and texture. Mix leftover ingredients into salads or sandwiches for a tasty lunch.
How do I choose the right cheeses? Aim for a variety. Common pairings include soft, hard, aged, and blue cheeses. Think about flavor contrasts and balance. Consider dietary restrictions as well!
Can I include hot items on the board? While it’s generally recommended to keep items cold, you can serve adjustments, like warm dips, in small containers. Just be sure to account for temperature safety.
What’s the best way to arrange things for visual appeal? Utilize color contrasts and varied heights. Group similar items and scatter accents throughout for a visually pleasing layout. Experiment with shapes, like cutting cheese into various sizes or shapes for unique looks.
Conclusion: Spring charcuterie boards with mini desserts offer a delightful balance of savory and sweet flavors, bringing joy to any table. Whether hosting a gathering or simply treating yourself, explore your creativity with this easy-to-assemble option. Don’t hesitate to customize based on your preferences and seasonal ingredients available. Happy assembling!