Prep time: 20 minutes
Cook time: 25 minutes
Total time: 45 minutes
Servings: 12
When spring arrives, it brings a burst of fresh flavors and a desire for lighter, refreshing desserts. One treat that perfectly captures this essence is the alluring lemon bar. The first bite of a well-made lemon bar takes you on a delightful journey of sweet and tart notes that effortlessly dance together on your palate. This recipe not only offers a simple way to achieve that joyful experience but also allows you to impress friends and family without spending hours in the kitchen. Throughout this article, you will discover tips for the perfect lemon bars, variations to suit various dietary needs, and techniques to refine your kitchen skills.
What Is Spring Dessert: Lemon Bars?
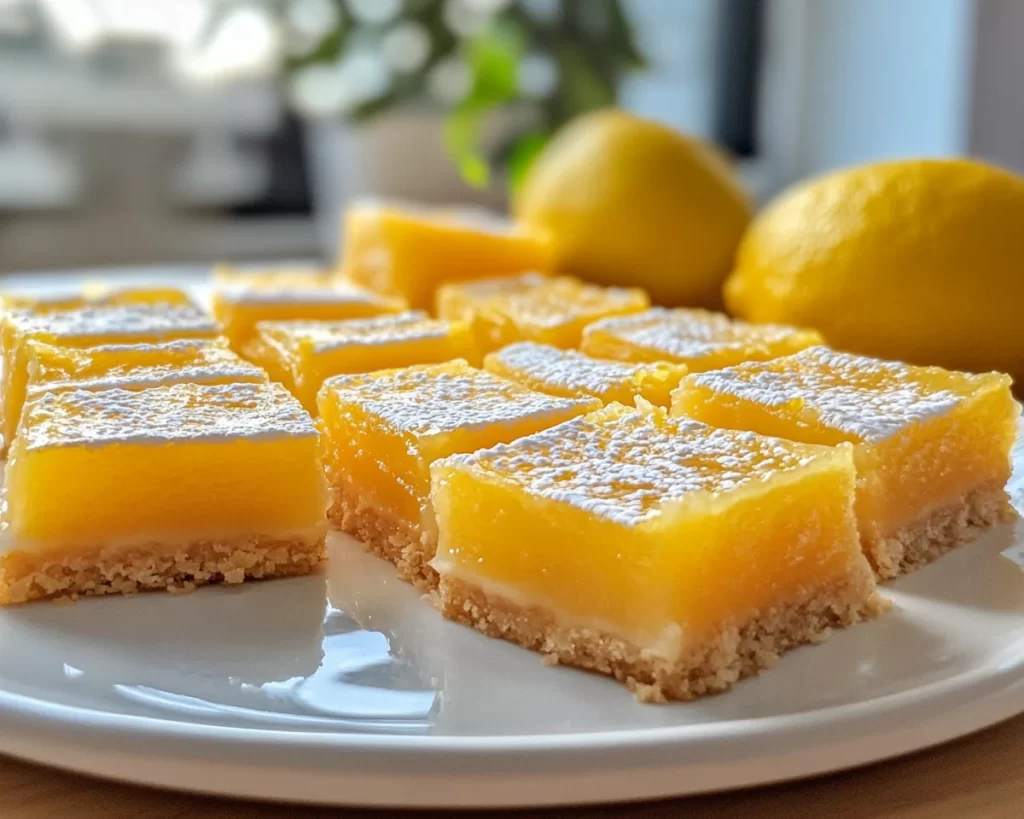
Lemon bars are a delightful dessert that combines a buttery crust with a smooth lemon custard filling, offering a perfect balance of sweetness and tartness. Originating in the United States, these bars often showcase bright, vibrant, fresh lemon flavors, making them a popular choice for spring gatherings, picnics, and family barbecues. The texture is key; the crust is firm yet crumbly, while the lemon filling is silky and refreshing. This tantalizing treat is enjoyed nationwide, with variations popping up to suit different tastes.
The essence of lemon bars lies in their simplicity and the brightness that fresh lemon juice and zest contribute to the dessert. The foundational elements—a buttery shortbread crust combined with a creamy lemon filling—come together harmoniously, resulting in a treat that is as beautiful as it is delicious. As the bars cool, they set nicely, allowing for easy slicing, making them ideal for serving at events where sharing is essential.
In addition to the satisfying taste, the process of making lemon bars is straightforward, making them accessible even for novice bakers. By the time you finish reading this, you will be well-equipped to create your own batch of lemon bars that will leave everyone craving more!
Why You’ll Love This
There are numerous reasons to fall in love with lemon bars. One of the main attractions is their delightful flavor profile. The marriage of tartness from the lemons with the sweetness of sugar creates a dessert that is remarkably refreshing, especially during warmer months. This contrast not only tantalizes the taste buds but also makes them a hit among guests who appreciate a layered flavor experience.
Another compelling reason is the ease of preparation. With a modest number of ingredients and simple steps, this recipe offers you the chance to create something spectacular without feeling overwhelmed. Even if you’re relatively new to baking, following the straightforward instructions will ensure you produce delicious results. Moreover, these bars are perfect for any occasion, whether you’re celebrating a birthday, honoring a holiday, or simply treating yourself and your loved ones to a sweet indulgence.
Cost-effectiveness is another notable advantage. Most of the ingredients required are staples in many kitchen pantries. When you think about how much you might spend on store-bought desserts, making lemon bars at home emerges as a far more economical option. Plus, they can be made ahead of time, meaning you can efficiently manage your baking schedule.
Ingredients You’ll Need
- Flour: 1 cup – All-purpose flour creates a sturdy crust. For a gluten-free version, consider using almond or coconut flour.
- Powdered Sugar: ½ cup – This will sweeten the crust and create a tender texture.
- Unsalted Butter: ½ cup (1 stick) – Butter adds flavor and richness. Make sure it’s softened for easy mixing.
- Eggs: 2 large – Eggs provide structure to the filling while enriching the flavor.
- Sugar: 1 cup – Granulated sugar balances the tartness from the lemon juice.
- Fresh Lemon Juice: ⅓ cup – Use fresh-squeezed lemon juice for the best taste; this is crucial for flavor.
- Lemon Zest: Zest of 1 lemon – Enhances the lemon flavor without adding extra tartness.
- Baking Powder: 1 teaspoon – Helps the filling rise slightly, creating a lovely texture.
- Salt: ¼ teaspoon – A pinch of salt enhances the sweetness and complements the flavors.
These ingredients work together harmoniously to deliver the classic flavor and texture we associate with lemon bars. Each component has been carefully chosen to ensure the success of your dessert.
How to Make
- Preheat your oven: Start by preheating your oven to 350°F (175°C). This step is essential in ensuring that your bars cook evenly. While the oven heats, gather your ingredients to streamline the process. Line an 8×8-inch baking dish with parchment paper, leaving some excess hanging over the sides for easy removal later.
- Prepare the crust: In a mixing bowl, cream together the softened butter and powdered sugar until light and fluffy, about 3–5 minutes. This is crucial; the creaming process incorporates air into the butter, resulting in a light and crispy crust. Gradually add the flour and salt, mixing until just combined. The mixture should resemble a coarse crumble.
- Press the crust: Transfer the crust mixture into the prepared baking pan. Use your fingers or a flat-bottomed glass to press the mixture firmly and evenly across the bottom. This step ensures that your bars will hold together nicely once baked. Bake the crust in the preheated oven for about 20 minutes or until lightly golden. Keep an eye on it, as baking times can vary based on individual ovens.
- Prepare the filling: While the crust bakes, whisk together the eggs, granulated sugar, fresh lemon juice, lemon zest, baking powder, and a pinch of salt in a large bowl until smooth. Make sure that no lumps remain for a silky filling. This mixture should be vibrant yellow and fragrant, offering an irresistible aroma that fills your kitchen.
- Add the filling to the crust: Once the crust has finished baking, carefully remove it from the oven. Pour the lemon filling directly over the hot crust, ensuring even coverage. The hot crust will help the filling set nicely as it bakes.
- Bake again: Return the dish to the oven and bake for an additional 20–25 minutes, or until the filling is set but still slightly jiggly in the center. A toothpick should come out clean or with a few moist crumbs attached when inserted into the filling. This step is critical because overbaking can result in a dry texture.
- Cool and cut: Allow the lemon bars to cool in the pan for about 30 minutes, then refrigerate for at least 2 hours before slicing. This cooling time ensures that they set properly. Use the excess parchment paper to lift the bars out of the pan, then slice them into squares or rectangles.
- Dust with powdered sugar: Before serving, sift powdered sugar on top for a finishing touch. This adds not only sweetness but also a beautiful presentation, elevating the appearance of your homemade lemon bars.
By following these detailed steps, you’ll create perfectly balanced lemon bars that highlight the flavors of spring. Remember, patience is key. It may take a bit of time, but the results are undeniably worth it.
Variations & Substitutions
Lemon Blueberry Bars
For those looking to take their lemon bars to the next level, adding blueberries creates a delightful twist. You can mix in about 1 cup of fresh or frozen blueberries into the lemon filling before baking. This addition not only enhances the flavor with a burst of sweetness but also offers a beautiful color contrast. Blueberries are a fantastic option for those seeking a fruitier variation, especially during the summer months when blueberries are in season.
Gluten-Free Lemon Bars
If you or someone you’re serving has dietary restrictions, these lemon bars can be made gluten-free without sacrificing taste or texture. Simply substitute all-purpose flour with a 1:1 gluten-free blend that includes xanthan gum. Follow the same steps in the recipe, and you won’t taste the difference; they’ll be just as zesty and delicious.
Lavender Lemon Bars
Adding a hint of dried lavender to your lemon bars enhances the flavor with floral notes. Mix in about 1–2 teaspoons of culinary-grade dried lavender buds into the filling, and switch out the lemon zest for a tablespoon of lavender honey. This substitution creates a uniquely sophisticated treat—perfect for special occasions or a lovely afternoon tea gathering.
Meringue Topping
For an elegant finish, why not top your lemon bars with a **light meringue**? Begin by whipping egg whites until soft peaks form, then gradually add granulated sugar while continuing to beat until stiff peaks develop. Pipe or spread the meringue over the cooled lemon filling and bake at 350°F (175°C) for about 10–15 minutes, or until the meringue is lightly golden. The result is a light and airy layer that contrasts beautifully with the dense lemon filling.
Common Mistakes to Avoid
While making lemon bars may seem easy, there are common pitfalls. One major mistake is overbeating the eggs when preparing the filling. This can introduce too much air, leading to a spongy texture instead of the dense, creamy filling characteristic of great lemon bars. Instead, whisk gently until just combined to maintain the silky texture.
Another concern is not allowing the bars to cool properly before slicing. Rushing this step can lead to messy cuts and a filling that hasn’t set fully. Patience here pays off, as cooling helps achieve perfectly neat slices.
Using bottled lemon juice instead of fresh lemon juice is also a frequent error. Bottled juice lacks the vibrant flavor and aroma of freshly squeezed juice, greatly impacting the outcome of your dessert. Always opt for fresh lemons for the best results.
Lastly, overbaking can lead to a dry filling. Keep a close eye during the final baking phase; it should be set with a slight jiggle at the center for the ideal texture. Trust your instincts and take the bars out when they look just right.
Storage, Freezing & Reheating Tips
To maintain the freshness of your lemon bars, it’s best to store them in an airtight container in the refrigerator. They will stay fresh for up to a week, making them an excellent make-ahead dessert for gatherings. If you find yourself with leftovers, felt free to freeze the bars for extended storage.
To freeze, wrap individual bars in plastic wrap and then place them in a freezer-safe container. They can be frozen for up to three months. When you’re ready to indulge again, simply remove the bars from the freezer and allow them to thaw in the refrigerator overnight.
If you wish to reheat, a quick trip to the oven at 300°F (150°C) for about 5–10 minutes should do the trick without overcooking the filling. Just keep an eye on them to ensure they warm through without losing their delightful texture.
Frequently Asked Questions
Can I make lemon bars ahead of time?
Absolutely! Lemon bars are perfect for making ahead of time. In fact, they taste even better after they have had a chance to chill in the refrigerator for a few hours or overnight. This allows the flavors to meld and the filling to set up nicely. Just remember to store them properly in the fridge, using an airtight container.
What’s the best way to slice lemon bars?
To achieve clean cuts, it’s best to use a sharp knife. If you want perfectly square bars, dip the knife in hot water and dry it with a kitchen towel before slicing. This technique helps ensure a cleaner edge, as the warmth will prevent the filling from sticking to the knife.
Can I use key limes instead of lemons?
Yes, you can substitute key limes for lemons to create a unique twist on this classic dessert. Key lime bars have a distinct flavor that stands out, offering a slightly more tart experience. Just use the same quantity of juice and zest.
What should I do if my filling doesn’t set?
If your filling doesn’t set, it may indicate that it needed more cooking time. It’s essential to bake until the edges are firm but the center still has a slight jiggle. If you find that it hasn’t set at all after cooling, you can return it to the oven for a little while longer and monitor closely.
Are lemon bars gluten-free?
Yes, lemon bars can easily be made gluten-free by using an appropriate gluten-free flour blend. Many brands now offer 1:1 blends that work well as a direct replacement for regular flour, ensuring that everyone can enjoy this delightful treat without concern.
Conclusion:
The beauty of lemon bars lies in their simple yet elegant flavor profile, refreshing sweetness, and buttery crust. Whether you’re making them for a family gathering or as a special treat for yourself, this recipe guarantees satisfaction with every bite. Don’t hesitate to experiment with variations to find your perfect combination. Remember, the world of baking allows for creativity—mix, match, and make it your own! Treat yourself to the joy of homemade lemon bars, and feel free to share this delightful recipe with friends and family for smiles all around.


