Prep time: 20 minutes
Cook time: 12 minutes
Total time: 32 minutes
Servings: 24 cookies
There’s something irresistibly magical about St. Patrick’s Day, when green hues, rich traditions, and delightful flavors converge! And what better way to celebrate this joyous occasion than with a batch of fresh-baked St. Patrick’s Day Mint Chocolate Chip Cookies? These cookies offer a mouthwatering treat filled with the refreshing taste of mint and the indulgent richness of chocolate, perfectly capturing the essence of the holiday. Whether you are hosting a festive gathering or looking for a fun baking activity with your kids, these cookies guarantee to bring smiles to faces young and old alike.
Imagine pulling a warm tray from the oven, the sweet aroma of mint and chocolate wafting through your kitchen. The moment you take a bite, you’ll feel the perfect balance of minty freshness and rich chocolate melting in your mouth; it’s pure bliss. In this article, you will not only learn how to make these delightful cookies but also discover variations to customize them to your taste, tips to ensure perfect cookies every time, and answers to common questions. So, get ready to embark on a delightful culinary adventure that pays homage to the beloved flavors of St. Patrick’s Day!
What Is St Patrick’s Day Mint Chocolate Chip Cookies?
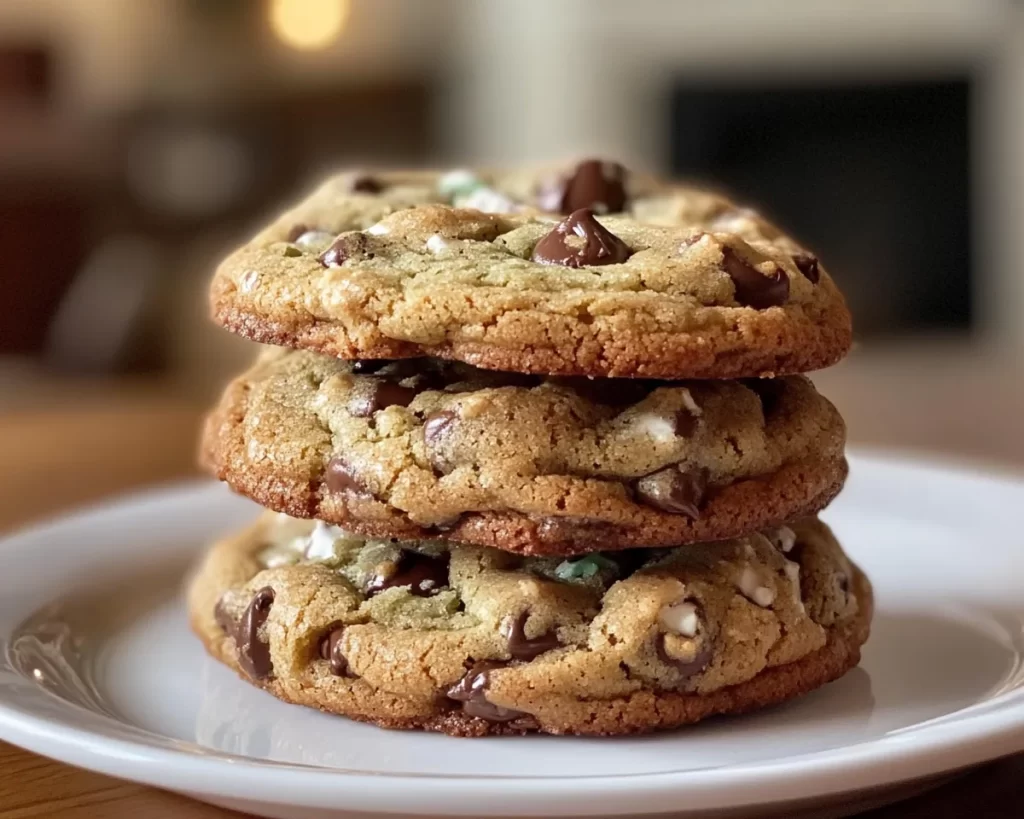
St. Patrick’s Day Mint Chocolate Chip Cookies are a magical blend of tradition and flavor. These cookies are typically made with a buttery dough infused with vibrant green mint flavoring, creating a festive treat that stands out during the holiday. Initially inspired by classic chocolate chip cookies, this variation adds a minty twist, elevating the flavor profile and making it perfect for the season. The cheery green color not only excites the eyes but also complements the rich chocolate chips speckled throughout the dough.
The texture of these cookies is another highlight; they are soft and chewy on the inside with a slight crunch on the edges. As you bite into one, the delightful mix of textures creates a satisfying experience. You’ll find that the mintiness balances beautifully with the bittersweet chocolate, crafting a harmonious blend that dances on your palate. The cookies are not just about taste; they also bring a sense of joy and festivity, making them an essential part of any St. Patrick’s Day celebration. So whether you’re baking with family, enjoying them fresh out of the oven, or sharing them with friends, these cookies are sure to become a beloved addition to your holiday traditions.
Why You’ll Love This
You’ll absolutely love these St. Patrick’s Day Mint Chocolate Chip Cookies for multiple reasons. Firstly, the flavor combination is simply divine; the refreshing mint cuts through the sweetness of the chocolate, creating a balanced treat perfect for a variety of palates. Plus, they’re incredibly easy to whip up, making them suitable for even the busiest of schedules. In just over thirty minutes, you can have a warm batch ready to share—or savored solo if you prefer to keep them all to yourself!
Additionally, they are cost-effective, requiring simple ingredients that you might already have in your pantry. No need for fancy gadgets or exotic components; this recipe emphasizes accessible, everyday ingredients. And if you’re conscious about dietary choices, these cookies can easily be adapted to different dietary needs such as gluten-free or dairy-free options without compromising flavor. By offering multiple variations and substitutions, you ensure that everyone can enjoy a taste of St. Patrick’s Day regardless of their dietary restrictions.
Lastly, making these cookies can be a lovely bonding activity with family or friends. Picture gathering in the kitchen, measuring ingredients, and sharing laughs as you mix and bake. It creates cozy memories that last much longer than the cookies themselves. So, whether you’re a seasoned baker or just starting, you and your loved ones will cherish this culinary experience.
Ingredients You’ll Need
- Flour: All-purpose flour is the base of your cookie dough. It gives structure and stability. If you’re looking for a gluten-free alternative, consider using almond flour or a gluten-free all-purpose blend.
- Baking soda: This ingredient helps your cookies rise, giving them that nice, soft texture. Make sure your baking soda is fresh for the best results.
- Salt: A tiny pinch of salt enhances the sweetness and balances all the flavors in your cookies.
- Butter: Unsalted butter adds richness and helps to create a tender cookie. Ensure it’s at room temperature for easy mixing. You can also substitute with coconut oil or vegan butter for a dairy-free option.
- Sugar: A combination of granulated and brown sugar is used. Granulated sugar contributes to crispness, while brown sugar adds moisture and a rich flavor.
- Mint extract: This is what gives the cookies that delightful mint flavor. Always opt for pure mint extract for the best results; artificial flavors can be overpowering.
- Chocolate chips: Semi-sweet chocolate chips are the classic choice, but feel free to mix in dark chocolate or white chocolate chips for variety.
- Green food coloring: This optional ingredient is mainly for aesthetics. If you want a pop of color without it, that’s perfectly fine!
- Eggs: Large eggs bind the ingredients together for a cohesive dough. If you’re looking for an egg-free option, consider using a flaxseed meal substitute.
Each of these ingredients plays a crucial role in the overall texture and flavor of the cookies. Understanding their purpose will help you feel more confident during the baking process, whether you are experimenting or sticking to the classic recipe.
How to Make
- Preheat your oven: Start by preheating your oven to 350°F (175°C). This step is crucial as it ensures that your cookies bake evenly. While the oven is heating, you can prepare your cookie dough.
- Mix dry ingredients: In a medium bowl, whisk together flour, baking soda, and salt. This helps to evenly distribute the baking soda and prevent any clumping, which is crucial for a successful cookie dough.
- Cream butter and sugars: In a large mixing bowl, combine the softened unsalted butter, granulated sugar, and brown sugar. Using an electric mixer, cream these ingredients together on medium speed until the mixture is light and fluffy. This typically takes about 2-3 minutes. The creaming process is essential for incorporating air into the dough, which aids in achieving a tender cookie.
- Add the egg and mint extract: Once your butter and sugars are well combined, add in the egg and mint extract. Beat on medium speed until fully incorporated. The egg provides moisture and binds the dough, while the mint extract infuses the mixture with that refreshing flavor.
- Combine dry and wet ingredients: Gradually mix in the dry ingredients you prepared earlier. Start at a low speed to avoid flour clouds in your kitchen, then gradually increase. Make sure everything is well combined, but do not overmix.
- Add chocolate chips: Gently fold in the chocolate chips using a spatula. This will ensure that the chips are evenly distributed throughout the dough while maintaining the nice, airy texture of your cookie base.
- Scoop the dough: Using a cookie scoop or tablespoon, drop rounded balls of dough onto lined baking sheets. Ensure you leave enough space between each cookie, as they will spread while baking.
- Bake the cookies: Place the baking sheets in the preheated oven and bake for 10-12 minutes, or until the edges are lightly golden but the centers are still soft. This underbaking is crucial for that perfect chewy texture.
- Cool and enjoy: Remove the trays from the oven and let the cookies cool on the sheet for about five minutes before transferring them to a wire rack. Enjoy your cookies warm or at room temperature, and watch them disappear!
These steps not only guide you through the process but also offer tips to ensure that your cookies perform beautifully. You’ll quickly develop confidence in your baking abilities as you follow these detailed instructions!
Variations & Substitutions
Chocolate Mint Swirl: For an exciting twist on your mint chocolate chip cookies, consider adding a swirl of melted chocolate. Simply melt some semi-sweet chocolate and gently streak it through your cookie dough before baking. This creates a marbled effect and a double dose of chocolate flavor, making every bite even more divine.
Gluten-Free Option: Making these cookies gluten-free is easy! Simply substitute all-purpose flour with a gluten-free all-purpose blend that contains xanthan gum. This will help maintain the right texture and structure of your cookies without sacrificing flavor. Be cautious while adjusting the baking time, as gluten-free dough can behave differently than regular dough.
Peppermint Patty Stuffing: For a fun surprise inside, you can stuff your cookies with mini peppermint patties. Simply take a spoonful of dough, place a peppermint patty in the center, and cover it with more dough. This will create gooey, melted pockets of minty goodness that your friends and family will love.
Vegan Version: You can easily make these cookies vegan by substituting ground flaxseed with water for the eggs and using vegan butter instead of regular butter. These ingredients work remarkably well, allowing you to enjoy the same lovely flavors while catering to plant-based diets.
Mint Chip Ice Cream Sandwiches: Take your cookies to the next level by sandwiching a scoop of mint chocolate chip ice cream between two cookies. This lively dessert is perfect for warm spring days and elevates your St. Patrick’s Day celebrations into something extraordinary!
Each of these variations offers unique flavors and fun twists, making this recipe versatile enough for everyone’s preference. Feel free to mix and match according to what you have available or your family’s taste!
Common Mistakes to Avoid
One common mistake is forgetting to properly cream your butter and sugar together. Skipping this step can lead to dense cookies because the mixture needs to incorporate air to give you a light texture. Always make sure to beat these ingredients until fluffy!
Another mistake to avoid is overbaking the cookies. Keeping them in the oven too long can cause them to turn hard and crunchy instead of remaining soft and chewy. Remember, they continue to cook slightly after you’ve pulled them out of the oven, so take them out when they’re still slightly underbaked.
Incorrectly measuring your ingredients can also lead to problems. Always use a scale for accuracy if possible, or make sure you’re spooning flour into your measuring cup rather than packing it down, which can lead to excess flour and altered dough consistency.
Lastly, ignore food coloring if you want to maintain a natural look for your cookies; many people often overdo it, resulting in an off-putting appearance. A few drops are sufficient to achieve that festive green without overpowering the original flavor profile.
Storage, Freezing & Reheating Tips
To store your St. Patrick’s Day Mint Chocolate Chip Cookies, keep them in an airtight container at room temperature. They will typically stay fresh for up to a week, making them perfect for spontaneous treats throughout the week. If you’re planning to keep them longer, consider freezing the cookies.
To freeze, lay the cookies in a single layer on a baking sheet and place them in the freezer for about an hour. Once they’re frozen solid, transfer them to a zip-top freezer bag and store for up to three months. When you want to enjoy one, just take it out and let it come to room temperature, or reheat briefly in the microwave for a warm cookie that tastes freshly baked!
When it comes to food safety, always ensure your cookies are completely cooled before storing them. This tip helps avoid excess moisture that could lead to soggy cookies. Keeping them in a cool, dry spot will also assist in maintaining their classic chewy texture.
Frequently Asked Questions
Can I use chocolate syrup instead of chocolate chips? Absolutely! If you want to incorporate a richer chocolate flavor, you can drizzle chocolate syrup into the dough. However, keep in mind that this may change the consistency. Be sure to adjust the dry ingredients accordingly to maintain a good dough texture.
What makes the cookies green? The vibrant green color comes from the addition of green food coloring. While it’s optional, it certainly adds a festive touch perfect for St. Patrick’s Day. Make sure not to add too much; a few drops will do the trick without overpowering the mint flavor.
Can I use fresh mint instead of extract? Yes, you can! Fresh mint leaves can be finely chopped and infused into the butter as you melt it. This may create a more subtle mint flavor compared to extract and can brighten the overall taste of your cookies.
What should I do if my dough is too crumbly? If you notice your dough is crumbly and doesn’t hold together, a simple fix is to add a tablespoon of milk, one teaspoon at a time, until the desired consistency is reached. This can help bind the ingredients without affecting the flavor.
Can I double the recipe? If so, are there any adjustments needed? Yes, you can definitely double the recipe without needing any major adjustments. Just ensure that you have ample mixing space because the larger batch may be harder to mix in a smaller bowl. Keep an eye on the baking time, as larger batches might require slightly longer to bake correctly.
Conclusion:
The St. Patrick’s Day Mint Chocolate Chip Cookies are not just a treat; they are a celebration of flavor and holiday spirit. With each bite, you experience a perfect match of minty freshness and rich chocolate goodness that will keep everyone coming back for more. Whether you stick to the classic recipe or experiment with your own variations, these cookies are sure to become a cherished favorite among your family and friends. So gather your ingredients, preheat that oven, and start concocting these delightful cookies in your kitchen today. And as you share them with loved ones, from cookie jar to heart, watch the smiles blossom! Enjoy every delicious moment of this festive baking experience!


