Prep time: 20 minutes
Cook time: 0 minutes
Total time: 4 hours and 20 minutes (including chilling)
Servings: 12
St. Patrick’s Day is a celebration filled with joy, laughter, and an explosion of delightful *green* and *gold* decorations. This year, why not elevate your festivities with an incredible dessert that captures the essence of the holiday? Introducing the St. Patrick’s Day Mint Chocolate Icebox Cake! If you’re looking for a show-stopping recipe that will keep your guests mesmerized and craving more, this is it. Imagine layers of rich chocolate and refreshing mint coming together to create a cake that is not only beautiful but also incredibly easy to make.
This recipe stands out for *several reasons*: it’s simple yet dramatic, it combines fantastic flavors, and it’s perfect for both novices and seasoned cooks alike. Additionally, it doesn’t require any baking, making it an ideal option for busy parents or individuals who want to create something special without spending hours in the kitchen. You will learn how to make this stunning icebox cake, what makes it unique, and some amazing variations to suit your taste.
What Is St Patrick’s Day Mint Chocolate Icebox Cake?
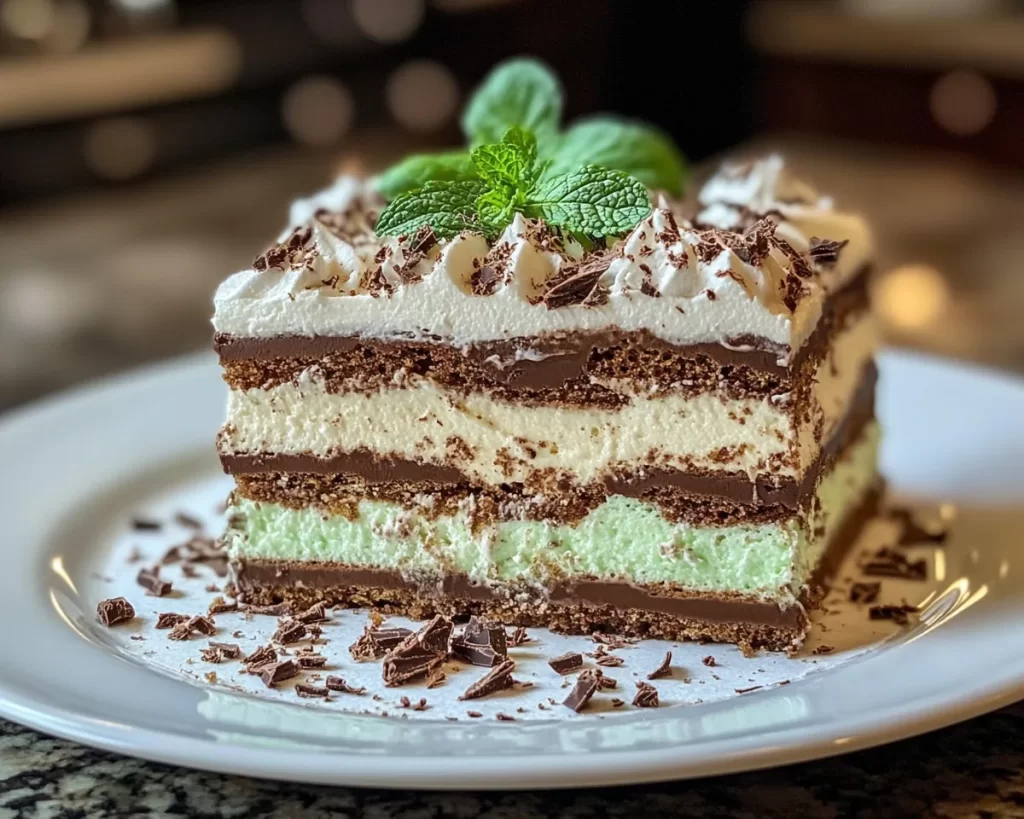
Mint chocolate icebox cake is a delightful combination of textures and flavors. Originating from the *classic icebox cake recipes* that date back to the early 1900s, this dessert features layers of cookies and a creamy filling, which *softens into lusciousness* as it chills in the refrigerator. The key flavor in this version is, of course, the combination of *mint* and *chocolate*, turning a simple dessert into a celebration of St. Patrick’s Day.
The texture of this icebox cake is quite captivating. The *crunchy cookies* provide a satisfying contrast to the *silky-smooth filling*. Each bite reveals the lightness of the cream balanced perfectly with the rich chocolate and refreshing mint. This cake is not only visually appealing with its alluring green accents and chocolate drizzle but is also oozing with memories of childhood and festive celebrations. The minty aroma wafting through your kitchen is sure to evoke warmth and joy, making it the perfect dessert to share with friends and family.
Why You’ll Love This
One of the main reasons to fall in love with this recipe is its incredible taste. The fusion of *mint* and *chocolate* is universally loved, blending sweetness with a refreshing zing that sets this dessert apart. Moreover, the ease of preparation makes it accessible even for beginner cooks. You don’t need to be a pastry chef to whip together this delightful cake; if you can mix ingredients, you’re halfway there!
Cost-effectiveness is another excellent reason to embrace this recipe. Most of the ingredients are staples that you may already have in your kitchen or can easily find at your local grocery store. You’ll get a dessert that looks and tastes gourmet without breaking the bank. Additionally, this cake offers versatility; it can be made ahead of time, leaving you free to enjoy the festivities worry-free.
Common mistakes often arise from a misunderstanding of layering and chilling. Many people worry that the cake won’t hold together, but as long as you allow ample chilling time, you’ll have a marvelous structure. If you think icebox cakes are simple and uninspiring, prepare to be amazed at how easy it is to create a stunning centerpiece for any celebration.
Ingredients You’ll Need
- Chocolate wafer cookies: These serve as the base of your cake and bring a rich chocolate flavor. You can substitute with any chocolate biscuit if needed.
- Heavy cream: Whipping cream is essential for that light, airy texture in the filling. Ensure it’s cold for optimal whipping.
- Sugar: A sweet touch to balance out the bitterness of chocolate. You can use granulated sugar or powdered sugar.
- Mint extract: This brings the delightful aroma and flavor of mint, essential for the St. Patrick’s Day twist. Use peppermint oil for a more potent flavor.
- Green food coloring: This is optional but adds a festive hue. Feel free to choose natural coloring if you prefer.
- Chocolate syrup: Perfect for drizzling on top or between layers; it enhances both flavor and presentation.
- Fresh mint leaves: For garnish, they add a beautiful touch, making the dessert visually appealing.
How to Make
1. **Prepare the Cream Filling**: Start by pouring the heavy cream into a mixing bowl. It’s essential to ensure the cream is cold, as this helps achieve the best whipping results. Using either a hand mixer or a stand mixer with a whisk attachment, beat the cream on medium speed until it starts to thicken. Gradually add sugar, mint extract, and a few drops of green food coloring. Continue whipping until stiff peaks form. You want the filling to be luscious yet maintain its structure for layering. This will create the light, airy texture that makes an icebox cake so enjoyable.
2. **Layering the Cake**: Begin by taking a 9×13 inch baking dish. Dip each chocolate wafer cookie quickly into some cold water—just a second or two to moisten them without soaking. This will help soften the cookies as they sit, creating that cake-like texture. Start layering the cookies at the bottom of the baking dish, creating an even layer.
3. **Add the First Layer of Cream**: Spoon a portion of the whipped cream mixture over the first layer of cookies, spreading it evenly. Using a spatula, ensure the cream fills the gaps between the cookies. You want a *generous layer* of cream to create a luscious contrast with the chocolate cookies. Repeat this process until you’ve built four or five layers of cookies and cream. The top layer should be cream, ensuring a beautiful finish.
4. **Chill the Cake**: Once your final layer is complete, cover the dish with plastic wrap. Refrigerate the cake for at least four hours, but overnight is ideal. This chilling time is essential; it allows the cookies to absorb the moisture from the cream, transforming them into a soft and decadent layer.
5. **Serve and Garnish**: When you’re ready to serve, remove the cake from the refrigerator. You can drizzle with chocolate syrup for an extra indulgent touch. Slice into squares or rectangles, and consider garnishing each slice with fresh mint leaves for a lovely presentation. The contrast of colors will delight your guests and create a dessert that’s almost too pretty to eat.
Variations & Substitutions
Chocolate Mint Icebox Cake: For those who crave a richer chocolate flavor, you can substitute the chocolate wafer cookies with brownies. Just cut the brownies into manageable squares and layer them in the same manner. This variation will provide a denser texture but still pairs fabulously with the mint cream.
Gluten-Free Option: If you have gluten intolerance, use gluten-free chocolate cookies, which are widely available and often just as delicious. Maintain the rest of the ingredients the same, ensuring no cross-contamination during preparation.
Healthier Version: Consider using a mix of Greek yogurt and whipped cream in the filling for a lighter take. It retains that creamy texture while reducing fats. A sprinkle of cocoa in the yogurt can also elevate the chocolate flavor without extra calories.
Vegan Option: Substitute heavy cream with coconut cream and sweeten with maple syrup or agave nectar. For cookies, look for vegan chocolate cookies; this way, anyone can enjoy this festive treat, regardless of dietary restrictions.
Different Flavor Profiles: Want to switch it up? Try using orange extract instead of mint for a *chocolate orange icebox cake* or add almond extract for a different twist. Experimenting with flavors can lead to exciting new traditions.
Common Mistakes to Avoid
A common pitfall occurs when over-whipping the cream; this can lead to a grainy texture and may even turn it into butter. Always stop whipping as soon as you reach stiff peaks. Another mistake is not allowing for enough chilling time. Remember, the longer the cake sits, the better the flavor and texture. If you slice the cake too early, the layers may fall apart.
Ensure to use a baking dish that’s large enough to accommodate the layers. A cramped space might lead to uneven distribution of cream and cookies. Maintaining the right proportions in each layer is crucial for a balanced dessert. Lastly, always remember to keep your toppings and drizzles simple; they should enhance the cake, not overpower it.
Storage, Freezing & Reheating Tips
This St. Patrick’s Day Mint Chocolate Icebox Cake can be stored in the refrigerator for up to four days, making it a perfect make-ahead dessert for your celebrations. Ideally, it should remain covered with plastic wrap or transferred to an airtight container to maintain its freshness.
Freezing is also an option, but beware that the texture may alter slightly after thawing. If you choose to freeze it, wrap the cake tightly in plastic wrap and then in aluminum foil for extra protection. When you’re ready to serve, allow it to thaw in the fridge overnight rather than at room temperature to retain its texture.
If you have leftovers, slice them into individual portions and store in an airtight container. Use parchment paper between slices to prevent them from sticking together. This makes grabbing a sweet treat throughout the week simple and convenient.
Frequently Asked Questions
Can I make this icebox cake ahead of time?
Absolutely! In fact, making it a day ahead often enhances the flavor as the ingredients meld together. Just ensure you allow enough time for it to chill.
What if I don’t have mint extract?
If mint extract isn’t available, you can use fresh mint. Just finely chop it and incorporate it into the cream. However, start with a small amount, as fresh mint can be more potent.
Can this recipe be made gluten-free?
Yes! By using gluten-free chocolate cookies, this icebox cake can cater to those with gluten sensitivities without sacrificing flavor.
How long should I chill the cake?
For the best results, chilling the cake for at least four hours is essential, but overnight is recommended. This ensures the cookies soften adequately.
Can I substitute heavy cream with something lighter?
You can use whipped coconut cream or a mixture of whipped yogurt and cream, but this may slightly alter the texture. It’s a delightful way to enjoy the cake with fewer calories.
Conclusion:
This delightful St. Patrick’s Day Mint Chocolate Icebox Cake is sure to be a hit at your celebrations. Its enchanting flavors of mint and chocolate create a dessert that’s easy to make and irresistibly scrumptious. Don’t hesitate to customize the recipe to suit your preferences, whether by adding different flavors or trying out variations that accommodate dietary needs. Embrace the spirit of the holiday by sharing this cake with family and friends, and watch as it brings smiles to everyone’s faces. Whether you’re a seasoned baker or a curious beginner, this recipe will inspire you to create something truly special. So, roll up your sleeves and dive into the world of decadent desserts!


