Prep time: 20 minutes
Cook time: 25 minutes
Total time: 45 minutes
Servings: 12
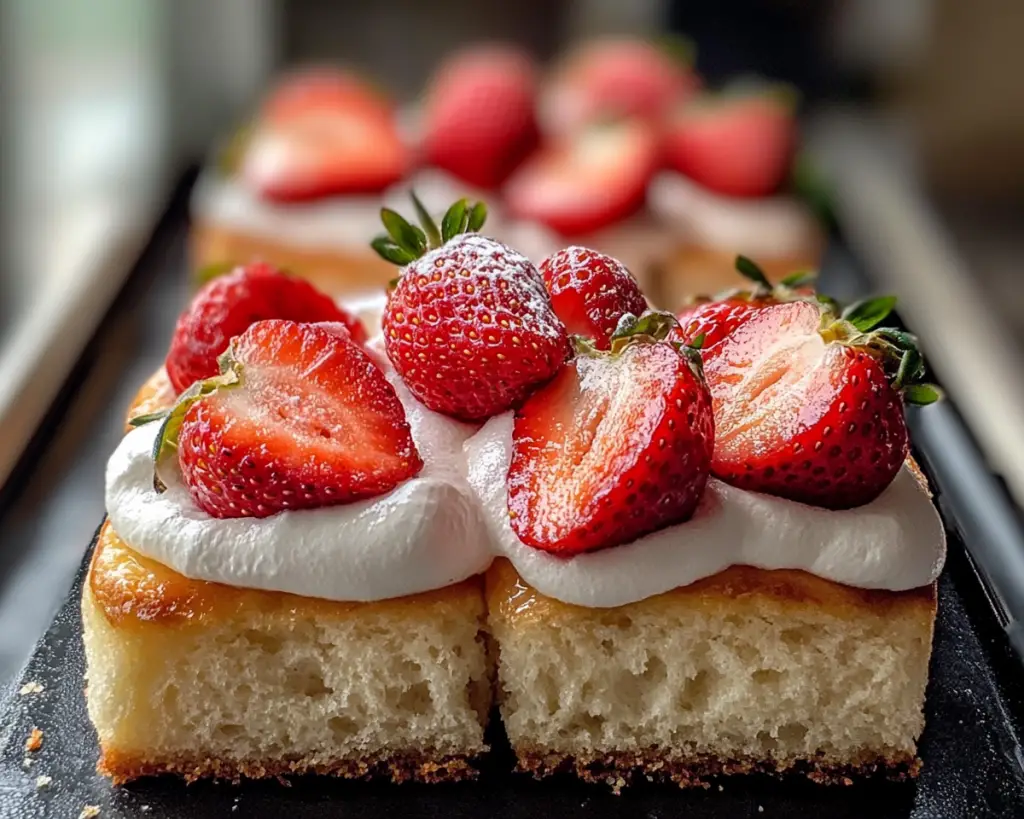
Indulging in a warm, sweet treat can often evoke comforting memories, like gathering around the kitchen table for special moments. Strawberry buns, or delightful strawberry desserts, are that exact treat that combines nostalgia with rich flavors. Imagine biting into a soft, fluffy bun filled with luscious, juicy strawberries — it’s a dream come true for dessert lovers.
This recipe brings together natural sweetness and sumptuous textures, making each bite a little piece of bliss. You can expect to learn all about crafting the perfect strawberry bun, tips for maximizing flavor, and even some fun variations to cater to everyone’s preferences.
What Is Strawberry Buns or Strawberry Desserts?
Strawberry buns are deliciously soft pastries, often filled with fresh strawberries or strawberry jam. Originating from various cultures, these treats can frequently be found in bakeries and homes alike, celebrated for their delightful balance of sweetness and texture. The outer layer is typically a fluffy bread or pastry shell that perfectly contrasts the juicy, vibrant filling.
This recipe calls for a light dough enriched with just the right amount of sugar and butter to result in a tender crumb. When baked, the strawberries inside create a warm, gooey filling that seeps into the outer crust, adding another layer of flavor that is deeply satisfying. The delightful combination of taste and texture makes strawberry buns an irresistible dessert option, perfect for parties, family gatherings, or even a casual afternoon snack.
Moreover, the versatility of strawberry desserts allows for many variations and adjustments, accommodating various dietary preferences. Each bite is not just about taste; it’s about the memories created in the kitchen and the joy of sharing a dessert made with love.
Why You’ll Love This
Strawberry buns are not only delicious but also easy to make, making them a favorite for busy parents or beginners in the kitchen. The simplicity of the recipe allows you to whip up a batch with minimal effort while still impressing guests with bakery-worthy treats. You won’t have to break the bank either; the ingredient list is budget-friendly, and strawberries are often in season, making them an affordable fruit choice.
Another appealing aspect is the health benefits associated with the key ingredient—strawberries. These juicy berries are rich in vitamins, fiber, and antioxidants, so enjoying a strawberry bun feels justifiable. Moreover, you can easily customize the recipe based on dietary needs or preferences, whether you want to make it gluten-free or dairy-free, ensuring that everyone at your table can enjoy them.
There’s a common misconception that pastries like these are complicated but fear not! With this straightforward recipe, you will be well on your way to mastering the art of baking strawberry buns. Similar to traditional cinnamon rolls but completely unique in flavor, these strawberry delights are bound to become a staple dessert in your home.
Ingredients You’ll Need
- All-purpose flour: 3 cups
This is the base of your buns and provides structure. You can substitute with gluten-free flour if needed, but be sure to check the blend for rising properties.
- Active dry yeast: 2 teaspoons
This ingredient is essential for making the buns rise and giving them a light texture. Be sure to proof it in warm water to activate it correctly.
- Sugar: 1/4 cup
This helps not just with sweetness but also with browning during baking. You could replace it with honey or agave syrup if desired.
- Salt: 1 teaspoon
Though it may seem minor, salt enhances the overall flavor. Avoid omitting or underestimating this ingredient.
- Butter: 1/4 cup, melted
Butter adds richness and moisture to the dough. You can use coconut oil or margarine for a dairy-free alternative.
- Milk: 1 cup, warmed
Warm milk helps to enhance the yeast activation; alternatively, choose almond or oat milk if you’re going non-dairy.
- Fresh strawberries: 2 cups, chopped
These are the star of the show, giving a sweet and fruity filling. Feel free to substitute with strawberry jam if fresh ones are out of season.
- Egg: 1, for egg wash
This gives the buns a golden-brown finish. You can skip this step if you’re avoiding eggs altogether.
How to Make
- Start by preparing your ingredients. In a small bowl, dissolve 2 teaspoons of active dry yeast in 1 cup of warm milk. Let it sit for about 5-10 minutes until it becomes frothy. This step is crucial as it activates the yeast, ensuring your buns rise beautifully.
- In a large mixing bowl, combine 3 cups of all-purpose flour, 1/4 cup of sugar, and 1 teaspoon of salt. Mix these dry ingredients thoroughly to ensure an even distribution of flavors throughout your dough.
- Create a well in the center of the flour mixture and pour in the yeast mixture along with 1/4 cup of melted butter. Mix until a shaggy dough starts to form. You may need to use your hands to bring it all together, ensuring there are no dry pockets of flour.
- Once it is well mixed, transfer the dough to a floured surface and knead it for about 10 minutes. The dough should become smooth and elastic. If it’s too sticky, you can sprinkle a little more flour as you knead.
- Once kneaded, place the dough in a lightly greased bowl, cover it with a clean cloth, and let it rise in a warm place for about 1 hour or until it doubles in size. This is the most exciting part as you can visualize how airy and fluffy your buns will be!
- While the dough is rising, prepare your strawberry filling. Chop 2 cups of fresh strawberries into small pieces. You can mix in a bit of sugar if they are not sweet enough—this will ensure that your filling is perfectly juicy.
- After the dough has risen, punch it down gently to release air bubbles. Roll it out on a floured surface into a rectangle that is about 1/2 inch thick. Evenly spread the strawberry filling on top, ensuring you get strawberries in every bite.
- Starting from one of the long ends, carefully roll the dough into a log shape. Once rolled, slice the log into equal pieces, about 1 inch thick. You will create luscious pinwheel shapes ready to be baked.
- Place the cut pieces in a greased baking dish, leaving space between each for further rising. Cover with a cloth again and let them rise for an additional 30 minutes.
- Preheat your oven to 350°F (175°C). Just before baking, brush the tops of the buns with an egg wash made from a beaten egg. This will guarantee a beautiful golden-brown color.
- Bake for about 20-25 minutes or until golden and cooked through. The aroma will fill your kitchen, tempting everyone who walks by. Once done, allow them to cool for a few minutes before serving. Enjoy them warm for the best experience!
Variations & Substitutions
Gluten-Free Strawberry Buns: You can easily make these strawberry buns gluten-free by substituting the all-purpose flour with a high-quality gluten-free flour blend. Many blends contain xanthan gum, which helps mimic the elasticity of gluten. Remember that the texture might be slightly different, but you’ll still get a delicious treat!
Dairy-Free Option: It’s simple! Replace butter with coconut oil or a light vegetable oil. For milk, almond milk or oat milk works just as well and doesn’t change the flavor significantly. This variation makes your strawberry buns suitable for lactose-intolerant individuals.
Strawberry Jam Buns: If fresh strawberries are out of season or unavailable, feel free to use strawberry jam instead. Spread it liberally over the rolled-out dough as your filling. This will add a rich flavor, but do monitor the sugar content as many jams are sweetened.
Chocolate Chip Strawberry Buns: For chocolate lovers, consider sprinkling chocolate chips onto the strawberry filling before rolling up the dough. The combination of strawberries and chocolate is a classic flavor pairing that feels indulgent and special.
Mini Strawberry Buns: If you’re looking for bite-sized treats, you can opt to make mini buns. Simply roll smaller portions of dough and cut them accordingly before baking. These are perfect for parties or as a fun treat for kids.
Common Mistakes to Avoid
One common mistake is not letting your dough rise long enough. If your dough isn’t airy after the second rise, your buns will be dense rather than light and fluffy. Make sure to give it enough time, as impatience here will compromise texture.
Another frequent issue is overfilling the buns with strawberries. While it’s tempting to add more for extra fruitiness, overstuffing can lead to a messy bake and buns that fall apart. Aim for a balanced filling that showcases the strawberries’ flavor without overwhelming the dough.
Lastly, always carefully check the baking time. Ovens can vary, and you don’t want to end up with overbaked buns that are dry. Keep an eye on them during the last few minutes of baking to ensure they’re perfectly golden.
Storage, Freezing & Reheating Tips
To store your strawberry buns, allow them to cool completely, then place them in an airtight container. They can be stored at room temperature for up to three days. If you want to extend their shelf life, you can freeze them; just make sure they are well wrapped in plastic wrap and then placed in a freezer-safe bag. They will freeze well for up to three months.
When it’s time to enjoy them again, thaw your buns in the refrigerator overnight and reheat them in a preheated oven at 350°F (175°C) for about 10 minutes until warmed through. Alternatively, you can microwave them for about 30 seconds, but be careful not to overdo it, as this can make the buns chewy instead of soft.
Always practice safe food handling—if they’ve been left out too long, it’s best to err on the side of caution and toss them.
Frequently Asked Questions
Can I use frozen strawberries instead of fresh ones?
Yes, you can absolutely use frozen strawberries! However, make sure to thaw and drain any excess liquid before mixing them into your filling. This will help prevent soggy buns, which can lead to an undesirable texture.
Can I make these buns ahead of time?
Yes, you can prepare the dough and have it rise the night before. Simply shape your buns and store them in the refrigerator overnight before baking. This can be a huge time-saver for special occasions when you want fresh buns in the morning!
What if my dough doesn’t rise properly?
If your dough fails to rise, it could mean your yeast is old or the liquids were either too hot or too cold, killing the yeast. It’s essential to proof your yeast beforehand and make sure your ingredients are at the right temperature for optimal rising.
Is it possible to replace the strawberries with other fruits?
Absolutely! While strawberries are the star of this recipe, feel free to experiment with other fruits like raspberries, blueberries, or even a combination. Just keep in mind that different fruits have varying flavors and moisture content, which can affect the overall result.
Can I prepare these strawberry buns as cinnamon rolls?
Yes, you can! Instead of the strawberry filling, you can spread a mixture of butter, sugar, and cinnamon on the rolled-out dough before slicing. Follow the same baking instructions for delicious cinnamon rolls that are equally indulgent.
Conclusion:
Strawberry buns are not only delectable but also incredibly versatile. With simple ingredients and easy instructions, you can create a delightful dessert that will impress friends and family alike. Whether you choose to stick with the classic strawberry filling or experiment with various delicious variations, the end result will undoubtedly be a comforting treat that brings joy and nostalgia.
So go ahead, gather your ingredients, and dive into this delightful baking adventure. Your kitchen will soon fill with the enchanting aroma of sweet strawberries, inviting everyone to the table for a shared moment of happiness. Don’t forget to share your creation with friends, and feel free to customize the recipe to make it your own. Happy baking!


