Prep time: 20 minutes
Cook time: 30 minutes
Total time: 50 minutes
Servings: 12 bars
Indulging in a delightful dessert can spark joy and warmth in our hearts, especially when it comes to sharing it with loved ones. This Strawberry Crumble Bars recipe is the perfect easy Valentine’s Day dessert that not only satisfies your cravings but also brings a *homemade warmth* to your gatherings. Picture creating a scrumptious treat with layers of *sweet strawberry filling* nestled between a buttery, crumbly topping—a refreshing alternative to traditional desserts. This recipe will guide you through every step, offering tips, variations, and insights to ensure your culinary journey is both rewarding and enjoyable.
With this recipe, you will discover how to create soft, flavorful, and slightly tart strawberry filling that contrasts beautifully with the crunchy crumble topping. This dessert is especially appealing for busy parents or novice bakers, as it requires minimal effort yet delivers outstanding taste. Whether it’s a special occasion or just a mid-week treat, these bars are bound to be a delightful addition to your table.
What Is Strawberry Crumble Bars Recipe Easy Valentine’s Day Dessert?
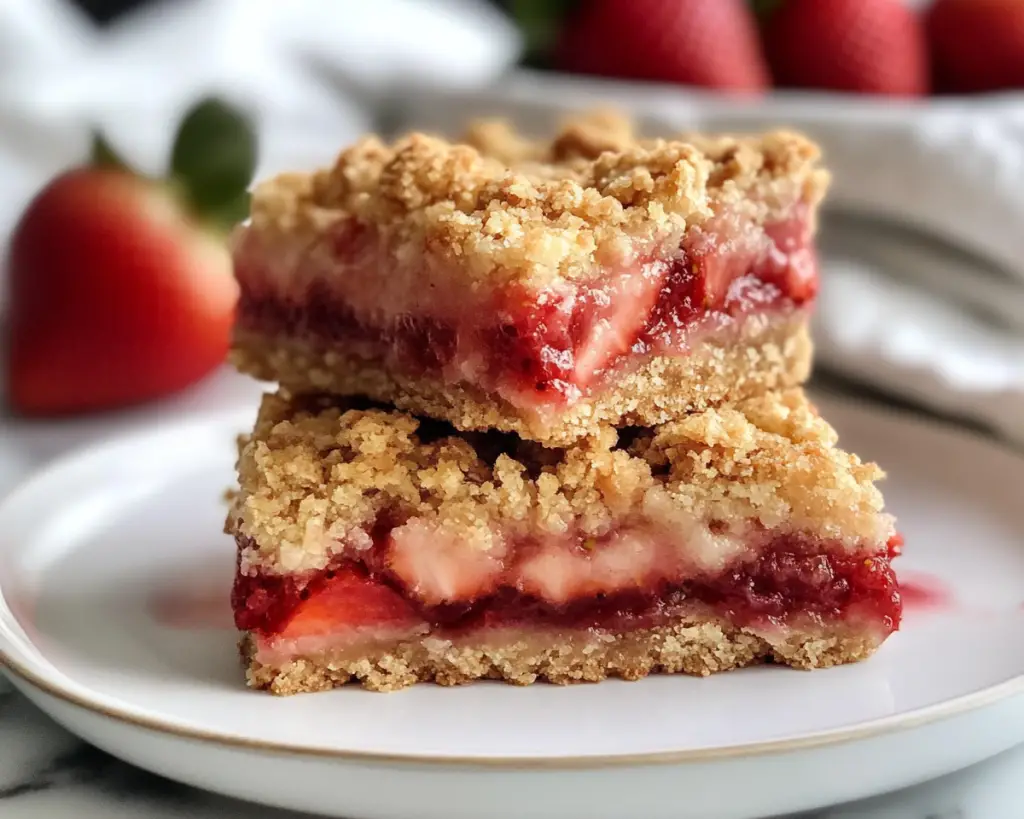
The Strawberry Crumble Bars are a *charming dessert* that can make hearts flutter. Originating from classic British *crumble desserts*, they consist of a fluffy cookie-like base topped with a *fruit layer* and finished with a crunchy topping. The strawberries offer a *tangy sweetness*, while the crumble adds a unique texture that appeals to both children and adults alike. Perfectly suited for Valentine’s Day, this recipe encapsulates affection in every bite.
The base of the bars is mildly sweet, providing an excellent foundation for the vibrant strawberry filling. The filling is made from fresh strawberries, sugar, and a hint of lemon juice, which amplifies the flavor and adds a refreshing zest. Combined, these elements create a delightful treat reminiscent of sunny picnics and family gatherings. The topping features oats for chewiness and brown sugar for sweetness, making it a harmonious blend of flavors and textures that’s easy to fall in love with.
Why You’ll Love This
This Strawberry Crumble Bars recipe is a treat you will adore for numerous reasons. Firstly, the *taste* is simply divine; the harmonious blend of sweet strawberries and crunchy crumble creates a *depth of flavor* that is irresistibly delicious. Secondly, the ease of preparation makes it accessible for all skill levels. You don’t need to be a professional baker to achieve stunning results. It’s an excellent dessert for busy parents or anyone who wants to whip up something special without spending hours in the kitchen.
Moreover, this dessert is surprisingly budget-friendly and utilizes simple ingredients that you likely already have in your pantry. Fresh strawberries might be the star, but they can easily be swapped out for other seasonal fruits, demonstrating the recipe’s versatility. You might wonder if it’s too indulgent, but the oats in the topping provide a *nutritious touch*, making this dessert feel a bit less guilty. Just keep an eye on the portion sizes, especially if you’re sharing with friends or at gatherings!
Lastly, it’s important to note that common mistakes often lead to subpar results. By being aware of these pitfalls, such as overmixing the crumble or forgetting to chill the filling, you can ensure that your strawberry bars turn out perfectly every time.
Ingredients You’ll Need
- Fresh Strawberries: 2 cups, hulled and chopped. Fresh strawberries provide the best flavor, but frozen can be used in a pinch.
- Sugar: 3/4 cup, divided. Sugar balances the tartness of strawberries and enhances the sweetness of the bars.
- Lemon Juice: 1 tablespoon. Lemon juice is key for brightening the strawberry flavor.
- All-Purpose Flour: 1 1/2 cups. This is essential for the base and topping structure.
- Oats: 1 cup, rolled. Oats add texture and heartiness to the crumble topping.
- Baking Powder: 1/2 teaspoon. Baking powder helps the bars rise slightly, giving them a fluffy texture.
- Salted Butter: 1/2 cup, softened. Butter adds richness and moisture, making the bars delectable.
- Vanilla Extract: 1 teaspoon. This enhances the overall flavor, giving it an aromatic touch.
Each ingredient plays a specific role in this recipe, contributing to the delightful outcome. If you find yourself short on fresh strawberries, consider using frozen ones; just remember to thaw and drain them properly to avoid excess moisture in your filling. For a *healthier twist*, one might substitute part of the all-purpose flour with whole wheat flour or alternative flour, such as almond or coconut flour, depending on dietary preferences.
How to Make
1. **Prepare the strawberries:** Start by hulling and chopping the fresh strawberries. Place them in a medium bowl and toss with 1/4 cup of sugar and the lemon juice. Let them sit for about 10–15 minutes. This process draws out the natural juices from the strawberries and enhances the flavor.
2. **Preheat the oven:** While the strawberries are marinating, preheat your oven to 350°F (175°C). Line an 8×8 inch baking dish with parchment paper, leaving overhang on two sides for easy removal later.
3. **Make the crumble base:** In a large mixing bowl, combine the flour, oats, 1/2 cup of sugar, and baking powder. Mix thoroughly. Add the softened butter and vanilla extract, and use your fingers or a pastry cutter to blend the mixture until it resembles coarse crumbs. You want some larger clumps for texture.
4. **Assemble the bars:** Press about two-thirds of the crumble mixture into the bottom of the prepared baking dish to form an even base. Make sure to pack it down firmly to create a uniform texture.
5. **Layer with strawberries:** Spoon the marinated strawberry mixture evenly over the crumble base. Try to spread it out to ensure every bite has that heavenly filling.
6. **Top with crumble:** Finally, take the remaining crumble mixture and sprinkle it evenly over the strawberry layer. It’s fine if some of the strawberries peek through; it adds a lovely aesthetic touch!
7. **Bake your bars:** Place the baking dish in the preheated oven and bake for 25–30 minutes, or until the top is golden brown and the strawberry filling is bubbly. Keep an eye on it for the last few minutes to prevent over-browning.
8. **Cool and cut:** Once baked, remove from the oven and allow it to cool in the pan for about 10 minutes. Then, lift it out using the parchment overhang and place it on a wire rack to cool completely before cutting it into squares.
Variations & Substitutions
Berry Medley Variation: If you want to diversify your flavors, consider using a mix of berries instead of just strawberries. Raspberries, blueberries, and blackberries can be combined for a colorful twist. Each berry has its unique texture and flavor profile, which can add depth to the bars. This variation is perfect for those looking to maximize their antioxidant intake or simply enjoy a wider flavor spectrum.
Gluten-Free Variation: For a gluten-free option, substitute the all-purpose flour with a gluten-free baking blend. Many brands offer versatile mixtures that can replace traditional flour without altering the taste significantly. Pairing this with gluten-free oats will ensure that everyone at your gathering can enjoy these delicious bars, including those with dietary restrictions.
Dairy-Free Variation: Making these bars dairy-free is simple. You can replace the butter with coconut oil or a vegan butter substitute, ensuring the final product remains moist and flavorful. For a touch of richness, consider adding a tablespoon of almond milk or oat milk to keep the consistency creamy without dairy.
Nutty Crunch Variation: If you enjoy nuts, incorporating chopped walnuts or pecans into the crumble mixture can provide an additional texture. Nuts not only enhance the flavor but also add healthy fats. Toasting them slightly before adding will bring out their natural oils, making the dessert even more irresistible. This variation is particularly appealing to those who appreciate a satisfying crunch in their desserts.
Common Mistakes to Avoid
When preparing your Strawberry Crumble Bars, there are a few common pitfalls to steer clear of. One common mistake is not allowing the strawberries enough time to marinate. This process allows the natural juices to permeate the berries, providing a flavorful filling. Skipping this step can lead to a less-than-desirable texture as the strawberries may release too much moisture during baking.
Another issue could arise from overmixing the crumble. A gentle hand is essential when combining the butter with the dry ingredients. Overmixing can lead to tough and dry bars. Remember to combine until just incorporated for an optimal texture. Lastly, be cautious about the baking time; every oven is different. Checking them a few minutes before the recommended time can prevent the bars from overcooking and ensure you achieve that perfect golden brown top.
Storage, Freezing & Reheating Tips
To store your Strawberry Crumble Bars, let them cool completely, then cover them tightly with plastic wrap or place them in an airtight container. They can be stored in the refrigerator for up to one week. For extended storage, consider freezing them. Wrap each bar in plastic wrap and place them in a resealable freezer bag. They can last up to three months in the freezer.
When you’re ready to enjoy them again, simply thaw the bars in the refrigerator overnight. You can reheat them in the microwave for about 15–20 seconds to revive their warmth and enhance the crumble topping’s texture. Just ensure they are not overheated, as this can affect the consistency of the strawberry filling.
Frequently Asked Questions
Can I make these bars ahead of time?
Absolutely! These Strawberry Crumble Bars can be made a day in advance. Allow them to cool completely, cover, and store in the refrigerator. This allows the flavors to meld together, creating an even better taste when served. Just remember to bring them to room temperature before serving, or reheat them slightly for that fresh-baked feel.
Can I use frozen strawberries?
Yes, you can substitute frozen strawberries if fresh ones are unavailable. Just make sure to thaw them first and drain any excess liquid to avoid a soggy filling. Frozen strawberries can often be more flavorful out of season, making this a viable option.
Do I need to refrigerate the bars?
Yes, it’s recommended to refrigerate your Strawberry Crumble Bars, especially if they contain fresh fruit. This helps maintain freshness and prevents spoilage. They can be kept in an airtight container for up to a week.
How can I tell when the bars are done baking?
Look for a golden-brown top and bubbling edges. The bars will be set in the center but slightly soft; they will firm up as they cool. If you insert a toothpick, it should come out mostly clean, with a few moist crumbs clinging to it.
Can I add spices to the crumble topping?
Yes! Adding a pinch of cinnamon or nutmeg to the crumble mixture can elevate the flavor profile, giving it a warm and inviting aroma. These spices pair beautifully with the strawberries and will make your kitchen smell heavenly while baking!
Conclusion:
With this Strawberry Crumble Bars recipe in your arsenal, impressing family and friends has never been easier. The inviting flavors, textures, and presentation make these bars the perfect dessert for Valentine’s Day or any time you crave something sweet yet comforting. Don’t hesitate to try different variations or, better yet, make it your own! Whether you choose to whip up a batch for a special occasion or a cozy night at home, this recipe promises to be a delightful treat. So, roll up your sleeves and enjoy the process of creating something extraordinary. Happy baking!


