Prep time: 15 minutes
Cook time: 30 minutes
Total time: 45 minutes
Servings: 12 servings
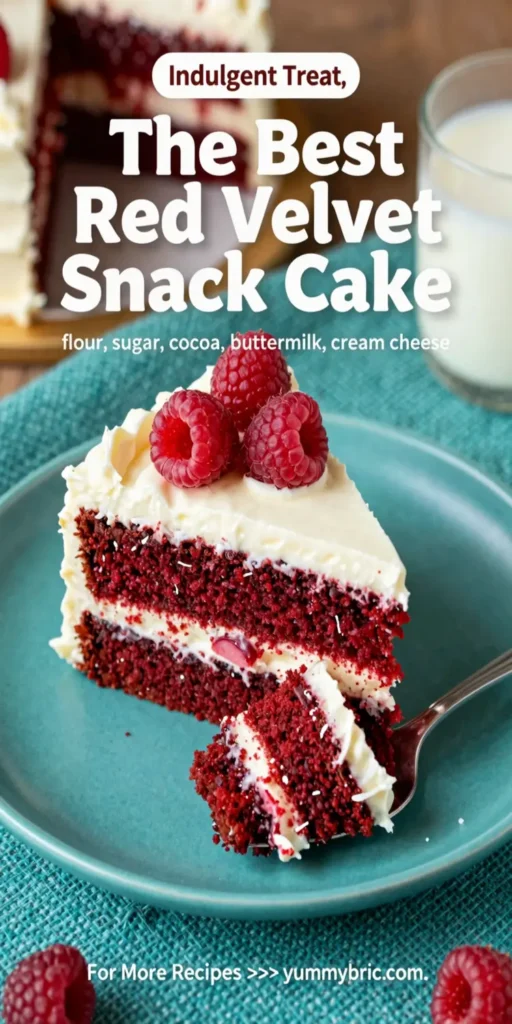
The Best Red Velvet Snack Cake is a delightful twist on the classic dessert. With its rich, moist texture and striking red color, this cake is perfect for gatherings, celebrations, or simply indulging your sweet tooth. The creamy frosting complements the cake beautifully, making every bite a treat you won’t soon forget. Whether you’re a baking novice or a seasoned pro, this recipe is designed to guide you through each step with ease and confidence.
What Is The Best Red Velvet Snack Cake?
The Best Red Velvet Snack Cake is a moist, fluffy cake made with a combination of cocoa powder, buttermilk, and red food coloring. Traditionally, it’s layered and topped with cream cheese frosting, but in snack cake form, it’s simpler yet equally delicious. The vibrant color, coupled with the subtle flavor of cocoa and the rich cream cheese frosting, creates a dessert that not only looks stunning but also tastes divine. This version is ideal for those who want a quick and satisfying treat without the fuss of a multi-layered cake.
Why You’ll Love This
There are plenty of reasons why The Best Red Velvet Snack Cake will become a favorite in your household:
- Quick to Make: With just a few simple ingredients, you can whip up this cake in no time.
- Moist and Delicious: The combination of ingredients ensures that your cake is soft, airy, and flavorful.
- Perfect for Any Occasion: Be it a birthday party, a holiday gathering, or just a midweek dessert, this cake fits the bill.
- Easy to Customize: Feel free to add your own twist, such as chocolate chips or nuts for extra flavor!
- Beautiful Presentation: The striking red color and creamy frosting make it visually appealing.
Ingredients You’ll Need
To make The Best Red Velvet Snack Cake, gather the following ingredients:
- 1 ½ cups all-purpose flour: This is the base of the cake, providing structure and fluffiness. Make sure to measure accurately for the best results.
- 1 cup granulated sugar: For sweetness that perfectly balances the cocoa flavor.
- ½ cup unsweetened cocoa powder: Adds a hint of chocolate flavor to complement the red velvet.
- 1 teaspoon baking soda: This leavening agent helps the cake rise, giving it a light texture.
- ½ teaspoon salt: Enhances the flavors of all the ingredients.
- 1 cup vegetable oil: Keeps the cake moist and soft.
- 1 cup buttermilk: Gives the cake a slight tanginess and helps it achieve a tender crumb.
- 2 large eggs: Provides richness and helps bind the ingredients together.
- 2 tablespoons red food coloring: Gives the cake its signature bright hue.
- 1 teaspoon vanilla extract: Adds extra depth to the cake’s flavors.

How to Make
Follow these simple steps to bake your cake:
- Preheat your oven to 350°F (175°C). Grease a 9×13-inch baking pan with cooking spray or butter; this is important to ensure easy removal once baked.
- In a large mixing bowl, combine the dry ingredients: flour, sugar, cocoa powder, baking soda, and salt. Whisk them together until well mixed—this helps to evenly distribute the leavening agents, ensuring the cake rises uniformly.
- In another mixing bowl, whisk together the wet ingredients: oil, buttermilk, eggs, food coloring, and vanilla extract. Mixing these separately helps to prevent clumps of dry ingredients from forming in the batter.
- Pour the wet mixture into the bowl with dry ingredients. Mix gently until fully combined. Be careful not to overmix as this can lead to a denser cake. A few lumps are perfectly fine!
- Pour the batter into the prepared baking pan. Use a spatula to spread it evenly to ensure consistent baking.
- Bake for 25-30 minutes, or until a toothpick inserted into the center comes out clean. Keep an eye on it during the last few minutes, as ovens can vary in temperature.
- Once baked, remove the cake from the oven and let it cool in the pan for about 10 minutes. After that, transfer it to a wire rack to cool completely before frosting.
Variations & Substitutions
Red Velvet with Cream Cheese Frosting: This classic combination is a must-try! Use a rich cream cheese frosting made from cream cheese, butter, powdered sugar, and vanilla to perfectly pair with your red velvet snack cake. The tanginess of the frosting elevates the flavors and enhances the overall experience.
Red Velvet with Chocolate Ganache: For a more decadent dessert, top your cake with a luscious chocolate ganache. Simply heat equal parts heavy cream and chocolate until melted and smooth, then pour over the cooled cake for a stunning finish.
Gluten-Free Red Velvet Cake: Substitute the all-purpose flour with a gluten-free flour blend to make this cake gluten-free. Just be sure to use a blend that contains xanthan gum or add some to provide similar texture and structure.
Nutty Red Velvet Cake: For a delightful crunch, consider adding chopped nuts—such as pecans or walnuts—into the batter. This not only enhances the flavor but also adds a satisfying texture.
Common Mistakes to Avoid
When making The Best Red Velvet Snack Cake, keep these pitfalls in mind:
Overmixing the Batter: This can develop gluten and make your cake dense rather than light and fluffy. Mix just until combined.
Skipping Measuring Ingredients: Precision is crucial in baking. Make sure to measure both dry and wet ingredients accurately for the best results.
Not Prepping Your Baking Pan: Don’t skip greasing your pan! This ensures the cake won’t stick and will come out in one beautiful piece.
Baking at the Wrong Temperature: Make sure your oven is preheated properly. An oven thermometer can help ensure its accuracy.
Storage, Freezing & Reheating Tips
Store any leftover cake in an airtight container in the refrigerator for up to a week to keep it fresh. If you’re looking to freeze it, place the fully cooled cake in an airtight container or wrap it tightly in plastic wrap, then in aluminum foil. It can be frozen for up to three months without losing flavor or texture.
When you’re ready to enjoy the frozen cake, remove it from the freezer and let it thaw in the refrigerator overnight before serving. For a quick reheat, microwave individual slices for about 20-30 seconds.
Frequently Asked Questions
Can I use a different type of dye for coloring? Yes, while red food coloring is traditional, you can use natural alternatives, like beet juice. However, the color may not be as vibrant.
Why did my cake turn out dry? This can happen if you’ve used too much flour or baked it for too long. Always measure your flour correctly, using the spoon-and-level method, and check the cake a few minutes before the recommended time is up.
Can I make this recipe ahead of time? Absolutely! You can bake the cake a day in advance. Just be sure to frost it close to serving time for the best texture.
What can I substitute for buttermilk? If you don’t have buttermilk, mix 1 cup of milk with 1 tablespoon of vinegar or lemon juice. Let it sit for about 5-10 minutes before using it in the recipe.
How can I make my cake more festive? For festive occasions, consider adding sprinkles on top of the frosting or using holiday-themed cake toppers to bring cheer to your dessert table.
Conclusion: The Best Red Velvet Snack Cake is not only visually striking but also deliciously satisfying. With its simple preparation steps and tasty variations, it’s the perfect dessert for any occasion. Enjoy this cake with loved ones and make lasting memories around your dinner table! Whether you’re baking for a special celebration or just indulging your sweet tooth, this recipe is sure to impress.