**Prep time:** 30 minutes
**Cook time:** 10 minutes
**Total time:** 40 minutes
**Servings:** 24 truffles
Valentine’s Day is just around the corner, and what could be a better way to express your love than with homemade chocolate truffles? These decadent treats are not only rich and indulgent but also surprisingly easy to make. Whether you are a seasoned baker or a complete novice in the kitchen, this recipe will guide you step-by-step to create the perfect Valentine Chocolate Truffles that your loved ones will adore.
When I think of chocolate truffles, I immediately recall the warmth of family gatherings and cozy evenings spent sharing stories while enjoying sweet treats. There’s something special about sharing food made with love. In this article, you’re going to learn about the art of making chocolate truffles, from key techniques and ingredients to variations that will impress everyone you share them with. Let’s get started on crafting these delightful melt-in-your-mouth candies!
What Are Valentine Chocolate Truffles?
Chocolate truffles are a type of confectionery made from a creamy ganache filling, typically rolled in cocoa powder, crushed nuts, or other flavorful coatings. These bite-sized treats have origins tracing back to France, where they were created in the late 19th century. The term “truffle” comes from the resemblance of these chocolates to the rare subterranean mushroom known as truffle.
The heart of a truffle is its **ganache**, which is a smooth mixture of chocolate and cream, creating a luscious, rich texture that melts in your mouth. You can think of truffles as a sweet and sophisticated bite-sized treat that’s perfect for sharing, especially on a romantic occasion like Valentine’s Day. They can be flavored in a variety of ways, incorporating everything from spices and liqueurs to fruit purées, making them truly versatile. The exterior can be as simple or elaborate as you’d like, showcasing your creativity.
Why You’ll Love This Valentine Chocolate Truffles
You’ll love making and gifting these Valentine Chocolate Truffles for several reasons. First and foremost, they are absolutely scrumptious! The combination of smooth chocolate and the subtle sweetness of the filling will satisfy any chocolate lover’s cravings.
These truffles also bring the romance and warmth of homemade treats into your Valentine’s celebrations. They are a low-cost way to show your affection, as purchasing high-quality chocolates from a shop can add up quickly. By creating a batch of these truffles at home, you can impress your loved ones without breaking the bank.
In comparison to store-bought chocolates, a homemade version allows you control over the **ingredients**. This means you can cater to dietary restrictions or preferences, whether that means using dairy-free chocolate, reducing sugar content, or experimenting with different flavorings. Many people also shy away from making candy because they feel it’s too complicated, but these truffles are incredibly straightforward and forgiving to create.
Ingredients You’ll Need
To make these delicious Valentine Chocolate Truffles, gather the following ingredients:
– **Chocolate:** 8 ounces of high-quality dark, semi-sweet, or milk chocolate. Chocolate is the star of this recipe, and choosing quality chocolate will significantly impact the flavor.
– **Heavy Cream:** ½ cup. The cream is essential for making the ganache; it provides the structure and rich texture that make these truffles luscious.
– **Unsalted Butter:** 2 tablespoons, at room temperature. This adds an extra layer of creaminess and flavor.
– **Flavoring Extracts (optional):** 1 teaspoon of vanilla extract or other flavoring like peppermint, orange, or espresso. Adding flavor extracts will enhance the taste of your truffles.
– **For Coating:** Cocoa powder, crushed nuts (like almonds or hazelnuts), or decorative sprinkles. This is where you get to be creative!
Each ingredient plays a crucial role in the overall texture and flavor profile of your truffles. Feel free to adapt substitutions where necessary. For instance, if you prefer to make vegan truffles, swap the heavy cream with coconut cream and use dairy-free chocolate.
How to Make Valentine Chocolate Truffles
Creating your own Valentine Chocolate Truffles may sound daunting, but with this step-by-step guide, you’ll be a truffle-making pro in no time!
1. **Chop the Chocolate:** Begin by finely chopping the chocolate into small pieces. This ensures that it melts evenly and incorporates well with the cream. You can use a knife or a food processor for this step. Place the chopped chocolate in a medium heat-proof bowl, and set it aside.
2. **Heat the Cream:** In a small saucepan over medium heat, pour the heavy cream. Bring it to a gentle simmer — do not let it boil as this can affect the ganache’s texture. You’ll know it’s ready when small bubbles start to form along the edges.
3. **Combine Chocolate and Cream:** Carefully pour the hot cream over the chopped chocolate. Allow it to sit for about 2-3 minutes. The heat from the cream will melt the chocolate. After a few minutes, stir the mixture gently with a spatula or whisk until smooth and glossy. This step is crucial. If you find any lumps, you can microwave it at a low power for just a few seconds until fully melted.
4. **Add Butter and Flavorings:** Once your chocolate mixture is completely smooth, add the unsalted butter and your choice of flavoring extract. Mix until well combined. The butter will enrich the truffles further, giving them a luxurious texture.
5. **Chill the Mixture:** Cover the bowl with plastic wrap or a lid and refrigerate for about 1-2 hours, or until it is firm enough to scoop. This can vary based on your refrigerator’s temperature, so check periodically.
6. **Scoop the Truffles:** Once the mixture is set, use a small cookie scoop or a teaspoon to portion out the ganache. Roll each portion between your hands to form balls. If the mixture becomes sticky, you can rinse your hands in cold water before continuing to roll.
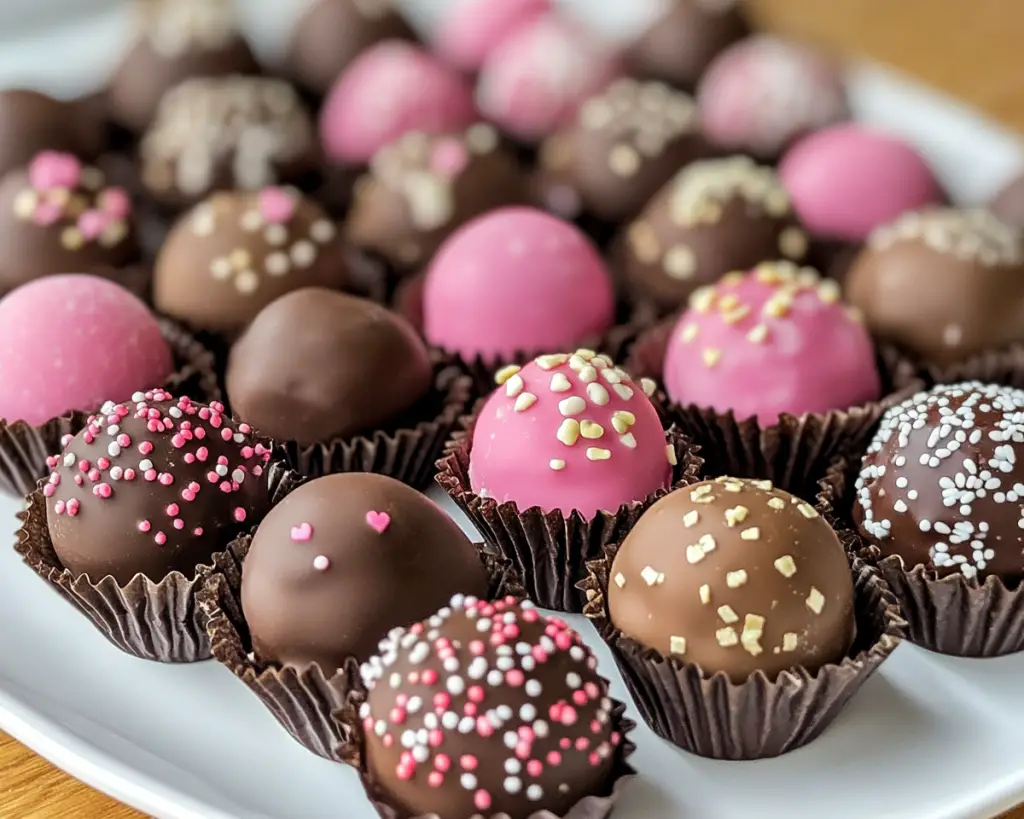
7. **Coat the Truffles:** Prepare your preferred coatings by placing cocoa powder, crushed nuts, or sprinkles in shallow bowls. Roll each truffle in the coating, ensuring it’s evenly covered.
8. **Store and Serve:** Place the truffles in a parchment-lined container and refrigerate until you’re ready to serve. Allow them to sit at room temperature for a few minutes before indulging for the best flavor and texture.
3 Variations & Substitutions
Making Valentine Chocolate Truffles can be a fun creative process, and here are some variations and substitutions to consider:
1. **Peppermint Truffles:** For those who love mint, add 1 teaspoon of peppermint extract to your ganache after mixing in the butter. This creates a refreshing mint-flavored truffle perfect for Valentine’s Day. Coat them in crushed candy canes or cocoa powder for a festive touch.
2. **Hazelnut Praline Truffles:** To give your truffles a nutty flavor, use Nutella or ground hazelnuts in place of some of the chocolate in your ganache. For an extra crunch, roll the truffles in finely chopped hazelnuts instead of cocoa powder. The sweet nuttiness complements the richness of the chocolate beautifully.
3. **Fruity Chocolate Truffles:** If you prefer a lighter flavor, consider using fruit puree. Instead of all heavy cream, substitute half of it with pureed raspberries, strawberries, or any fruit you love. This will add a refreshing note to the chocolate, making it less dense. Roll these truffles in desiccated coconut or citrus zest for an extra flair.
You can experiment with countless combinations, so don’t be afraid to get creative with the flavors and coatings.
Common Mistakes to Avoid
Even the most experienced of bakers can face challenges when making chocolate truffles. Here are some common mistakes and how to avoid them:
– **Using Low-Quality Chocolate:** A crucial factor in the success of your truffles is the quality of chocolate used. Using inexpensive or imitation chocolate can lead to a lackluster flavor and texture. Always opt for high-quality chocolate, and don’t be afraid to splurge a little.
– **Boiling the Cream:** When heating the cream, ensure it doesn’t boil. Boiling can cause the cream to curdle and can affect the final texture of your ganache. Keep an eye on it and remove it from the heat as soon as you see small bubbles forming.
– **Not Allowing the Ganache to Chill Properly:** If the ganache isn’t chilled long enough, it can be too soft to scoop and roll into truffles. Be patient and allow enough time for it to firm up.
– **Overloading on Coating:** When coating the truffles, avoid dumping too many in your coating of choice at once. This can lead to uneven coverage and messy hands. Instead, coat in small batches for better results.
– **Not Storing Properly:** Store your truffles in an airtight container in the refrigerator, and separate layers with parchment paper to prevent them from sticking together. If stored incorrectly, they can lose their flavor and texture, diminishing the overall experience.
Storage, Freezing & Reheating Tips
Proper storage is key to enjoying your Valentine Chocolate Truffles for days after you make them. Here are some tips:
1. **Storage:** Keep the truffles in an airtight container in the refrigerator. They will last for about 1-2 weeks. Allow them to sit at room temperature for a few minutes before consuming for the best texture and flavor.
2. **Freezing:** If you want to store your truffles for an extended period, you can freeze them. Place the coated truffles on a baking sheet in a single layer and freeze until solid. Then transfer them to an airtight, freezer-safe container or zip-top bag. Truffles can be frozen for up to three months. When ready to enjoy, let them thaw in the refrigerator overnight before serving.
3. **Reheating:** There’s no need to “reheat” chocolate truffles since they’re enjoyed cold or at room temperature. However, if you make a ganache base that has become too firm, you can gently reheat it in the microwave for just a few seconds at a time, stirring well between increments.
Frequently Asked Questions
**1. Can I use milk chocolate instead of dark chocolate?**
Yes! You can definitely use milk chocolate instead of dark chocolate in your truffles. Just keep in mind that the overall sweetness will be higher, and the flavor profile will be different. Experimenting with different chocolate varieties can lead to delightful results that suit your preference.
**2. How do I keep my hands from getting too warm when rolling the truffles?**
If you find that your hands are warming up the ganache too much as you roll, you can keep a bowl of cold water nearby and dip your hands in it periodically. This helps to maintain a cooler temperature, making it easier to shape the truffles without melting them too quickly.
**3. Can I make these truffles ahead of time?**
Absolutely! Valentine Chocolate Truffles can be made a few days or even weeks in advance. Simply store them in the fridge or freeze them for later. This makes them a perfect treat to prepare for special occasions without the last-minute rush.
**4. What’s the best way to coat truffles?**
The best way to coat truffles is to use a shallow dish and roll them in the coating gently. Do this in small batches for even coverage. For chocolate coatings, you can also melt some chocolate and dip the truffles to create a more decadent outer layer.
**5. Why did my ganache not set properly?**
If your ganache is too soft, it may not have been chilled long enough to firm up. Alternatively, if the chocolate was improperly tempered or if the ratios of cream to chocolate were off, this can also affect the setting. Make sure to follow the recipe closely for the best results.
In conclusion, homemade Valentine Chocolate Truffles are not only a delightful treat for you and your loved ones but also a joyful activity, encompassing the love and care that goes into all cooking. With their rich flavor, endless variations, and the ability to customize to your heart’s content, they are a winning choice for Valentine’s Day or any special occasion. So roll up your sleeves, gather your ingredients, and enjoy the process of creating these sweet morsels of love. Don’t forget to share the love and delight with your friends and family!
You’ll find that they’ll appreciate the effort and taste in every bite. Happy truffle making!
[Read also: Easy Dessert Recipes for Beginners]


